

Ever stood on the back porch of your farm, watching the sun stretch over the paddocks, and thought, “my shed’s seen better days” or “the kitchen could use a proper worktop”?
If you’ve felt that mix of pride and frustration, you’re not alone – most country owners wrestle with the same dilemma: keep the place functional without breaking the bank or waiting months for a city‑based contractor.
That’s where a true rural builder tamworth steps in – someone who knows the dust, the distance, and the day‑to‑day grind of farm life, and can turn a rough‑cut plan into solid, weather‑ready results.
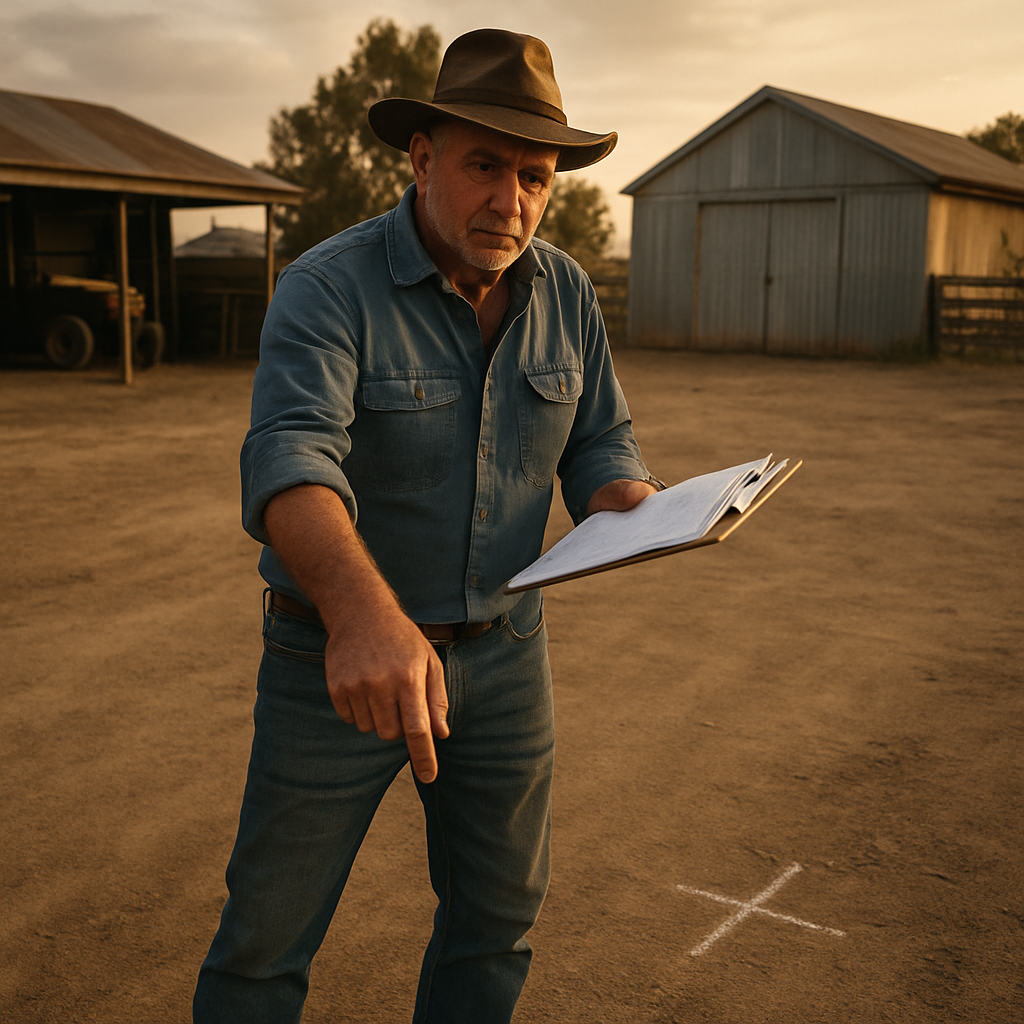
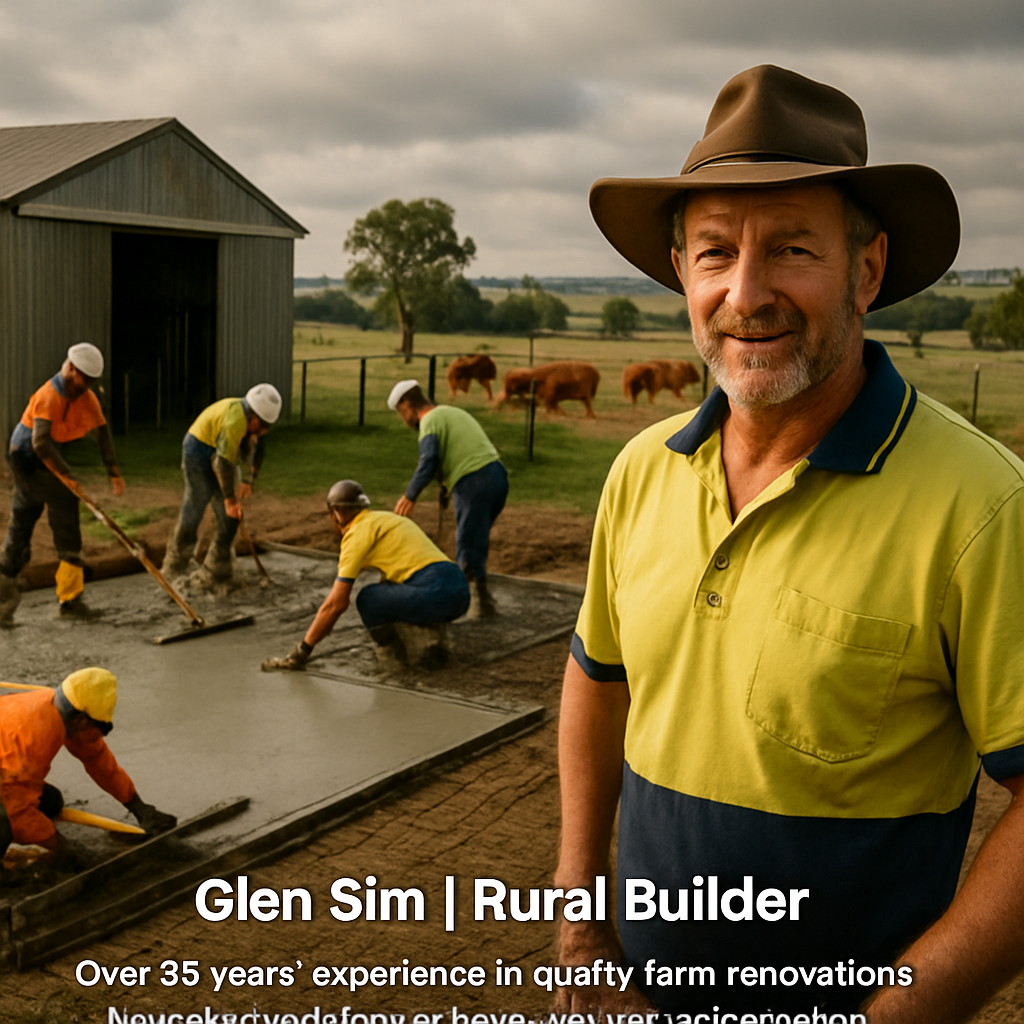
I’m Glen Sim, and after 35 years of swinging hammers across the New England region, I’ve learned that the best solutions are simple, built to last, and fit right into the rhythm of your daily chores.
Maybe you’re staring at a cracked concrete slab that’s been a tripping hazard for the kids, or you’re battling a leaky roof that lets the rain sneak in during those sudden summer storms – and you’ve tried a few quick fixes that just don’t hold up.
In the next few minutes, I’ll walk you through the key things to consider before you pick a builder, the little‑but‑crucial details that separate a decent job from a masterpiece, and how to keep your project on track without endless headaches.
So, grab a cuppa, picture that finished shed or refreshed kitchen, and let’s dive into how a seasoned rural builder in Tamworth can make that vision a reality – with straight‑talk, real‑world tips, and no fluff.
What matters most is trust – you need a builder who shows up when the road’s muddy, respects your schedule, and leaves the site cleaner than they found it. That’s the hallmark of a reliable partner.
By the end of this guide you’ll know exactly which questions to ask, what red flags to watch for, and how to budget smartly so the final bill isn’t a surprise. Ready? Let’s get started.
The Awesim Way
Looking to replace a leaky roof, fix a cracked slab, or upgrade your kitchen, this guide shows how a reliable rural builder in Tamworth delivers sturdy, low‑maintenance results.
We cover the key questions, red‑flag signs and tips you need to keep the project on track and your farm life easy.
Step 1: Assess Your Property and Building Needs
Before we even think about a new shed or kitchen, we need to take a good, honest look at the land itself. That moment when you stand on the back porch, coffee in hand, and wonder if the soil will hold a fresh concrete slab or if the roof will survive the next summer storm – that’s the starting line.
First up, map out the boundaries. Grab a fresh survey plan or, if you’re comfortable, walk the fence line with a tape measure. Jot down any low‑lying spots where water pools after a rain. Those wet patches are red flags for future foundation trouble.
Next, ask yourself: is the site in a bush‑fire‑prone zone? The NSW Rural Fire Service’s online mapping tool can tell you in seconds. Checking the bush‑fire status is essential because any new work will need to meet specific fire‑protection standards.
And what about access? Can a 4‑wheel‑drive get to the build site with the current track, or will you need to clear a new driveway? Think about the timing of mustering or harvest – you don’t want a dusty road cutting into your busy season.
Now, let’s talk structure. Take a look at the existing building envelope: are the walls cracked, the roof leaking, or the doors swinging on their hinges? A quick visual audit often reveals hidden problems. For example, a sagging roof might mean the timber joists are compromised, which could cost you far more than a simple repair later.
Don’t forget the interior. Walk through the space and note any uneven floors, damp spots, or mouldy corners. Those clues point to ventilation or drainage issues that should be fixed before you pour a new slab.
Once you’ve got the on‑site observations, compare them against your budget and timeline. Write down what’s “must‑have” versus “nice‑to‑have”. That list will become the brief you hand to any rural builder tamworth you consider.
Here’s a quick checklist you can print out:
- Boundary lines and any encroachments
- Soil drainage and low spots
- Bush‑fire‑prone status (RFS tool)
- Vehicle access and track condition
- Existing structural defects (roof, walls, doors)
- Interior moisture signs
- Must‑have vs. nice‑to‑have features
Got the checklist? Great. The next step is to decide if you need a specialist service. If you’re planning a new floor, a solid base is key – that’s where Concrete Slabs for Rural Properties come into play. A properly designed slab will handle the weight of farm equipment and resist cracking under temperature swings.
Speaking of slabs, the Australian Building Code sets out minimum thickness and reinforcement requirements for rural structures. The NCC guidance makes it clear that a 100‑mm slab with steel mesh is usually the baseline for a standard shed.
And don’t overlook local council approvals. Most councils in New England will ask for a Section 10.7 Planning Certificate if your land is fire‑prone. It’s a small paperwork step that can save you weeks of delay later.
So, how do you organise all this info? I like to create a simple spreadsheet: column A for each item (site, soil, fire status, access, etc.), column B for current condition, column C for required action, and column D for cost estimate. It turns a messy walk‑around into a clear project brief.
Now, a quick visual break – here’s a short video that walks you through a basic site assessment on a typical farm property.
When you’ve gathered all the data, sit down with your chosen rural builder tamworth and walk through the spreadsheet together. A good builder will ask probing questions – “What’s the water table like here?” or “How often do you need the driveway cleared after rain?” – and then tailor a solution that fits your farm’s rhythm.
Bottom line: a thorough property assessment is the foundation of any successful rural renovation. It prevents surprise costs, keeps the project on schedule, and ensures the finished building weathers the outback just as well as the old homestead does.
Step 2: Planning, Designs and Permits
Sketching the vision
At this stage you start sketching what the finished shed, workshop or kitchen will actually look like. It’s not about fancy CAD software – a simple sheet of A4, a ruler and a few coloured pens can capture the layout, door swings and where the water tanks will sit.
Because you know the daily rhythm of your property, you can flag the spots that need extra clearance for a tractor or a seasonal livestock pen. Those little details save you from a costly redesign later.
Getting the right design on paper
Once you have a rough sketch, hand it to a qualified drafter or, if you’re handy, use a free tool like SketchUp Free. The goal is a set of clear drawings that show floor area, roof pitch and the location of any fire‑break walls.
Don’t forget to include the “must‑haves” you jotted down in Step 1 – things like a larger door for a combine, a ventilated roof hatch, or a dedicated space for a water tank pump.
Understanding council and fire‑plain rules
In New South Wales, any new structure that sits on a bush‑fire‑prone site needs a Section 10.7 Planning Certificate. The RFS online mapping tool will tell you instantly if your land falls into that category.
If it does, you’ll need to meet the “B” rating for external walls, use non‑combustible cladding and keep a minimum 30‑metre clearance around the building. A good rural builder tamworth knows how to incorporate those specs without turning your budget into a nightmare.
Permits and paperwork checklist
Here’s a quick, no‑fluff checklist you can paste into your spreadsheet:
- Development application (DA) for new structures
- Section 10.7 Planning Certificate (if fire‑prone)
- Construction certificate (CC) confirming compliance with the NCC
- Stormwater management plan (if you’re adding a large roof catchment)
- Heritage or irrigation‑scheme approvals (only if applicable)
Most councils in the New England region ask for the NCC “Construction Certificate”. The 2022 NCC Volume One outlines the minimum 100 mm slab thickness and steel mesh reinforcement for typical farm sheds.
Why you need a local “rural builder tamworth” on board
A seasoned builder from Tamworth can translate the paperwork into a realistic timeline. They’ll know which council officer prefers a digital PDF versus a hard‑copy plan, and they’ll have relationships with local surveyors who can stamp the boundary lines fast.
When we sit down together, I usually pull out my own “design‑to‑permit” worksheet – it shows exactly where the fire‑rating walls sit, how the roof pitch complies with the NCC, and which items need a separate approval.
Action step: lock in your design and apply
Take your sketch, run it past the RFS tool, tick the checklist, and hand the package to your chosen rural builder tamworth. Ask them to submit the DA and CC on your behalf – that way you keep your hands on the farm while the paperwork moves through council.
Once the approvals are in hand, you’ll have a clear go‑ahead, a realistic budget and a timeline that respects planting seasons, mustering dates and the occasional dust storm.
Bottom line: solid planning, a well‑drawn design and the right permits turn a weekend project into a permanent, low‑maintenance asset that works with the outback, not against it.
Step 3: Choosing Materials & Builders – Comparison Table
Alright, you’ve got your design locked and the permits in the drawer. Now the real question is – what do you actually put together, and who’s going to do it? That’s where a solid comparison table saves you from a night of second‑guessing.
First, let’s talk material families. On a farm you’re juggling a few things: budget, how hard the ground gets in winter, and whether the shed will see a lot of heavy machinery traffic. Steel‑mesh reinforced concrete is the workhorse for most sheds, but a fibre‑reinforced polymer slab can be lighter and still hold up against cracking. Then there’s the classic timber frame – cheap and quick, yet you’ll need to treat it for termites and fire.
What about the people who actually lay those materials? A local rural builder tamworth like Awesim brings 35 years of outback know‑how, while a larger regional contractor might have more machinery but less of that hands‑on, farm‑first mindset. The right builder will also know which council officer prefers a PDF versus a hard‑copy plan – a small detail that can shave days off your schedule.
So, how do you weigh those options? Below is a quick decision‑making table. It’s not exhaustive, but it pinpoints the three criteria most farmers care about: cost, durability, and builder compatibility with rural realities.
| Feature | Option 1 – Concrete (Steel Mesh) | Option 2 – Fibre‑Reinforced Polymer | Option 3 – Treated Timber Frame |
|---|---|---|---|
| Initial Cost (per m²) | Mid‑range – $200‑$250 | Higher – $250‑$300 | Low – $130‑$180 |
| Life Expectancy | 30+ years with minimal maintenance | 25+ years, resistant to cracking | 10‑15 years, needs regular re‑treatment |
| Best Builder Match | Rural builder with slab expertise (e.g., Awesim) | Specialist contractor familiar with polymer pours | Carpentry‑focused builder, preferably with bushfire‑rating experience |
Notice how the “best builder match” column ties back to the skill set you need on the ground. If you’re leaning toward a concrete slab, ask your builder about sub‑grade preparation – a stable base is the difference between a road that lasts and one that turns into a pothole nightmare. Quality contractors stress proper sub‑grade work, and the same principle applies to farm slabs.
Now, a quick checklist to run through with any builder you interview:
- Do they have recent experience with the material you prefer?
- Can they provide a detailed cost breakdown, including site prep?
- How do they handle council submissions – digital, hard‑copy, or a hybrid?
- What warranty or post‑build support do they offer?
Ask them to walk you through a recent project. A good builder will pull out photos, point out the sub‑grade compaction, and explain why they chose a particular mix. If they can’t, you’re probably looking at someone who cuts corners.
One more thing – don’t forget the fire‑rating requirements if you’re in a bush‑fire‑prone zone. The NCC mandates a “B” rating for external walls and non‑combustible cladding. The 2022 NCC volume outlines those specs, and a seasoned rural builder will already have those details baked into their quote.
Bottom line: line up your material choice with a builder who knows the local soil, the council quirks, and the weather extremes. When the numbers line up in the table, you’ll feel confident that the shed you’re about to raise will stand up to the outback for decades.
Step 4: Managing Construction on a Working Farm
Now that you’ve got permits and a material plan, the real juggling act begins – keeping the build moving while the farm keeps running.
Think about the morning you’re milking the cows and, half a kilometre away, a crew is digging a foot‑wide trench for your new concrete slab. That overlap feels chaotic, but with a little foresight it becomes routine.
Map the farm’s daily rhythm
First, sit down with your rural builder tamworth and sketch a simple calendar that marks must‑do farm tasks – mustering, irrigation checks, shearing dates, and feed deliveries.
Ask the builder to slot heavy‑equipment days (excavator, concrete pump) around those windows. On my own 35‑year run, I always schedule earthworks on a dry week after a light rain, because the ground stays firm enough for compaction but isn’t too soggy for machinery.
Result? Fewer “we can’t get in because the paddock’s wet” delays and less stress for the crew.
Set up a temporary traffic plan
Most farms have a single access road that serves both livestock and machinery. Create a short‑term detour using a wide‑tread gravel strip or a portable steel mat. This keeps tractors from getting stuck and protects the new slab’s edge from stray wheels.
Example: A sheep farm near Gunnedah installed a 3‑metre‑wide timber board walkway across the driveway while the builder laid a 5‑metre‑wide concrete slab. The boards were removed once the concrete cured, saving the farmer from a costly re‑grade.
Coordinate deliveries with farm cycles
Materials like cement, steel mesh, and timber arrive in bulk. Schedule deliveries for early morning when the farm’s staff are already on site, or after a mustering when the yard is clear.
Tip: Ask the builder to confirm the exact delivery windows a week in advance. A missed delivery can mean the concrete set on the truck and you lose both material and time.
Communicate weather and fire‑risk updates
In NSW, the Rural Fire Service (RFS) issues daily alerts that can swing a construction schedule from “on‑track” to “stand‑down” in minutes. Keep a phone line or a group chat open with your builder so you can pause work the moment an “Emergency Warning” or “Watch and Act” is issued.
According to the NSW Rural Fire Service, many rural projects lose an average of two days per fire season due to sudden restrictions. By checking the fire‑danger rating each morning, you can pre‑emptively move indoor tasks (e.g., wall framing, electrical rough‑in) into those high‑risk windows.
Safety brief on‑site every day
Before the crew steps onto the property, run a five‑minute safety huddle. Cover site‑specific hazards – moving livestock, uneven terrain, and any nearby water sources that could cause slip hazards.
In one of my recent builds near Armidale, a stray dog wandered onto the site. A quick “watch for animals” reminder prevented a near‑miss with a concrete mixer.
Track progress with a simple visual board
Put up a weather‑proof whiteboard at the edge of the shed site. List today’s tasks, who’s responsible, and any “stop‑work” triggers (e.g., rain > 5 mm, wind > 30 km/h, fire alert level 2). The visual cue keeps everyone aligned without endless phone calls.
When the board shows “Concrete pour – 09:00 am”, the farm crew knows to keep the access lane clear, and the builder knows the crew is ready with the pump.
Final checklist before handover
- Confirm all sub‑grade compaction meets the 100 mm specification in the NCC – you can ask the builder for a compaction log.
- Verify fire‑rating walls and non‑combustible cladding are installed as per the Section 10.7 certificate.
- Inspect door and window openings; if you need later repairs, the Australian Building Code Board offers guidelines on proper sealing for bush‑fire zones.
- Obtain a signed warranty and a maintenance schedule for future slab inspections.
By treating the construction phase as an extension of your farm routine – mapping tasks, planning traffic, staying alert to weather and fire alerts, and keeping communication tight – you’ll finish on time, stay within budget, and end up with a building that works as hard as you do.
Step 5: Ongoing Maintenance & Rural Property Services
Set a calendar, then stick to it
Imagine you’re looking at a brand‑new shed a month after the build and you notice the doors are sagging. What went wrong? Most of the time, it’s simply a missed maintenance check.
Start by creating a master maintenance calendar. Block out quarterly inspections for the building envelope, monthly checks of mechanical systems, and an annual deep‑clean of the whole site. Write it on a wall planner, sync it to your phone, whatever keeps you honest.
So, what should you actually inspect each time?
Quick‑fire inspection checklist
- Roof: look for loose sheeting, rusted flashing, or debris that could trap water.
- Gutters & downspouts: clear out leaves and twine to maintain proper drainage.
- Doors and windows: test seals, hinges, and locks for wear.
- Structural timber: check for signs of rot, especially around the base where soil meets wood.
- Electrical & lighting: verify all fixtures are secure and that there’s no corrosion on connections.
Even a five‑minute walk‑around can catch problems before they become costly repairs.
Does a simple checklist feel too basic? Not when you pair it with a solid reference. The Renewable Energy Landholder Guide recommends quarterly visual inspections for any rural‑installed equipment – a habit that works just as well for sheds, barns, and workshops.
Keep the surrounding land tidy
Vegetation isn’t just an eyesore; it’s a fire hazard and a moisture trap. Trim back scrubby branches within at least a two‑metre radius of the structure. If you’re near a fire‑prone area, follow the NSW Rural Fire Service’s clear‑zone recommendations – they’re the gold standard for protecting farm buildings.
When you clear the area, you also improve airflow, which helps dry out any lingering dampness that could sneak into timber joints.
What about the ground itself?
Manage the soil and drainage
After a heavy rain, walk the perimeter and watch for pooling water. If you see puddles lingering for more than 24 hours, consider adding a French drain or re‑grading the soil away from the foundation. A simple sand‑filled trench can do wonders.
Don’t forget the sub‑grade beneath any concrete pads – a cracked slab can let moisture seep up into your building, leading to mould and rust on steel brackets.
Service the mechanical heart of your property
Many rural properties rely on pumps, generators, and solar arrays. Treat them like a car: change oil in hydraulic pumps, replace battery terminals, and wipe down solar panels to keep efficiency high.
If you’re not comfortable with the tech, schedule a bi‑annual visit from a qualified technician. Most local electricians will offer a maintenance package – it’s cheaper than emergency call‑outs.
Ever wondered why a generator that seems fine one month sputters the next? It’s usually a clogged air filter or a loose connection that a quick service would have caught.
Document everything
Every time you complete a task, jot down the date, what was done, and any observations. A simple spreadsheet works, but a paper logbook kept in the workshop is often more reliable when you’re out in the paddock with muddy boots.
When it’s time to sell or hand over the property, that logbook becomes proof of diligent care – a selling point that can boost the asking price.
Budget for upkeep, not just emergencies
It’s tempting to set aside a “rainy‑day” fund, but you also need a rolling maintenance budget. Allocate 1‑2 % of the building’s replacement cost each year for routine repairs. That way, you won’t be caught off‑guard when a roof panel finally gives way.
And remember, as a rural builder tamworth you have local suppliers who often offer trade discounts for repeat maintenance contracts – leverage those relationships.
Emergency plan – because the unexpected happens
Write a one‑page emergency response sheet: who to call, where the shut‑off valves are, and where spare parts are stored. Hang it near the main switchboard.
During a bushfire alert, the plan should include clearing the immediate area, covering vulnerable openings with metal sheets, and having a portable fire extinguisher ready.
Does that sound like a lot? Break it into bite‑size actions, tackle one item each month, and you’ll have a resilient, well‑maintained property without the stress.
Step 6: Sustainable & Energy‑Efficient Building Practices
Start with the site, not just the walls
Before we even think about insulation, I always walk the plot at sunrise. The sun’s angle tells me where to place eaves, and the prevailing wind shows me which side needs a windbreak. A simple 2‑metre timber fence or a row of native shrubs can cut heating loss by up to 15 % in winter, according to Australia’s energy‑efficiency guidelines.
So, map the sun, note the wind, and sketch a shelter‑belt plan before the first concrete is poured. It feels a bit like planning a garden, but the payoff is a building that breathes with the land.
Choose low‑impact materials that still do the heavy lifting
In Tamworth we have access to locally‑sawn hardwood, recycled steel studs, and even rammed‑earth walls for larger structures. Hardwood frames last decades without chemical preservatives, and recycled steel cuts embodied carbon by roughly 75 % compared with new steel.
Real‑world example: a 300 m² cattle shed we built for a client in Gunnedah used 40 % recycled steel for the roof trusses. The client reported a 12 % reduction in annual energy use because the lighter roof reduced heat gain on hot summer days.
Insulation that works in the outback
Don’t fall into the trap of “one‑size‑fits‑all” insulation. For a workshop that houses heavy machinery, a rigid PIR board with a reflective foil facing the interior stops heat from radiating off the metal roof. For a milking shed, a breathable cellulose blanket keeps the interior dry while still offering R‑values around 2.5 per 100 mm.
Here’s a quick checklist you can stick on the site office:
- R‑value target: 2.5 for walls, 3.0 for roofs in temperate zones.
- Seal every joint with foil‑backed tape – gaps are the silent energy thieves.
- Install a vapour barrier only on the warm side of the wall to avoid condensation.
Passive solar design – let the sun do the work
Orient the longer side of the building north‑south. South‑facing windows stay shaded in summer, while north‑facing glazing lets low‑angle winter sun flood the space. Adding an overhang of about one‑third the window height blocks the high summer sun but welcomes the low winter rays.
One of our recent projects in Armidale used a 1.2 m roof overhang on a 3 m‑wide north‑facing window. The result? A 20 % drop in heating demand during the chilly months, verified by the NABERS energy rating after the first winter.
Water‑wise building envelopes
Rainwater isn’t just for the paddock; it can also cool your roof. A shallow roof tray filled with gravel and a thin water layer can shave a few degrees off roof temperature, reducing the load on any ventilation fans.
It sounds a bit DIY, but the system only needs a simple overflow pipe and a low‑cost pump for occasional flushing. The maintenance is similar to a livestock water trough – check the level quarterly and clear debris.
Energy‑efficient services and lighting
Swap out old halogen floodlights for LED panels with a colour temperature around 4000 K. LED fixtures use up to 80 % less electricity and produce far less heat, which means your roof stays cooler.
For power, consider a modest 5 kW solar array mounted on the south side of the roof (where it won’t shade the building). In our experience, a typical rural shed with a 5 kW system offsets roughly 30 % of its annual electricity use, even with the occasional high‑power milking pump.
Step‑by‑step action plan
- During the design phase, sit with your builder and map sun/wind directions. Sketch a simple shelter‑belt.
- Select locally sourced, low‑embodied‑carbon materials – ask your supplier for recycled‑content percentages.
- Specify insulation type and R‑value in the contract. Include a joint‑sealing clause.
- Design windows and overhangs for passive solar gain. Use a 3‑point check: orientation, size, overhang depth.
- Plan a rain‑water roof tray or simple drip‑edge system for roof‑cooling.
- Choose LED lighting and, if budget allows, a 5 kW solar array with a battery backup for critical loads.
- After construction, run a NABERS or similar energy audit to benchmark performance and set a yearly review date.
By breaking it down into these bite‑size steps, you’ll avoid the overwhelm that often comes with “green building”. You’ll end up with a shed, workshop, or homestead that not only stands up to bushfire, flood, and heat, but also saves you money on electricity and keeps the land healthier for generations to come.
FAQ
What does a rural builder tamworth actually do for a farm renovation?
A rural builder tamworth like Awesim takes the whole picture – from digging footings on cracked ground to fitting a weather‑tight roof that can shrug off a bushfire warning. We start by chatting with you about how you use the shed or homestead, then draw up plans that respect wind direction, solar gain and local council codes. On‑site, we manage everything: ordering timber, coordinating trades, and doing the hands‑on carpentry so you don’t have to chase a dozen subcontractors.
How much does a typical sustainable shed cost in Tamworth?
Costs vary, but most owners in the New England region find a 30‑metre‑square, low‑embodied‑carbon shed runs between $70,000 and $90,000 when you include insulation, LED lighting and a modest 5 kW solar array. That figure already factors in local timber rates, recycled‑steel trusses and a simple rain‑water roof tray. If you stretch the budget for premium finishes – double‑glazed doors or a heated floor – add another 10‑15 percent. The key is to set a clear budget early and ask your rural builder tamworth to give a line‑item quote so there are no surprise invoices later.
Can I add solar power to an existing shed without major structural changes?
Absolutely. Most older sheds have enough roof space to mount a lightweight solar racking system that bolts onto the existing battens. The trick is to check the roof’s pitch and ensure there’s at least a 10‑degree slope for water runoff – otherwise you risk ponding and premature panel failure. A rural builder tamworth will reinforce any weak points with extra purlins, then connect the panels to a small battery bank that can keep essential lights and pumps running when the grid goes down.
What maintenance tasks should I schedule each year to keep my farm building in top shape?
Write a simple calendar and stick it on the workshop wall. In spring, give the roof a quick sweep and check for loose fasteners – that’s when wind‑driven debris shows up. Summer is the time to service pumps, change hydraulic oil and clean solar panels; a hose and a soft brush are all you need. Autumn calls for gutter cleaning and a seal‑check around doors and windows; any gaps will let cold air in during winter. Finally, in winter, run the heating system once a week to prevent motor seize‑up and inspect insulation for any moisture spots.
How do I choose the right door and window replacements for a dusty farm environment?
Look for robust frames made from powder‑coated steel or hardwood that can handle the occasional sandstorm. Double‑glazed units with low‑E coating are great for keeping heat in winter and out in summer, plus they reduce dust infiltration. Make sure the seals are silicone‑based rather than rubber; silicone lasts longer under UV exposure. A rural builder tamworth will also fit self‑closing hinges and secure latches so the doors stay shut even when a gust rattles the shed.
Is it worth investing in a battery backup for my rural shed’s essential equipment?
In most outback scenarios, a modest 5 kW battery system pays for itself within three to five years. It keeps critical loads – like milking pumps, security lighting and a small fridge – running during a grid outage, which is common after a storm or bushfire. The upfront cost is offset by lower electricity bills because you can draw from the battery during peak tariff periods. Talk to your rural builder tamworth about sizing the bank correctly; oversizing wastes money, undersizing leaves you in the dark.
How can I make my rural building more fire‑resistant without breaking the bank?
Start with the basics: clear a 10‑metre safety zone around the structure, install metal eaves and roof flashing, and choose non‑combustible cladding such as fibre‑cement boards. Adding a thin fire‑break membrane under the roof sheeting can stop flame spread for a few extra minutes – a small cost that gives you precious time to call the fire brigade. Finally, keep a dedicated fire‑extinguishing kit near the main entrance; a Class A‑B powder extinguisher is cheap and works on both wood and electrical fires.
Conclusion & Call to Action
So there you have it – a shed that keeps its cool in summer, stays warm in winter, and won’t go up in flames when the bushfire siren sounds. It’s the kind of peace of mind every farm owner dreams about, right?
We’ve walked through passive solar orientation, low‑embodied‑carbon materials, a modest 5 kW solar array with battery backup, and cheap fire‑break tricks that buy you precious minutes. Those steps, taken together, turn a simple outback shed into a resilient, cost‑saving asset.
But what does that mean for you today? Maybe you’re staring at a leaky roof, or the idea of a battery feels daunting. You’re not alone – most of our clients start with one small win, like sealing the joints or swapping a halogen for an LED panel.
We’ll also walk you through any permits, show you the best local suppliers, and keep an eye on the budget so nothing surprises you later.
Here’s the next move: grab a coffee, pull out that checklist we listed earlier, and give us a call. At Awesim, your local rural builder tamworth, we’ll sit down, map your priorities, and sketch a realistic budget that fits your farm’s rhythm. Let’s turn those ideas into a building that works as hard as you do.


