

Imagine standing on your farm at sunrise, the breeze carrying the scent of eucalyptus, and thinking, “What if my workshop could double as a cosy home?”
But that’s the spark behind a barndominium – a sturdy barn‑style structure that feels like a modern country retreat.
But you might be wondering if a barndominium builder nsw can really deliver something that blends rugged utility with comfortable living.
Let me be straight with you: not every builder knows how to balance the structural demands of a barn with the finish work of a home.
When I first started in Tamworth, I saw families trying to squeeze a house onto a shed, only to end up with drafty walls and leaky roofs.
We learned the hard way that you need a team that understands farm logistics – like scheduling around mustering, harvest windows, and the occasional dust storm.
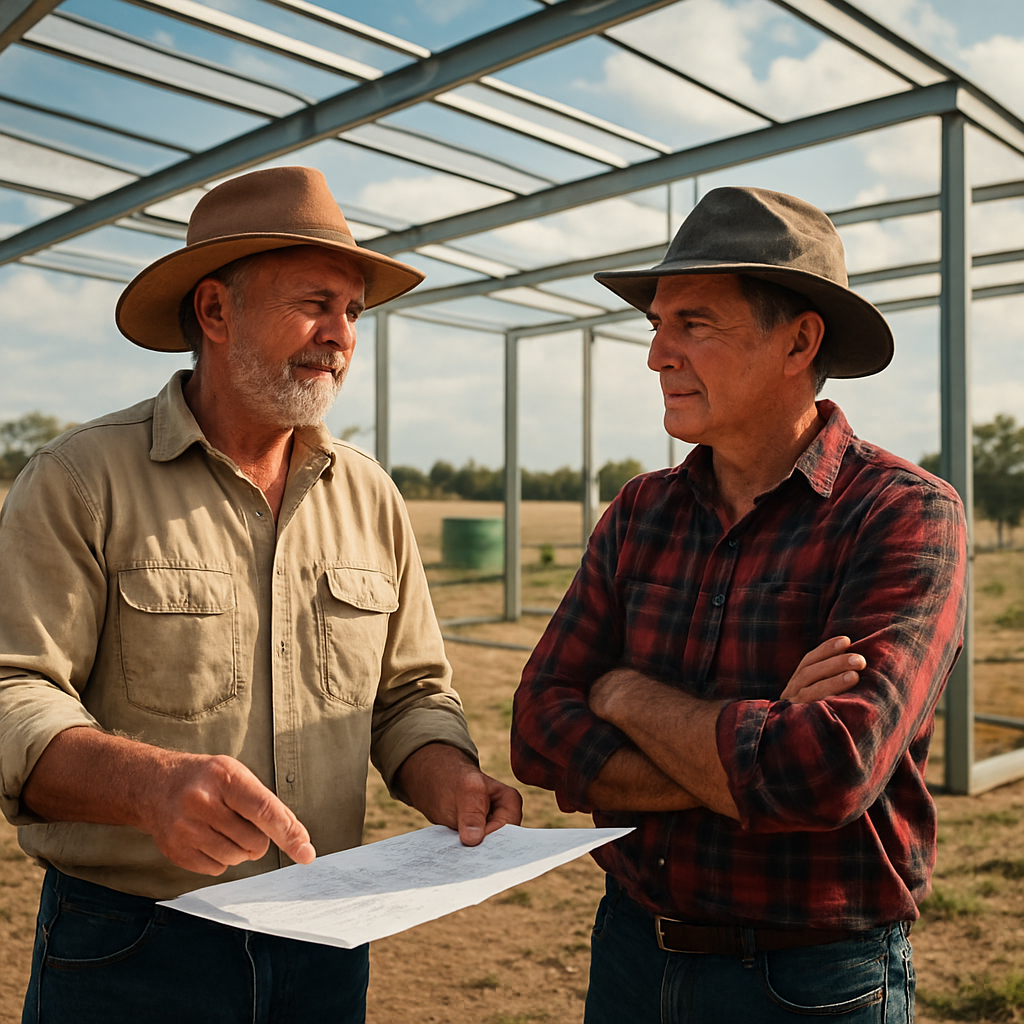
So, what does a good barndominium builder nsw actually do? First, they assess your land’s slope, soil type, and how you move livestock or equipment.
Then they design a layout that gives you wide‑span clearances for a workshop, plus insulated living quarters that stay warm in a Gunnedah winter.
Think about it this way: the same steel frames that hold up a hayloft can also support a loft bedroom, a kitchen island, and even a solar array.
And because we’ve been in the field for 35 years, we know the right fasteners, sealants, and ventilation tricks that keep the building tight against the outback heat.
One of my favourite projects was on a cattle station near Bourke – we turned a 30‑metre pole barn into a family home with a wrap‑around deck that overlooks the creek.
The owners now host weekend barbecues, and the kids sleep under a vaulted ceiling that feels both spacious and safe.
It’s not just about the structure; it’s about the peace of mind that comes from working with a builder who respects your schedule.
We coordinate deliveries so you don’t lose a day of milking, and we keep the site tidy because a clean yard means fewer accidents.
Does this sound like the kind of solution you’ve been hunting for?
If you’re nodding, you’re probably ready to explore how a barndominium can fit your lifestyle and budget.
In the sections that follow, we’ll break down budgeting, planning permissions, and the step‑by‑step process of turning that vision into reality.
Let’s dive in together and see how a barndominium builder nsw can transform your property into a place you truly love.
TL;DR
A barndominium builder NSW can turn your farm shed into a comfortable, durable home that fits your lifestyle, with expert design, reliable construction, and seamless coordination around milking or mustering schedules. We’ll guide you through budgeting, approvals, and step‑by‑step builds so you can enjoy a modern country retreat without the headaches.
Step 1: Assess Your Site and Zoning Requirements
Before we even talk about steel frames or interior layouts, we need to know exactly what you’ve got on the ground. A quick walk around the property – looking at slope, soil type, existing structures, and the way you move livestock or equipment – can save you weeks of redesign later.
Does your land tilt downhill toward a creek? Is the soil heavy clay that swells after rain? Those are the kind of details that dictate whether you’ll need a deeper slab, extra footings, or special drainage.
Do a hands‑on site audit
Grab a notebook, a tape measure, and a camera. Sketch the outline of the lot, note the high‑point and low‑point, and photograph any trees you might want to keep (or remove). Mark where power, water, or septic lines already run – you’ll be surprised how often a pre‑existing service line can become the backbone of your new barndominium.
While you’re out there, think about how the building will sit in relation to your daily routine. Will the kitchen face the milking shed? Is the bedroom going to double as a lookout over the paddocks? The more you visualize now, the less you’ll have to re‑think later.
Check the zoning and land‑use rules
Every council in NSW has a zoning map that tells you what you can build where. In most rural zones, a barndominium qualifies as a “secondary dwelling” or a “farm building”, but the exact classification matters when you apply for approval.
Here’s a shortcut most people miss: if your project fits within the complying development pathway, you could shave months off the paperwork. That route can deliver a decision in as little as 20 days and often avoids the full council hearing process.
But remember, complying development still requires you to meet the specific standards for setbacks, height, and floor‑area ratio in your zone. Grab the zoning schedule from your local council’s website or give the council office a call – they’ll hand you a PDF that spells out the exact numbers.
Ask yourself the right questions
Do you need a separate approval for a septic system, or can you tie into an existing one? Will you be adding a new water tank that exceeds the council’s storage limits? Is your planned roof pitch within the allowable range for your zone?
These questions feel like busywork, but they’re the difference between a smooth approval and a stop‑work order in the middle of winter.
Gather the paperwork early
Start assembling the key documents now: a site plan (scaled to 1:200), a basic floor‑plan layout, and a preliminary engineering sketch. Even a rough draft shows the council you’re serious and can speed up the review.
Our team at Farm New Builds – Awesim always asks clients to bring a copy of the title deed and any existing building permits. Having those on hand lets us cross‑check any easements or covenants that might bite you later.
If you’re unsure about a particular restriction, you can request a “Section 149” advice from the council – a free service that tells you whether your concept is likely to be approved.
Once you’ve nailed down the zoning envelope, you can move on to the design stage with confidence, knowing the land will actually allow what you’ve imagined.
One final tip: think about the finishes early, especially the floors. A well‑chosen floor can add instant value and make the space feel like home from day one. For example, you might explore premium flooring options that stand up to dust, mud, and the occasional spill of milk.
Step 2: Design Your Barndominium Layout for Rural Living
Alright, you’ve got the zoning cleared – now it’s time to start sketching how the space will actually live and breathe on your property.
Imagine stepping out of the bedroom onto a timber deck that frames the sunrise over your paddocks. That feeling of the floorboards warm under your feet? That’s the kind of everyday magic we want to bake into the layout from day one.
So, where do you begin? First, think about the flow of your day – where you load the truck, where the animals move, where you cook dinner after a long muster. Mapping that flow on graph paper (or a simple digital tool) stops you from ending up with a kitchen that backs onto the milking shed or a workshop that blocks your favourite view.
Map your daily flow
Start with the “high‑traffic zones”: the entry gate, the feed store, the workshop bay, and the living core. Draw arrows showing how you move between them. You’ll quickly see natural “clusters” – maybe the workshop and laundry belong together, while the bedroom and family lounge form a quieter zone.
Tip: leave a 1‑metre clearance around the main doors. It sounds tiny, but it gives you room for a wheelbarrow or a horse lead without jamming the door.
Think about zones inside the building
Next, break the interior into functional zones. A classic barndominium layout stacks the workshop on one side, the kitchen‑dining area centrally, and the sleeping quarters at the opposite end. This separation keeps dust and noise away from your evenings.
Don’t forget ceiling height. A 4‑metre clear span over the workshop lets you fit a forklift or a large hay rack without a headache. Meanwhile, a slightly lower, cosy ceiling over the lounge can make the space feel more intimate.
And here’s a little secret: many of my clients love a “raised loft” above the workshop for seasonal storage or a kids’ play area. It adds value without expanding the footprint.
Plan for future growth
Rural life changes – you might add a new cattle paddock, a solar array, or even a separate granny flat. Design your layout with “plug‑in” spaces: a 2‑metre wide opening on the side wall for a future extension, or a pre‑wired conduit for solar panels on the roof.
Think about services too. Run the main water and power lines along a central trench so you can tap into them later without tearing up the slab.
One practical checklist I always hand to clients:
- Locate the main entry and ensure a wide turning circle for farm trucks.
- Place the workshop opposite the living area to isolate noise.
- Reserve a 2‑metre buffer zone on the north side for a future shed or solar.
- Mark where the HVAC and insulation will go – rural winters can be brisk.
- Sketch any future loft or mezzanine ideas now, even if you don’t build them straight away.
When the sketch feels right, hand it to your barndominium builder nsw. A seasoned builder will take that layout, run the structural calculations, and confirm that the steel frames can span the distances you’ve imagined.
Remember, the goal isn’t a perfect drawing on the first try – it’s a flexible blueprint that reflects how you live, work, and dream on the land. And once the design is locked, you’ll have a clear roadmap for budgeting, material orders, and the inevitable excitement of watching a steel frame rise against the outback sky.
Ready to turn that sketch into a solid plan? Grab a coffee, pull out that notebook, and start mapping the flow. Your future barndominium is just a few lines away.
Step 3: Choosing Materials That Withstand NSW Outback Conditions
Alright, you’ve nailed the layout and the permits – now it’s time to pick the stuff that’s actually going to survive the NSW outback. We’re talking scorching summer sun, sudden cold snaps, dust storms, and the occasional bout of humidity after a heavy rain. If the right materials aren’t on the table, you’ll end up with a building that squeaks, cracks, or leaks before you even finish the first coat of paint.
Know the climate stresses you’ll face
First thing’s first: understand the three big enemies – heat, moisture and wind‑borne grit. In places like Tamworth or Bourke, summer temperatures can push 40°C, while winter nights dip below 5°C. That swing means steel expands and contracts a lot, so you need a framing system with a good thermal break and corrosion‑resistant coating.
Moisture isn’t just rain; it’s the ground‑swell after a downpour and the occasional flood on low‑lying paddocks. Look for concrete footings with a proper vapor barrier and consider a raised slab or pier system if your soil is heavy clay.
Pick the right steel and fasteners
Most of us rely on pre‑engineered steel frames – they’re strong, quick to erect, and can span wide bays without intermediate columns. The trick is to choose hot‑dip galvanized or epoxy‑coated sections that won’t rust the first time a dust storm sweeps through. And don’t forget the fasteners: stainless‑steel or hot‑dip coated bolts are the only ones worth the extra few dollars.
When you order a barndominium kit, the supplier usually outlines the steel grade and coating options. A quick glance at a barndominium kit material guide shows the typical options and price ranges, so you can match the spec to your budget.
Insulation that fights both heat and cold
Rural NSW is a place where you want the workshop cool in summer and the living space warm in winter. Rigid foam board (polyiso) or mineral wool batts both work, but mineral wool has the edge for fire resistance – a real plus when you store hay or livestock feed nearby.
Seal every joint with acoustic sealant and tape to stop drafts. A thin layer of reflective foil on the exterior of the insulation can bounce back a chunk of the solar heat, keeping the interior temperature more stable.
Exterior cladding that tolerates grit
For the outer skin, colourbond steel is the go‑to for many NSW farmers. It’s pre‑painted, UV‑stable, and the built‑in coil‑coat protects against rust. If you prefer a more rustic look, you can opt for fibre‑cement panels – they’re tough, low‑maintenance, and won’t blister in the heat.
Make sure the panels are installed with a “rain screen” gap behind them. That tiny air cavity lets any moisture that sneaks behind the cladding dry out, rather than sitting against the steel frame and causing corrosion.
Roofing that survives the outback wind
A standing‑seam steel roof is hard to beat. The seams lock together, so there’s no need for fasteners that can loosen over time. Choose a colour that reflects sunlight – lighter shades cut roof temperature by up to 20°C, which also reduces cooling loads inside.
If you’re adding solar panels later, pick a roof pitch that gives you a flat‑top area. A 4‑to‑12 pitch works well for both rain runoff and solar array placement.
Quick checklist before you sign off
- Confirm steel is hot‑dip galvanized or epoxy‑coated.
- Specify stainless‑steel or coated fasteners for all connections.
- Choose mineral wool for fire‑rated insulation, or polyiso with reflective foil for maximum R‑value.
- Opt for colourbond or fibre‑cement cladding with a rain‑screen gap.
- Select a standing‑seam steel roof in a light colour, with a pitch that suits future solar.
- Plan a raised slab or pier footings with a vapor barrier for heavy soils.
Bottom line: the outback doesn’t forgive cheap shortcuts. By matching each material to the specific climate pressure it’ll face, you give your barndominium the durability it needs to stay solid for decades. And when the next dust storm rolls in, you’ll be the one laughing over a cold beer while the building stands firm.
Step 4: Cost Breakdown and Financing Options
Alright, you’ve got the design nailed and the materials sorted – now it’s time to stare at the numbers. I know, the spreadsheet can feel like a brick wall, but breaking the cost down into bite‑size pieces makes the whole thing feel doable.
1. Sketch out the big line items
Start with the five pillars that most barndominium projects in NSW revolve around:
- Land preparation & foundations
- Steel frame & roof kit
- Insulation & interior finishes
- Plumbing, electrical & services
- Labour & builder’s margin
Put a rough dollar figure next to each – even if it’s a range. For example, a raised slab on heavy clay around Gunnedah usually runs $45‑$55 per square metre, while a simple pier system in Dubbo can be as low as $30 per metre.
2. Real‑world example: the Bourke family project
When the Bourke family wanted a 250 m² barndominium near the river, their cost sheet looked roughly like this:
| Item | Estimated Cost (AUD) | Notes |
|---|---|---|
| Site prep & slab | $42,500 | Vapor barrier, reinforcement, 12‑week cure |
| Steel frame & roof kit | $55,000 | Hot‑dip galvanized, standing‑seam roof |
| Insulation & cladding | $38,000 | Mineral wool + colourbond panels |
| Services (plumb/electrical) | $32,000 | Pre‑wired for solar future |
| Labour & builder margin | $50,000 | 35 years of Awesim experience |
That adds up to about $217,500 – roughly $870 per square metre, which sits comfortably under the average $673,000 price tag for a conventional home in NSW. Barndominium Life notes that a simple shed‑style barndominium can start as low as $20,000‑$35,000, so you can see how scaling up adds value without blowing the budget.
3. How to secure financing
Banking on a barndominium can feel a little odd because many lenders still think of it as a ‘non‑traditional’ dwelling. Here’s a practical three‑step approach that’s worked for dozens of our clients:
- Get a detailed construction budget. Your table above is the foundation. Lenders love numbers they can verify.
- Show a reputable builder’s quote. A quote from a licensed NSW builder (like Awesim) signals that the project is real, not a wish‑list.
- Explore specialised rural loan products. Some regional credit unions have “farm‑home” lines that allow up to 80 % LVR for a barndominium, especially if you can prove the structure will also support a workshop or livestock storage.
Tip: keep a copy of the council’s complying development approval on hand – it shortens the underwriting process dramatically.
4. Cash‑flow tricks to keep the build moving
Even with a loan, you’ll hit moments where cash is tight. Try these small hacks:
- Stage payments: agree on 30 % deposit, then pay 40 % after the frame is up, and the rest on completion. It aligns cash with progress.
- DIY‑friendly tasks: you can handle site clearing, temporary fencing, or even painting the interior walls – just make sure the builder signs off on any work that could affect structural integrity.
- Leverage government grants for rural energy efficiency. A modest rebate on solar‑ready wiring can shave a few thousand dollars off your services budget.
5. Checklist before you sign the finance agreement
Don’t let a fancy spreadsheet hide the basics. Run through this quick list:
- Confirm interest rate, repayment term, and any early‑payoff penalties.
- Make sure the loan covers contingency – 10 % of the total budget is a safe cushion.
- Ask the lender if they require a mortgage on the land only or on the building as it progresses.
- Verify that the builder is covered by a Home Warranty Insurance policy – NSW law requires it for residential projects over $20,000.
- Get a written schedule of when each payment is due, tied to concrete milestones (foundation, frame, lockup, completion).
If you tick all those boxes, you’ll walk into the bank feeling like you’ve already built the barndominium in your head.
6. Bottom line – make the numbers work for you
Cost breakdown isn’t just about pennies; it’s about confidence. When you see exactly where every dollar goes, you can adjust the spec – maybe trade a premium cladding colour for a modest interior finish – without fearing surprise invoices.
Remember, a barndominium builder nsw who’s been on the ground for 35 years knows how to keep the budget tight while delivering a structure that stands up to the outback’s toughest seasons. Use the table, the checklist, and the financing steps as your roadmap, and you’ll move from “that sounds expensive” to “we’ve got this covered”.
Step 5: Hiring the Right Barndominium Builder in NSW
Alright, you’ve crunched the numbers and picked your materials – now the real magic happens when you find the right hands to bring the vision to life.
What does a good barndominium builder actually do?
In a nutshell, they blend barn‑style durability with home‑comfort finish. That means they know how to frame a 4‑metre clear span, seal a standing‑seam roof against dust storms, and still deliver a kitchen that feels warm on a chilly Gunnedah night. If you’ve never heard the term before, the podcast explains that a barndominium is essentially a barn‑like shell housing residential spaces, so you need a builder who gets both sides of that equation.
Step‑by‑step checklist for vetting your builder
1. Verify licences and insurance. In NSW any builder working on a project over $20,000 must carry Home Warranty Insurance. Ask to see the policy number and confirm it’s current.
2. Look for local experience. A builder who’s spent 35 years around Tamworth, Dubbo or Bourke will already know the soil quirks, seasonal road closures and council quirks that can derail a build.
3. Ask for a detailed quote. It should break down steel, cladding, labour, and milestones (foundation, frame, lock‑up, finish). Anything vague is a red flag.
4. Check references on similar barndominiums. A good builder will gladly put you in touch with a family who turned a shed into a weekend retreat. Listen for stories about on‑time deliveries and how the team handled unexpected rain.
5. Confirm a written schedule of payments tied to milestones. This protects your cash flow and gives you leverage if the frame isn’t up when the invoice arrives.
Red flags to watch out for
Don’t be swayed by rock‑bottom prices – they often mean cheaper fasteners or a lack of insurance. If a builder can’t give you a clear timeline, or if they push you to pay the full amount before any work starts, walk away. Also, be wary of contractors who aren’t members of a recognised industry body; those groups usually enforce a code of practice that keeps you safe.
Another subtle sign is communication style. Do they reply to emails within a day? Do they explain technical jargon in plain language? You’ll be dealing with them for months, so a builder who talks like a neighbour rather than a sales‑pitch robot will make the process far less stressful.
How to interview the shortlist
Bring a notebook and ask these three questions:
- What’s your experience with barndominiums in NSW’s outback climate?
- Can you show me a copy of your Home Warranty Insurance and licence?
- How do you manage deliveries around farm activities like mustering or harvest?
Listen for specifics – a vague “we’ve built a few” isn’t as reassuring as “we built a 250 m² barndominium in Bourke last summer, and we coordinated the steel delivery around a cattle drive”.
Once you’ve narrowed it down, ask for a site visit to a current project. Seeing the crew in action, the way they protect the slab, organise tools and keep the yard tidy will tell you more than any brochure.
And remember, a builder who respects your schedule will also respect your budget. They’ll flag potential cost overruns early, rather than waiting until the roof is on and you’re already deep in debt.
Finally, trust your gut. If something feels off – maybe they’re evasive about insurance, or they keep promising “we’ll get it done next week” without a concrete plan – it’s better to keep searching. The right partner will make you feel confident that the barndominium will stand strong for decades.
Step 6: Managing Construction Timeline and Rural Logistics
Imagine the day the steel arrives just as you’re herding the cattle back from the paddock – the timing feels like a perfect dance, right?
If you’ve ever tried to squeeze a delivery between a mustering run and a rain‑soaked road, you know the difference a solid timeline makes. That’s where a seasoned barndominium builder nsw becomes your logistics partner, not just the guy with a hard hat.
Map the whole season before the first nail
Start by pulling out your farm’s annual calendar. Mark the months you’re busiest – mustering, sowing, harvest, cattle sales – and then block out a “construction window” that avoids those peaks. Even a two‑week buffer can save you from a delayed steel shipment that would otherwise stall the whole project.
Ask your builder to sketch a high‑level Gantt chart. It doesn’t need to be fancy, just a visual of foundation, frame‑up, lock‑up and interior fit‑out. When you can see each stage lined up against your farm activities, you’ll spot conflicts before they turn into costly setbacks.
Secure reliable supply‑chain partners
Rural roads can turn to mud in minutes, so the last thing you want is a delivery truck stuck halfway to the site. Choose a steel supplier who’s used to delivering to outback locations and who can hold the material on site for a few days if weather forces a pause.
One trick we use at Awesim is a “delivery liaison” – a local contact who coordinates the truck’s arrival, checks road permits, and even pre‑positions a temporary lay‑down area on the property. It sounds like extra work, but it removes the guess‑work when the 12‑metre beam finally rolls in.
Plan for on‑site storage and protection
Steel, cladding panels and roofing sheets love the sun, but they also hate rust. Set up a covered off‑site storage shed or a large tarp‑covered zone close to the build pad. Keep a simple inventory sheet: item, quantity, arrival date, and who’s responsible for checking it.
Don’t forget to protect the slab once it cures. A few days of rain can wash away the curing moisture, weakening the concrete. A quick “wet‑cure” blanket or a portable shelter can keep the slab dry without delaying the next step.
Synchronise trades with the farm rhythm
Electricians, plumbers and HVAC crews all need clear entry points. If your property has a single gate that’s only open during daylight, let the trades know well in advance. Schedule the heavier deliveries – like the roof trusses – for a day when you’ve already cleared the access track.
We’ve found that a simple “trade‑day checklist” works wonders: confirm the gate is unlocked, the site is level, and any livestock are safely penned away. It sounds like a lot, but the checklist only takes a minute to fill out each morning.
Build in flexibility – the “what if” plan
Even the best‑planned timeline meets unexpected hiccups: a sudden storm, a delayed permit, or a broken forklift. The key is to have a contingency buffer built into both time and budget. A 10 % time cushion on each major milestone gives you breathing room without having to renegotiate the whole contract.
On the money side, keep a “hold‑back” fund – a small percentage of the total contract kept aside for surprise expenses. When the hold‑back is already agreed upon, you won’t be scrambling for cash when the roof needs an extra sealant due to unexpected humidity.
Communication is the glue
Set a weekly 15‑minute “construction huddle” either on site or over the phone. During that call you can confirm what was completed last week, what’s coming up, and any road‑block that needs a decision. A quick “yes, we can move the delivery to Friday” can keep the whole schedule on track.
And don’t underestimate the power of a simple text message when a storm rolls in. A quick “rain expected – pause deliveries until after 10 am tomorrow” saves everyone a lot of frustration.
Quick checklist for managing the timeline
- Lay out your farm’s busy calendar and block a construction window.
- Get a simple Gantt chart from your barndominium builder nsw.
- Choose a steel supplier experienced with rural deliveries.
- Set up covered on‑site storage and an inventory log.
- Prepare a trade‑day checklist for gate access and livestock safety.
- Add a 10 % time buffer and a financial hold‑back for surprises.
- Schedule a weekly 15‑minute progress call or site huddle.
- Keep real‑time communication channels open for weather alerts.
When you treat the construction timeline like you’d plan a seasonal crop, you’ll see the same kind of predictability and peace of mind. A barndominium builder nsw who respects those rhythms will keep the project moving while you keep the farm running – and that’s the sweet spot we aim for every day.
FAQ
What should I look for when choosing a barndominium builder nsw?
First off, make sure the builder is licensed and carries NSW Home Warranty Insurance – it’s the law for projects over $20,000 and protects you if anything goes sideways. Next, ask for recent barndominium projects in the same region; a builder who’s tackled a 250 m² build near Dubbo will already know the soil quirks, road‑access limits and climate stresses you’ll face. Finally, check how they communicate – quick replies, plain‑English explanations and a willingness to walk the farm with you are signs they’ll keep the process smooth.
How long does it typically take to complete a barndominium in rural NSW?
Timing depends on size, site prep and the weather window you give it. Most of my clients see the steel frame up within 4–6 weeks once the slab has cured, then another 6–8 weeks for interior fit‑out and services. In practice, budget around 12–16 weeks total, but add a 10 % buffer for rain, road closures or a delayed delivery. Planning the build during the dry season (April to October) usually shaves a week or two off the schedule.
Can I customise the interior layout after the steel frame is erected?
Absolutely – the steel frame is a skeleton, not a set‑in‑stone design. Once the frame is up you can still tweak room locations, add a loft or shift the workshop bay, as long as you stay within the original engineering limits. The key is to lock in any major structural changes before the cladding goes on; that way you avoid costly re‑erections. Talk it through with your builder early, and they’ll show you where there’s wiggle‑room.
What are the common financing options for a barndominium builder nsw project?
Many regional credit unions offer “farm‑home” loans that treat the barndominium like a mixed‑use building – you can borrow up to 80 % LVR, especially if the design includes a workshop or livestock storage. A construction loan with staged payments (deposit, frame‑up, lock‑up, completion) lines up cash flow with progress. Don’t forget to include a 10 % contingency in your budget; lenders like to see that you’ve planned for unexpected soil fees or extra insulation.
Do I need separate approvals for the steel frame and the residential interior?
In most NSW rural zones the barndominium falls under a “secondary dwelling” or “farm building” classification, so a single complying development approval usually covers both the structural frame and the habitable space. However, if you’re adding a septic upgrade, a larger water tank or a roof‑mounted solar array, you might need extra council sign‑offs. It’s worth getting a quick “Section 149” advice from the local council – it’s free and tells you exactly what extra paperwork is required.
How can I protect the steel frame from rust and dust in the outback?
The secret is in the coating and the storage plan. Choose hot‑dip galvanized or epoxy‑coated sections, and insist on stainless‑steel fasteners – they’re a few dollars more but save you headaches later. Once the steel arrives, keep it under a tarp or in a covered lay‑down area until it’s lifted onto the site. A simple rain‑screen gap behind the cladding lets any moisture escape, preventing corrosion on the frame.
What maintenance does a barndominium need once it’s lived in?
Treat it like any other rural building: inspect the roof seams after a big storm, clear debris from the gutters, and check the sealant around windows and doors annually. A quick visual check of the steel frame every couple of years – look for rust spots or loose bolts – can catch problems before they spread. And don’t forget the interior; mineral‑wool insulation should be refreshed if it gets damp, especially after heavy rains.
Conclusion
We’ve walked through design, material choices, budgeting, hiring, and timeline tricks – all so you can feel confident about your barndominium builder NSW journey.
Remember, a solid layout that mirrors your daily flow stops you from re‑designing once the steel is up.
Choosing hot‑dip galvanized or epoxy‑coated steel and stainless fasteners is the cheapest way to dodge rust down the road.
A clear cost breakdown and staged payments keep the bank happy and your cash flow steady.
When vetting a barndominium builder NSW, licence, Home Warranty Insurance, and local project references are non‑negotiable.
Plan the construction window around mustering, harvest or heavy rains – the timeline works better when it respects the farm rhythm.
Give your trades a simple checklist for gate access and livestock safety; a few minutes saved on site means fewer headaches later.
Keep a modest hold‑back fund and a 10 % time buffer; unexpected weather or a delayed delivery will never catch you off‑guard.
Most importantly, stay in regular contact – a quick text about a looming storm can save a day’s work.
So, what’s the next step? Grab a notebook, jot down the key items we’ve covered, and reach out to a trusted local builder.
At Awesim, we’ve spent 35 years turning farm sketches into sturdy barndominiums across Tamworth, Dubbo, Bourke and beyond.
If you’re ready to turn that vision into reality, give us a call or drop us a message – we’ll help you map the plan, lock in the budget, and keep the build on track.


2 Comments