

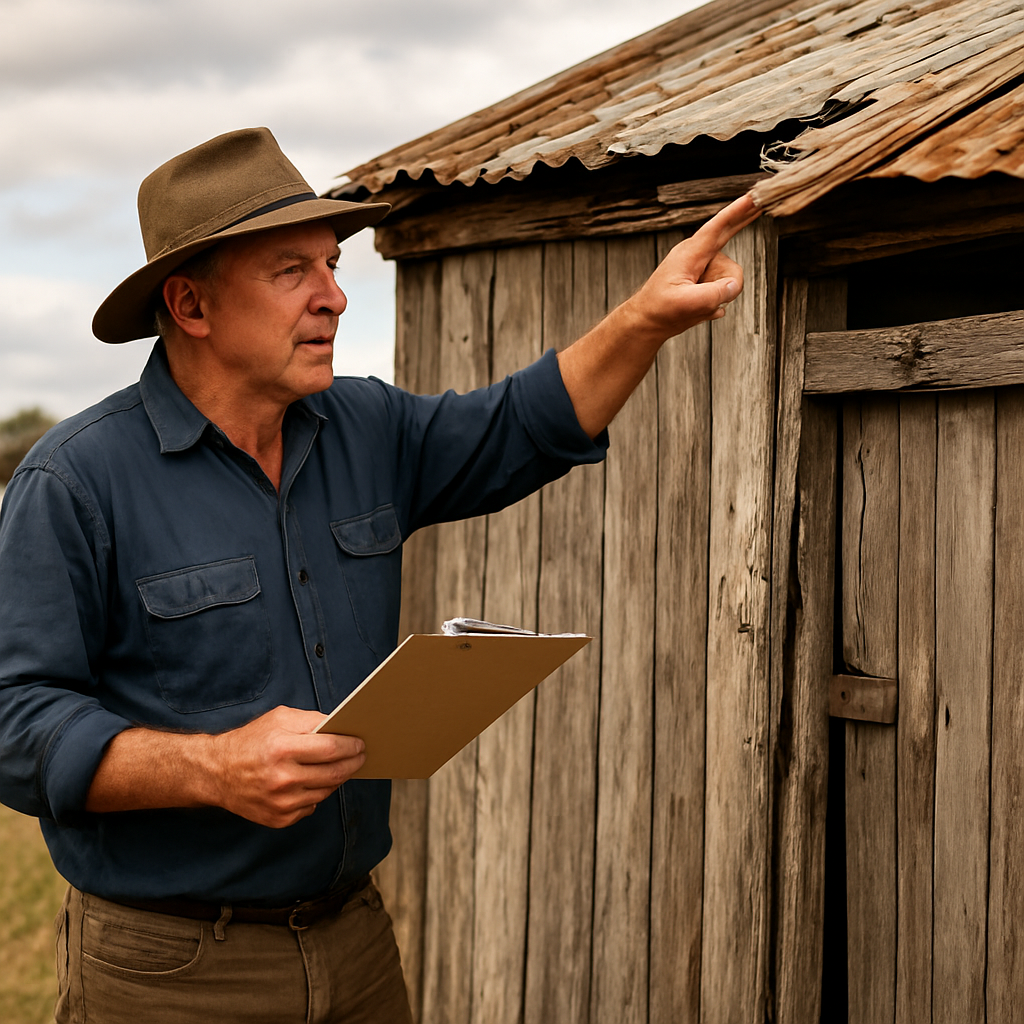
Ever walked past a weather‑worn farm shed in Tamworth and thought, “That could use a proper fix before the next storm?”
Maybe you’ve already tried a DIY patch, only to watch the roof leak again when the rain hits hard, and you’re left wondering if there’s a better way.
That’s where we come in. At Awesim Building Contractors we’ve spent more than three decades turning cracked barns, ageing homesteads and tired verandahs into sturdy, weather‑ready spaces that actually last.
We get it – rural life runs on a strict timetable. Harvest, shearing or cattle must go on, and a renovation can’t turn your whole property into a construction site.
So we plan around your season, bring a 4×4 crew right to the edge of your paddock, and start with the bits that matter most: solid foundations, leak‑proof roofing and sensible layouts that suit farm chores.
Picture this: a cracked timber wall in your kitchen finally gets a fresh, sealed finish, the old tin roof is swapped for colour‑matched metal that laughs at the summer heat, and the new verandah becomes the perfect spot for a cuppa after a long day in the paddocks.
It’s not just about looks. A well‑executed renovation improves safety for the whole family, reduces long‑term repair costs and even adds resale value – something every primary producer keeps an eye on.
What makes our approach different? We’re not a city‑based crew that shows up once a week and leaves you guessing. We live in Tamworth, we know the dusty roads, the sudden summer storms and the way a farm’s rhythm changes with every season.
Because of that, we can assess a project on site, give you a clear quote, and schedule work when it least disrupts your day‑to‑day operations.
And if you’re worried about hidden costs, we’ll walk you through each material choice, from durable cladding to low‑maintenance flooring, so you know exactly where every dollar goes.
Ready to stop staring at that sagging roof and start planning a renovation that works with, not against, your farm life? Let’s dive in and explore how rural building renovations in Tamworth NSW can be simple, reliable and tailored just for you.
TL;DR
If you’re a Tamworth farmer tired of leaky roofs and sagging sheds, our local crew delivers fast, durable rural building renovations Tamworth NSW that keep your operation running.
We schedule work around harvest, use colour‑matched metal and 4×4 access, so you get a safe, cost‑effective upgrade without missing a beat.
Step 1: Assess Your Property and Set a Renovation Budget
First things first – grab a cuppa, walk out to the back of the paddock, and take a good look at the building you want to fix. You’ll notice the spots that creak when the wind blows, the roof that drips the first time it rains, and maybe a floor that feels soft under the boots. That moment of recognition is your starting line.
Walk the site like a neighbour
Don’t just glance at the roof from the road. Drive the 4×4 right up to the shed, climb up on a ladder, and check the cladding, gutters and brackets. Jot down anything that feels off – even a tiny rust patch can turn into a big leak later. And if you spot water‑stained walls, you might want to read up on class 3 water damage drying guidelines before you decide whether to replace the plaster or let it dry out first.
Identify the big‑ticket items
Make three columns on a sheet of paper: “Must‑Fix”, “Nice‑to‑Have”, and “Future Ideas”. The must‑fix list usually includes structural cracks, roof leaks, and any safety hazards. Nice‑to‑have could be a fresh coat of paint or a new verandah railing. Future ideas are the dream upgrades you’ll tackle when the farm’s cash flow is stronger.
When you’re sorting that list, think about the seasons. If you’re heading into harvest, you’ll want the roof sealed first so the grain stays dry. If it’s winter, maybe focus on insulation and heating. This timing logic saves you from costly re‑work.
Here’s a quick checklist to keep in your pocket:
- Inspect foundations for cracks or shifting.
- Check roof sheeting, flashing and gutter alignment.
- Test doors and windows for drafts.
- Look for signs of water damage on walls and ceilings.
- Note any pest activity that could affect timber.
Once you’ve got that list, it’s time to put numbers on it. Grab a calculator, your recent invoices for timber or metal, and start estimating each item. Don’t worry about getting it perfect – the goal is a ball‑park figure you can work with.
Tip: Add a 10‑15% contingency for unexpected surprises. Rural builds love throwing a curveball when the ground gets softer after a sudden rain.
Now, let’s talk money. Break the budget down into three buckets: Materials, Labour and Permits/Fees. Materials cover everything from colour‑matched metal roofing to concrete for a new slab. Labour is the crew you’ll hire – remember Awesim’s crew can access even the most remote sites with a 4×4, which can save you transport costs. Permits are often overlooked, but a quick chat with your local council can keep you from fines later.
To see a real‑world example of how we price a full farm renovation, check out our farm renovations for rural & remote NSW page. It breaks down typical costs and shows why a transparent quote matters.
After you’ve tallied the numbers, compare the total to your cash flow. If it’s higher than you can swing this year, consider phasing the work – start with the roof, then move to walls, and finish with interior finishes when the budget eases.
Want to make sure your online presence matches the quality of your renovations? A little SEO boost can help more local farmers find you. Tools like Rebelgrowth’s SEO platform can automate the heavy lifting, so you spend more time on site and less time on the computer.
Here’s a short video that walks through a typical property assessment – it’ll give you a visual feel for what to look for.
After watching, take a moment to sketch a rough floor plan. Even a quick hand‑drawn diagram helps the builder understand the flow of livestock, equipment and daily chores.
Finally, write a simple brief for your chosen builder. Include the must‑fix list, your budget range, and any timing constraints. Ask for a detailed quote that breaks down each line item – this is where you’ll see if the contingency is realistic.
When the quote lands in your inbox, sit down with a cup of tea, compare it to your checklist, and ask questions. If something feels vague, flag it. A clear, honest conversation now prevents misunderstandings when the hammer starts swinging.
By the end of this step, you’ll have a solid assessment, a realistic budget, and a roadmap that aligns with your farm’s rhythm. You’re ready to move on to the next phase – planning the actual renovation works.
Step 2: Navigate Local Regulations and Obtain Permits
Alright, you’ve got the budget nailed down, now it’s time to face the paperwork. I know, permits sound like a snooze‑fest, but in rural building renovations Tamworth NSW they’re the safety net that keeps the council off your back and your shed standing for decades.
Know what’s exempt and what isn’t
First thing’s first – not every shed or verandah needs a full development application. Tamworth’s council actually lists about 80 low‑impact categories that qualify as “exempt development”. If your project falls under those standards – think a single‑storey outbuilding under a certain size, or a simple roof replacement – you can skip the lengthy approval process altogether.
Grab a copy of the Tamworth council’s exempt development guide and tick the boxes. If everything lines up, you’re good to go, but don’t forget there might still be other licences (like a plumbing permit) that the guide mentions.
Rural Housing Code vs Inland Code
Now, if your plan steps outside the exempt limits – maybe you’re adding a larger barn, a new livestock facility, or extending the main homestead – you’ll need to meet the standards set out in the Rural Housing Code (east of the Great Dividing Range) or the Inland Code (west of it). Tamworth sits right on the edge, so you’ll likely be under the Rural Housing Code.
Both codes spell out minimum setbacks, roof pitch, fire‑rating and even how you connect water supplies. It sounds like a lot, but think of it as a checklist that keeps your project safe from bushfire, flooding and heritage concerns. You can find the full rundown on the NSW Planning website’s outbuildings in rural areas page.
Getting a Complying Development Certificate
If your renovation needs a complying development certificate (CDC), the process is actually smoother than a traditional development application. You submit a concise set of documents – site plan, building specs, and a statement of compliance with the relevant code – and a private certifier or the council reviews it.
Pro tip: use the NSW Planning Portal to lodge your CDC online. The portal will flag any missing items before you hit “submit”, saving you a round‑trip to the office.
Here’s a quick step‑by‑step:
- Check the exempt list – if you’re not on it, move to the next step.
- Identify which code applies (Rural Housing or Inland).
- Draft a simple site plan (a hand‑drawn sketch works for small projects).
- Gather any extra licences (e.g., plumbing, electrical).
- Submit the CDC via the NSW Planning Portal.
- Wait for the certifier’s sign‑off – usually 5‑10 business days.
Once you have the certificate, you can start ordering materials and scheduling the crew without the fear of a stop‑work order.
And remember, the CDC is not a free pass – you still need to follow the approved conditions. If the certifier notes a fire‑rating requirement, make sure your timber frames get the right treatment.
So, what’s the best way to keep this from becoming a headache?
Tips to keep the paperwork painless
1. Start early. Pull the council’s checklist while you’re still measuring the site. It’s easier to spot a missing item before the builder shows up.
2. Use a local certifier. They know the quirks of Tamworth’s rural zones and can often fast‑track the review.
3. Keep a “permit folder”. Snap photos of your site plan, the CDC receipt, and any licences. When the inspector comes around, you’ll have everything on hand.
4. Ask us. At Awesim, we’ve helped dozens of farmers navigate the exact same steps. We can flag if your shed size pushes you out of the exempt category, or if a fire‑rating tweak will save you a costly redesign later.
5. Don’t forget the neighbour check. Some local environmental plans require you to inform adjacent landholders before you start major works. A quick chat can prevent a future dispute.
Once the permits are in hand, you’ll feel a lot more relaxed about the build – and that’s exactly the vibe we aim for on every rural building renovation in Tamworth NSW.
Need a visual walk‑through of the CDC process? Check out this quick video that breaks down each stage, from the initial application to the final sign‑off.
With the paperwork sorted, you can focus on the fun part – watching your old barn transform into a solid, weather‑ready asset that fits right into your farm’s rhythm.
Step 3: Choose the Right Materials and Sustainable Solutions
Now that the paperwork is out of the way, it’s time to get our hands dirty – literally. The materials you pick will decide whether your shed can survive the next summer blaze or the sudden downpour that hits Tamworth in a flash.
Start with the climate checklist
First thing’s first: look at the local weather patterns. Hot, dry summers, occasional hail, and those fierce bush‑fire risk zones mean you need something that won’t warp, rust or melt.
Grab a notebook and jot down the top three climate stressors for your property. That simple list becomes your compass when you compare cladding, roofing and insulation options.
Low‑emission cladding and roofing
Colour‑matched steel panels are a go‑to for many Tamworth farms. They’re tough, reflect heat, and recycle easily at the end of life. If you’re after a bit more warmth, consider fibre‑cement sheets – they’ve got the durability of metal but a softer feel under the hand.
For the roof, think about standing‑seam metal or high‑grade corrugated steel with a reflective coating. Not only does this cut cooling costs, it lines up with the NSW Sustainable Buildings SEPP push for lower embodied emissions in new and renovated structures.
Thermal mass matters
If you’ve ever felt the heat radiating off a concrete slab on a scorching day, you know why thermal mass is a game‑changer. A concrete floor or brick walls absorb daytime heat and release it slowly at night, keeping your interior temperature more even.
When you combine that with proper insulation – think rigid foam or reflective batts between studs – you get a building that stays cooler in summer and warmer in winter without cranking the heater.
Recycled and locally‑sourced timber
Timber is still a favourite for interior framing and verandah posts, but not all wood is created equal. Look for reclaimed pine or hardwood that’s been milled locally. It reduces transport emissions and gives your renovation a story you can brag about at the next community meeting.
Make sure any timber you use is treated for termite resistance and fire‑rating – the Rural Housing Code will ask for that, and it’ll save you a costly redo later.
Water‑wise fixtures and rainwater capture
Even a shed can benefit from a low‑flow tap or a simple rainwater tank. A 200‑litre tank tucked behind the shed can feed a wash‑down area or a small livestock trough, cutting down on mains water use.
Pair the tank with a basic first‑flush diverter to keep debris out, and you’ve got a sustainable solution that’s cheap to install and easy to maintain.
Solar and off‑grid power options
If you’re already investing in 4×4 access for heavy material delivery, why not bring a portable solar kit along? A 2‑kW panel can power LED lighting, a small fridge or the power tools you need on‑site. The system can be wired into an existing inverter if you’ve got one, or run off a battery bank for night work.
Solar isn’t just green – it’s practical when the grid flickers during a storm.
Quick material‑selection checklist
- Roof: standing‑seam metal with reflective coating.
- Cladding: colour‑matched steel or fibre‑cement sheets.
- Floor/thermal mass: concrete slab or brick wall.
- Insulation: rigid foam or reflective batts.
- Timber: reclaimed, locally‑sourced, fire‑treated.
- Water: low‑flow fixtures + 200‑L rain tank.
- Power: portable solar panel + battery.
Run through this list on site with your crew. If anything feels off, pause – it’s cheaper to swap a panel now than to wrestle with a leaky roof later.
Bottom line? Choosing the right materials isn’t just about looking good; it’s about future‑proofing your farm building against the climate challenges that Tamworth throws at us. When you blend durability with the sustainable guidelines from the state, you’ll end up with a shed that not only lasts but also reduces your operating costs and carbon footprint.
Step 4: Planning the Renovation Timeline and Managing Contractors
Alright, you’ve got the budget and the permits – now it’s time to wrestle the calendar and the crew. If you’ve ever felt the stress of a rainstorm hitting the site halfway through a roof replacement, you know why a solid timeline is worth its weight in steel.
Map the whole project, not just the big chunks
Start by breaking the renovation into bite‑size phases: site prep, foundation work, walls & cladding, roofing, services (electrical, plumbing), and finishing touches. Jot down the estimated days for each, then add a buffer – three to five days for a rural build is realistic when a truck gets stuck in a 4×4‑only track.
Does it feel like over‑planning? Think of it as a road‑map for your 4×4 crew. When everyone knows what’s coming next, you avoid the dreaded “we’re waiting on the next step” lull.
Sync the timeline with the farming calendar
Harvest, lambing, or mustering season? Those are non‑negotiable windows. Slot the noisiest jobs (like concrete pours or heavy framing) either before the rush or after the main work on the paddock is done. A simple spreadsheet with columns for “Farm Activity”, “Renovation Phase”, and “Allowed Dates” keeps the whole operation in sync.
Here’s a quick sanity check: if you’re planting wheat in May, aim to have the roof sealed by early April so the shed stays dry during the first rains.
Choosing and vetting contractors
When I’m picking a subcontractor, I look for three things: local 4×4 experience, clear communication, and a track record with council inspections. Ask for recent references on farms similar to yours – a neighbour’s shed upgrade is a great litmus test.
Don’t be shy about asking, “What’s your plan if a sudden storm hits mid‑project?” A confident answer usually includes a temporary cover and a revised schedule, which saves you headaches later.
Set up a simple contractor management system
Even a paper notebook works, but a shared Google Sheet (or printed copy on site) does wonders. Columns you’ll want:
- Task
- Assigned Trade
- Start / End Dates
- Materials On‑Site
- Notes / Risks
Update it daily. When the crew walks by, they can tick off completed items – it creates a sense of progress and keeps you from forgetting that the rainwater tank still needs a first‑flush diverter.
So, how do you keep the momentum going when a day is lost to weather?
Flexibility tricks
1. Pre‑stage materials: have roofing panels delivered early and stored under a tarp. 2. Cross‑train: if the carpenter finishes early, see if they can help the electrician prep conduit runs. 3. Buffer days: treat them as “rain days” rather than wasted time.
These little adjustments turn a potential setback into a productivity boost.
Quick decision‑making checklist
When a surprise pops up – say, a hidden termite line – run through this:
- Assess impact on safety and schedule.
- Consult your contractor’s estimate for the extra work.
- Decide: absorb cost now or defer to a later phase.
- Document the change in your timeline sheet.
Having a process stops the conversation from spiralling into “maybe we should scrap the whole thing”.
Comparison table – timeline & contractor tips
| Phase | Typical Duration (days) | Key Contractor Management Tip |
|---|---|---|
| Site prep & access clearing | 2–4 | Confirm 4×4 access routes before any heavy trucks arrive. |
| Foundations & slab | 5–7 | Have concrete supplier on standby; schedule delivery early in the day. |
| Roofing & weatherproofing | 4–6 | Store panels under cover; use a temporary waterproof membrane if rain is forecast. |
Keep this table handy on site – it’s a quick reminder of where you are and what to watch for.
Finally, schedule a short “walk‑through” with your crew every Friday. Review what’s done, what’s pending, and any new risks. Those ten minutes keep everyone aligned and give you a chance to celebrate the week’s wins – like that moment when the new metal roof finally clicks into place and you hear the satisfying “clank”.
With a realistic timeline, a clear contractor checklist, and a few buffers for Mother Nature, your rural building renovations Tamworth NSW will stay on track, on budget, and most importantly, on schedule for the next harvest.
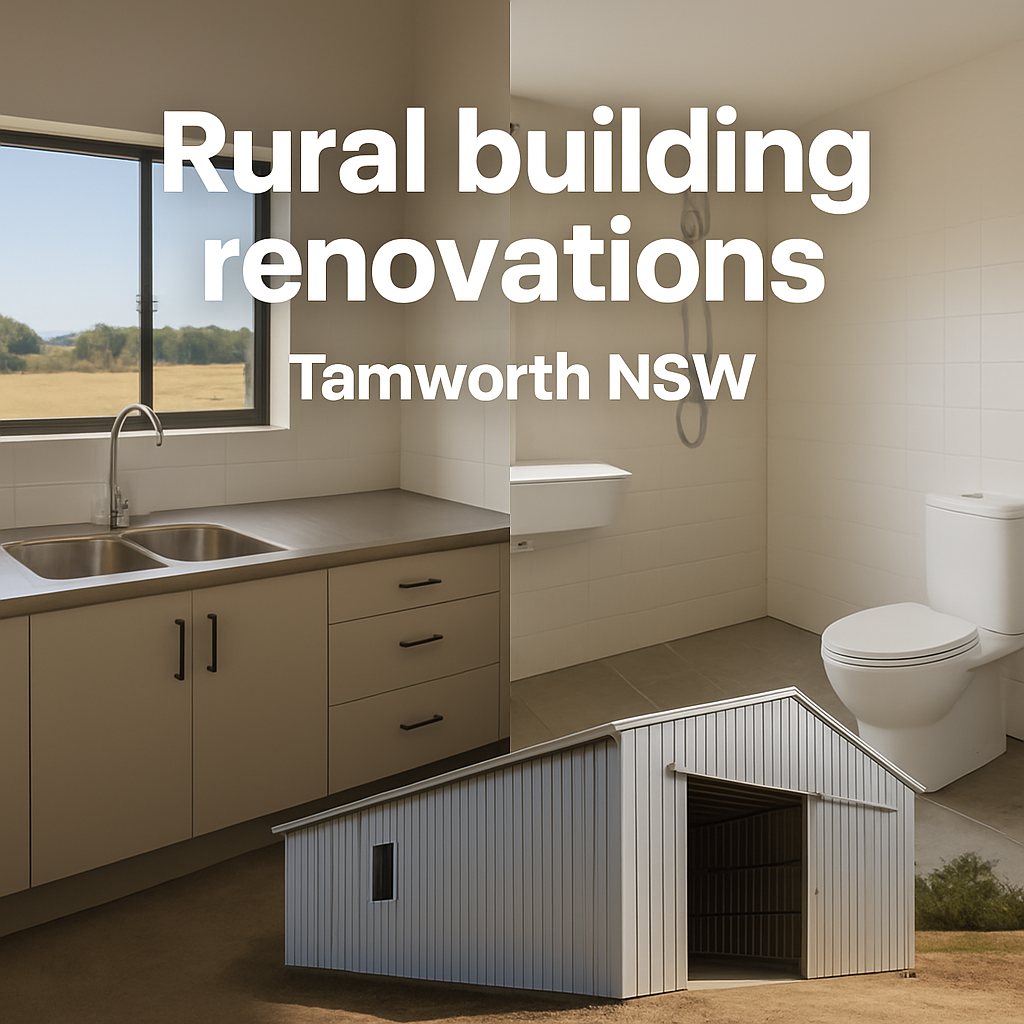
Step 5: Essential Renovation Projects – Kitchen, Bathroom, and Shed Upgrades
Now that the paperwork’s out of the way, it’s time to roll up our sleeves and tackle the three rooms that make a farm home actually livable: the kitchen, the bathroom, and the out‑building shed. These are the spots where a bad renovation shows up fast – a leaky tap in the morning, a sagging countertop after a rainstorm, or a shed door that won’t stay shut when the wind kicks up.
So, what should you focus on first? Think about what keeps the farm running day‑to‑day. A sturdy kitchen lets you prep meals for the crew, a reliable bathroom keeps everyone healthy, and a functional shed protects tools and livestock feed. Let’s break each upgrade down into bite‑size actions you can check off on the spot.
Kitchen upgrades that survive a busy farm
Start by walking through the kitchen with a cup of coffee in hand. Does the countertop wobble when you lean on it? Are the cabinet doors dragging? Those little annoyances become big problems when you’re juggling a dozen chores.
Here’s a quick three‑step fix list:
- Surface durability: Swap timber tops for a colour‑matched steel or high‑grade laminate that resists spills, heat, and the occasional splash of water from a rain‑soaked coat.
- Storage rethink: Add wall‑mounted, lockable metal cabinets that a 4×4 crew can easily install. They keep tools, cans, and pantry items safe from dust and critters.
- Ventilation boost: Fit a modest, energy‑efficient extractor fan near the stove. It pulls out steam and keeps the shed‑adjacent walls from getting mouldy during the humid months.
And don’t forget the little things: replace any cracked taps with low‑flow models, and line the sink base with a rubber mat to protect the floor from water damage.
Bathroom basics for remote living
Bathrooms on a farm need to be tough, low‑maintenance, and easy to clean. A cracked tile or a leaky pipe can turn a quick wash into a full‑blown flood that drags the whole site into a mess.
Try this checklist:
- Floor & wall finish: Use slip‑resistant, waterproof floor tiles and fibre‑cement wall panels. They stand up to mud tracked in from the paddock and are simple to mop.
- Toilet upgrade: Install a dual‑flush, water‑saving toilet. It reduces your water bill and eases pressure on any off‑grid rainwater tanks you might have.
- Shower enclosure: Opt for a prefabricated, aluminium frame with a clear acrylic door. It’s lighter to ship on a 4×4 truck and resists rust in the salty Tamworth summer.
Pro tip: add a small, vented skylight if you can. Natural light cuts down on electricity use and lets you spot any damp spots before they get out of hand.
Shed upgrades that keep the work flowing
When the shed is your tool hub, every inch matters. A leaky roof means wet tools, and a shaky door means livestock can wander out.
Follow these steps:
- Roof revamp: Replace old corrugated iron with colour‑matched standing‑seam metal panels. They snap together quickly, shed water fast, and look tidy against the outback horizon.
- Door reinforcement: Fit a steel door with a weather‑tight seal. It’s worth the extra cost because it stops drafts, keeps rain out, and adds a bit of security for expensive equipment.
- Floor protection: Lay a concrete slab if you don’t already have one, or apply a heavy‑duty epoxy coating over the existing floor. Both options create a flat, clean surface that won’t rot under a tractor’s weight.
Don’t overlook lighting – a few LED floodlights on the roof ridge give you bright, low‑energy illumination for early‑morning work or night‑time checks.
What about budgeting? Take each item on the three checklists, write down the quantity you need, and then call a local supplier for a price on colour‑matched steel, fibre‑cement panels, and low‑flow fixtures. Add a 10‑15% contingency for unexpected rust or hidden rot – that’s the safety net most rural projects need.
Finally, schedule a “finish‑line walk‑through” once the kitchen, bathroom, and shed are wrapped up. Walk through each space with your contractor, test every tap, open every door, and make sure the new roof panels click securely. A quick “yes, that’s solid” saves you a call back weeks later.
By breaking the upgrades into these focused, step‑by‑step actions, you keep the project manageable, stay on budget, and end up with three spaces that actually make farm life easier. Remember, the goal isn’t just a pretty look – it’s a set of durable, low‑maintenance rooms that let you get on with the harvest, the shearing, or the next big move on the property.
Step 6: Maintaining Your Renovated Rural Building for Longevity
You’ve just watched the new metal roof click into place, the fresh concrete slab cure, and the whole place feel like a brand‑new barn. But the real work starts after the dust settles – that’s when you keep the building strong enough to brave another summer, a harsh winter, or that sudden thunderstorm that hits Tamworth.
Why bother with a maintenance plan? Because a well‑kept structure saves you from costly repairs, lowers water and energy bills, and gives you that quiet confidence when the next storm rolls in. It’s the difference between “Oh no, the roof’s leaking again” and “We’ve got this covered, let’s grab a cuppa while the crew finishes up.”
Seasonal inspection checklist
Think of your building like a farm animal – it needs a quick health check every season. Grab a notebook, a ladder, and a sturdy pair of gloves, then run through these simple steps.
- Spring: Clear gutters and downpipes of any leaves, twigs, or debris that collected over winter. A quick hose‑down will reveal hidden blockages before the rains start.
- Summer: Inspect the roof panels for loose screws or fasteners. The heat expands metal, so a tightened bolt now prevents a panel from popping off later.
- Autumn: Check timber posts and frames for early signs of rot or termite activity. Look for faint discoloration or a soft spot when you tap with a hammer.
- Winter: Test all seals around doors, windows, and the concrete slab for drafts. A cold breeze sneaking in means you’ll need fresh weather‑stripping before the next freeze.
Does that feel like a lot? Not really – each check takes less than fifteen minutes, and you can slot it into a regular farm routine, like after you’ve fed the cattle.
Roof and gutter care
The roof is your building’s first line of defence. After a renovation, the panels are still settling, so give them a once‑a‑month look‑over for the first six months. Walk the perimeter, press each panel gently – you should feel a solid, “click” rather than a wobble.
Gutters are the unsung heroes. Even a small amount of rust can create a slow leak that turns into a major water issue. Spray a rust‑inhibitor on any visible metal that’s turned pink, then repaint with a UV‑resistant coating. It’s a cheap trick that adds years of life.
Concrete and floor maintenance
Concrete slabs love a good seal. Apply a penetrating waterproof sealant every two years, especially after a heavy rain season. It prevents water from seeping into the slab and causing cracks.
If you opted for an epoxy floor in the shed, a quick mop with a pH‑neutral cleaner keeps it looking fresh and stops grit from scratching the surface.
Pest and moisture management
Termites love the warmth of a newly renovated timber frame. Set up a simple bait station around the perimeter – you can buy a low‑cost kit from any local hardware store and check it quarterly.
Moisture is a silent enemy. Place a hygrometer in the building; if it reads above 60 % for several days, run a dehumidifier or improve ventilation. A small roof vent or a ridge vent can do wonders without costing a fortune.
Record‑keeping and contractor follow‑up
Every time you finish a task, jot it down in a maintenance log. Include the date, what you inspected, and any action taken. When the next season rolls around, you’ll have a clear picture of what’s been done and what still needs attention.
Schedule a “12‑month check‑in” with your contractor. Most crews, including Awesim’s team, offer a quick post‑renovation walkthrough to spot anything that may have shifted once the building settled into daily use.
Emergency preparedness
Storms in Tamworth can arrive without warning. Keep a small emergency kit near the entrance: a tarp, a spare set of roof screws, a bucket, and a basic tool kit. If a sudden gust lifts a panel, you’ll have the right items to secure it before water gets in.
And remember, the easiest way to avoid an emergency is to stay on top of those seasonal checks. A little time now saves you a whole day of frantic repairs later.
So, what’s the next step? Grab that notebook, set a calendar reminder for the first seasonal check, and give yourself a pat on the back for thinking ahead. Your renovated rural building will thank you with years of solid performance, and you’ll get to enjoy the peace of mind that comes with a job well‑done.
FAQ
What should I check before starting rural building renovations in Tamworth NSW?
First, walk the site with a notebook and note any rusted panels, cracked concrete, or termite activity. Verify that your project falls within the council’s exempt‑development list – if it doesn’t, you’ll need a CDC. Confirm 4×4 access routes, measure door and window openings, and double‑check fire‑rating requirements for any timber framing. A quick checklist now saves you a surprise stop‑work order later.
How do I decide whether a shed upgrade needs a full building permit?
Tamworth’s council classifies most single‑storey outbuildings under 30 metres² as exempt, but once you add a new roof pitch, enlarge the footprint, or install a mezzanine, you cross the threshold. The safe route is to download the exempt‑development guide, tick each box, and if anything is missing, submit a complying development certificate. It’s faster than a traditional application and gives you written proof that the work meets local standards.
What are the most durable roofing options for farm buildings here?
Colour‑matched standing‑seam steel with a reflective coating is the go‑to because it resists warping, sheds heat, and meets fire‑rating codes. For tighter budgets, high‑grade corrugated steel works well if you replace every screw and seal the seams with a silicone‑based sealant. Avoid untreated timber roofs – they swell after rain and become fire hazards in the hot Tamworth summer. They also attract pests, so swapping to metal reduces long‑term maintenance costs.
How often should I inspect the roof after a renovation?
Do a quick visual check after the first six months, then schedule seasonal inspections: tighten fasteners in summer when metal expands, clear gutters in spring, and look for rust spots in winter. A 15‑minute walk every three months catches loose panels before a gust lifts them, and a simple hose‑down reveals hidden leaks you might otherwise miss. Keep a spare set of roof screws in your emergency kit so you can tighten any loose fastener on the spot.
Can I combine solar power with my renovation budget?
Absolutely. A 2‑kW portable solar kit costs roughly $1,200 and can run LED lighting, a small fridge, or power tools while you’re on site. Pair it with a battery bank and you’ll avoid generator fuel costs during a storm‑related power cut. Treat the solar system as a line‑item in your budget spreadsheet and ask your contractor to route conduit during the roof‑work phase to save time later.
What maintenance routine keeps a concrete slab in top shape?
Seal the slab with a penetrating waterproof sealant every two years, especially after a heavy rain season. Sweep away grit weekly and mop with a pH‑neutral cleaner to prevent salt build‑up. If you notice any hairline cracks, fill them with a polymer‑based filler before the water can work its way in and cause larger damage. Inspect the joint edges after any freeze‑thaw cycle; sealing them prevents moisture from seeping underneath and extending the slab’s life.
How do I choose a contractor who understands rural challenges?
Look for a builder that lists 4×4 site access, experience with council CDCs, and references from nearby farms. Ask them how they handle sudden weather changes – a confident answer will include temporary covers and a revised schedule. Request a written “permit folder” that contains copies of all approvals; that way you’ll have everything handy when the inspector swings by.
Conclusion
We’ve walked through the paperwork, the material pick‑list, the contractor checklist and the seasonal upkeep plan – all aimed at one thing: a renovation that survives Tamworth’s heat, storms and farm hustle.
So, what’s the next move? Grab a fresh notebook, mark today’s date, and jot down the top three actions that will push your project from “idea” to “under‑roof”. Maybe it’s calling Awesim for a 4×4 site‑visit, or ordering that reflective metal panel before the next rain.
Remember, the biggest wins come from the small habits: tighten a roof screw after a hot day, seal a concrete slab every two years, and keep a spare set of fasteners in your emergency kit. Those tiny steps add up to a building that feels solid for decades.
And if you ever hit a snag – a surprise termite line, a delayed delivery, or a sudden storm – lean on the process we built together. A quick “what’s the impact?” check, a chat with your contractor, and a written note in your maintenance log will keep things moving.
Rural building renovations in Tamworth NSW aren’t just about bricks and steel; they’re about peace of mind while the farm runs. Ready to turn the plan into reality? Let’s get your shed, kitchen or barn ready for the next season, together.


1 Comment