

Ever stood on the porch of a weather‑worn farm shed, feeling the weight of years of storms, dust and endless seasons, and thought, “who’s gonna fix this without turning my whole day upside down?”
That moment of recognition is where every rural property owner’s story begins. You’re juggling livestock, crops, maybe a school run, and suddenly a roof leak or cracked slab feels like the whole operation is on pause.
I get it because I’ve spent 35 years driving a 4×4 through gravel tracks around Tamworth, Inverell and Bourke, hauling timber and concrete to sites most city builders wouldn’t even consider. The challenge isn’t just the construction—it’s getting there, working around rain‑checks from the forecast, and leaving the farm running smoothly.
So, what does a good rural building contractor actually do? It’s not just about nailing boards or pouring concrete. It’s about listening to your schedule, understanding that a calf birth can’t wait for a plaster finish, and delivering solutions that survive the outback heat and sudden downpours.
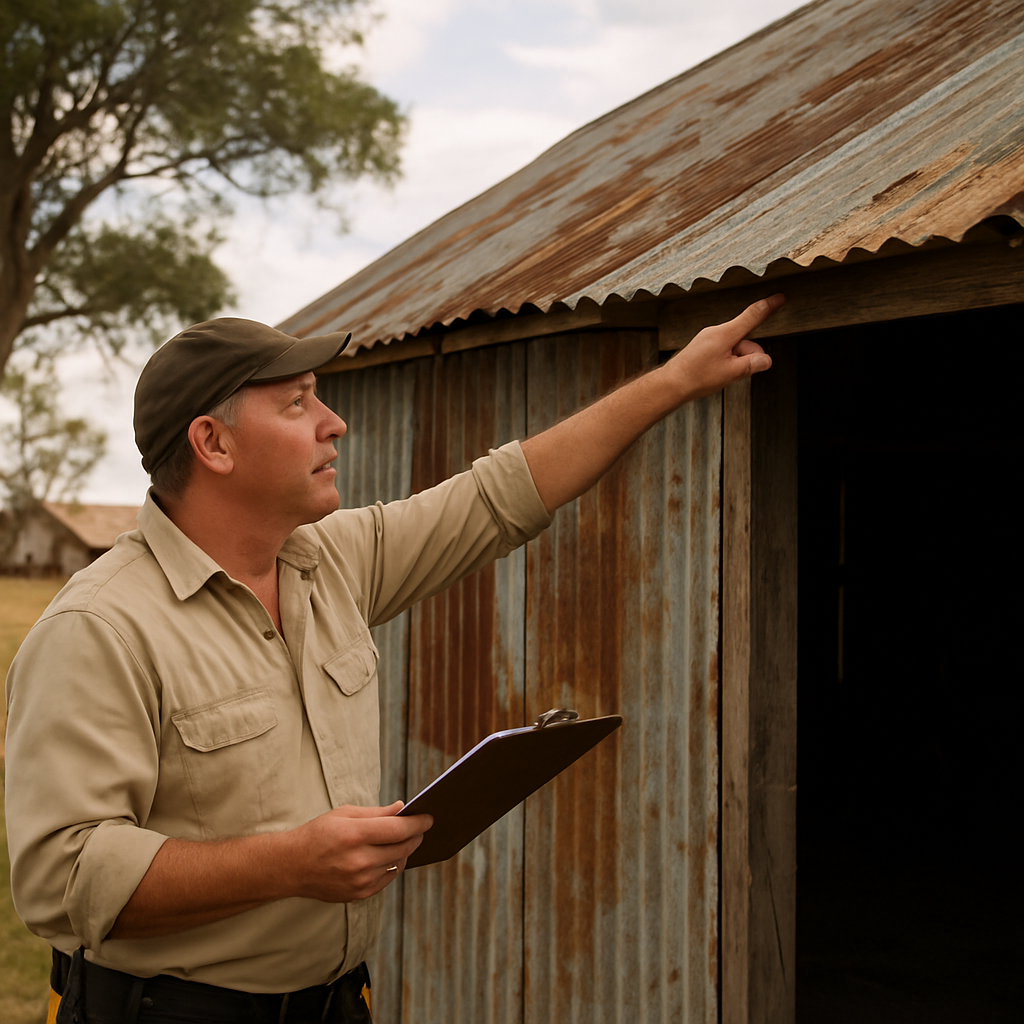
Imagine this: you call, we meet on the property, walk the line where the old roof meets the wall, and I point out the exact board that’s been chewing up by termites. Together we decide on a lightweight metal cladding that snaps on in a day, keeping your cows sheltered and your budget intact.
That’s the kind of practical honesty you’ll find with a contractor who knows the difference between a sealed road and a river crossing. No fancy jargon, just clear advice, realistic timelines, and a team that can haul materials up a steep ridge with a 4×4, no drama.
Ready to stop worrying about that leaking gutter or wobbly floor? Let’s dive in and explore how a specialised rural building contractor can turn those “maybe someday” projects into solid, lasting improvements you’ll actually use tomorrow.
TL;DR
A reliable rural building contractor like Awesim will swoop in, fix leaky roofs, cracked slabs and worn sheds, and keep your farm running without missing a milking or a calf birth.
We work with 4×4 access, timelines, and sturdy materials so you can focus on the land, not the repairs.
Step 1: Assess Your Farm Property Needs
First thing’s first – you need a clear picture of what your property actually needs right now. It’s easy to stare at a cracked slab or a leaky roof and think, “I’ll fix it later”, only to end up with a bigger disaster when the next storm hits. So grab a notebook, a cold brew, and let’s walk through the assessment together.
Take a walk around the site
Start at the main house and make your way out to the outbuildings, fences, and any other structures you rely on. Notice the colour of the timber – is it fading, warping, or showing signs of termite damage? Look at the rooflines – any missing corrugates, rusted gutters, or water stains on the interior walls? Jot down every little thing that catches your eye; those tiny details often tell the story of larger structural issues.
And don’t forget the ground. Is the soil around your slabs cracking or shifting after a rain? That could mean you’ll need a stronger concrete base or better drainage. A quick visual check can save you weeks of unexpected work later.
Talk to the people who use the space
Who’s actually living, working, or storing equipment in each building? Your milking shed, the dog paddock shelter, the family kitchen – each has its own set of priorities. Ask the crew, the kids, even the neighbour who drops by for a cuppa. Their day‑to‑day frustrations point straight to the most urgent fixes.
For example, one farmer I worked with in Inverell mentioned his calves were getting cold because the shed’s side wall had a gap where the metal cladding had peeled away. That single gap meant a whole night of extra heating costs – and a stressed herd. Spotting that early lets you plan a quick metal‑cladding replacement rather than waiting for a full wall rebuild.
Does this feel overwhelming? It doesn’t have to be. Break the assessment into three quick questions for each structure: Is it safe? Is it functional? Is it efficient?
Prioritise by impact and timing
Once you have a list, rank each item by how much it affects your operation and when it needs fixing. A roof leak during calving season? Top priority. A cracked driveway that’s still usable? Lower down the list. This helps you and your rural building contractor plan a realistic timeline that works around your farm calendar.
Here’s a simple table you can copy onto a piece of paper:
- Critical – Immediate: Safety hazards, weather‑related damage, anything that could halt production.
- High – This Season: Repairs that will affect the upcoming planting or breeding cycle.
- Medium – Next Year: Cosmetic upgrades or non‑essential improvements.
Having this hierarchy ready makes the quote process with a contractor a lot smoother – they’ll know exactly where to focus their resources first.
And speaking of resources, when you’re thinking about external work like paving for a new driveway or a patio, you might find some inspiration from other regions. For instance, there are creative paver layouts that blend durability with style, which you can see on paver installation ideas for outdoor living. It’s not NSW‑specific, but the concept of choosing the right material for harsh weather translates well to our farms.
That video walks through a typical on‑site assessment, showing how a contractor measures roof pitch, checks slab integrity, and maps out material deliveries – all in under an hour. It’s a handy visual reminder of what to expect when you call in a professional.
Now, after you’ve gathered notes, talked to your team, and set your priorities, you’re ready to bring in a rural building contractor for a detailed on‑site inspection. They’ll confirm your findings, point out anything you missed, and give you a realistic quote that respects your farm’s schedule.
Remember, the goal isn’t just to fix what’s broken; it’s to future‑proof your property so you can focus on what matters most – the herd, the crops, and the peace of mind that comes with a sturdy, well‑maintained farm.
Step 2: Planning Permits & Budget
Once you’ve nailed down which sheds, barns or outbuildings need work, the next hurdle is making sure the paperwork and the money line up before the first 4×4 kicks up dust.
In NSW most small farm projects qualify as exempt development, but as soon as you cross the size or height thresholds you’ll need a Development Application (DA) or a Complying Development Certificate (CDC). That’s why a quick call to your local council or a seasoned rural building contractor can save you weeks of back‑and‑forth.
Check the permit pathway
First, pull up the NSW Rural Fire Service’s “building on bush‑fire prone land” guide. If your property sits on a certified fire‑prone map, the Planning for Bush Fire Protection (PBP) 2019 specifications will dictate roof pitch, external cladding and even the distance of any new footings from vegetation. Ignoring that requirement can force a costly redesign after you’ve already ordered steel. (building on bush‑fire prone land guidelines)
If the outbuilding stays under the exempt limits – typically 15 m² floor area and 7 m height – you’ll only need a simple notification form. Your contractor will usually handle that form, attach a site plan and get a council sign‑off within a week. When it’s over the limit, budget an extra $1 500‑$3 000 for the DA processing fee and the architect’s sketched‑up compliance drawing.
If a storm leaves water pooling after a roof repair, you’ll want a quick clean‑up guide – see this dishwasher leak water‑damage cleanup guide.
Map the costs line‑by‑line
Grab a spreadsheet and break every cost into three buckets – Materials, Labour and Logistics. Materials cover steel roofing, timber frames, concrete, fasteners and any fire‑rating upgrades. Labour isn’t just the crew’s daily rate; it also includes travel time, especially when you’re crossing a river or a steep ridge with a 4×4. Logistics capture fuel, equipment hire (like a portable generator) and site‑set‑up fees such as temporary fencing.
Next, put a contingency column next to each line. In rural builds 10‑15 % is the industry norm because hidden costs – like a sudden rise in diesel price or a surprise rock outcrop that needs blasting – pop up once the crew is on site. For a $80 000 project, that means reserving $8 000‑$12 000 as a safety net.
Factor in seasonal and access costs
Your farm’s calendar should dictate when you start the job. If you schedule a roof replacement during the wet season, you’ll likely pay extra for weather‑related delays or for a crew that can work in rain‑slick conditions. Likewise, a concrete slab poured in the heat of January needs a water‑curing plan, which adds the cost of extra water tanks and shade tarps. Talk to your contractor about the best window – many NSW farmers find March to May the sweet spot.
Create a realistic cash‑flow buffer
Write down when money needs to leave your account – deposit for the steel, a mid‑project payment for the concrete pour, and the final settlement after the roof is sealed. Then line those dates up with your farm’s income cycle – for example, align a big payment with the post‑harvest sale of wheat or the cash‑in from a livestock round‑up. This way you avoid chasing invoices while the cows are waiting for fresh water.
And while you’re budgeting, think about protecting your loan – a mortgage protection insurance guide can help you keep the project funded even if life throws a curveball.
Finally, get everything in writing before the first truck rolls onto the track. A detailed scope, signed price schedule and a clear timeline protect you from surprise change orders. Our full range of services page walks you through exactly what to expect from a rural building contractor, from the initial quote to the hand‑over checklist.
Step 3: Choosing the Right Materials for Rural NSW
Start with the climate and the land
First thing’s always the weather. In the New England and Far West parts of NSW you’ll swing from scorching summer heat to sudden summer storms, and up north a bush‑fire season can turn a simple repair into a safety nightmare.
Knowing whether your shed sits on a flood‑prone creek line or a wind‑exposed ridge tells you whether you need a material that breathes, a material that resists fire, or both.
Ask yourself: “If a thunderstorm hits tomorrow, will my roof buckle or will the walls soak through?” That simple question narrows the list from dozens of options to the few that actually survive outback conditions.
Pick materials that match the job
When you’re choosing a cladding or roofing system, think about three things – durability, maintenance and cost‑effectiveness.
Steel roofing, for example, is cheap, strong and won’t rot in a wet season. It also reflects heat, keeping the interior cooler in January.
Timber can look great, but in a high‑fire‑risk zone you’ll need a fire‑rated treatment that adds both time and money.
Concrete slabs are another favourite for farm sheds because they stand up to heavy equipment and don’t shift when the ground swells after a rain.
The downside? You need a water‑curing plan in summer, which means extra tanks or shade tarps – something we always factor into the budget.
For those who want to future‑proof a building against climate stress, researchers are pointing to “climate‑resilient building materials” that blend steel and engineered panels for extra strength according to a recent industry overview. While these high‑tech panels aren’t standard on every farm, they’re worth a chat if you’re planning a long‑life structure on a fire‑prone property.
Build a quick material checklist
- Roofing: Colour‑bond steel, fire‑rated metal panels, or insulated metal roofing if you need extra thermal control.
- Walls: Galvanised steel cladding, fibre‑cement board (low maintenance), or timber with a certified fire‑retardant finish.
- Floors: Reinforced concrete slab with a polymer seal, or compacted hardcore topped with a breathable membrane for sheds that house livestock.
- Fasteners: Stainless‑steel screws and nails to avoid rust in salty or humid environments.
Match the material to your schedule
A rural building contractor knows that a four‑hour drive to a remote station means every minute on‑site counts.
Choose materials that can be installed quickly – snap‑on steel panels go up in a day, whereas a timber frame might need several days of curing.
The faster the install, the less you disrupt milking, shearing or crop‑sowing cycles.
Also, line the delivery dates with your cash flow. If you’re expecting a post‑harvest payout in June, order the steel and concrete in May so you don’t have to juggle payments while the cows are waiting for fresh water.
Don’t forget the little things
Even the toughest material can fail if the details are ignored. Seal all roof penetrations with silicone that can handle temperature swings, protect steel edges with a rust‑inhibiting paint, and add a perimeter drainage ditch around any new slab to keep water away.
And always ask your rural building contractor to walk the site after the material is laid – a quick “let’s check the flashings” can save you a $1,000 repair down the track.
Takeaway
Choosing the right materials isn’t about picking the flashiest product; it’s about matching the climate, the farm’s workflow and your budget.
Steel roofing, fire‑rated cladding, and a well‑cured concrete slab are the workhorse trio that most NSW producers rely on.
If you’re curious about newer, climate‑resilient panels, bring them up at the next site visit and see if they fit your long‑term plan.
Step 4: Hiring a Rural Building Contractor
So you’ve picked the right materials, now it’s time to bring the right hands on board. Hiring a rural building contractor feels a bit like picking a mate you’ll trust with your tractors – you want honesty, know‑how and someone who can actually get to the job when the road is just a dust track.
Here’s a simple, down‑to‑earth checklist that takes the guesswork out of the process. Grab a notebook, sip a coffee, and walk through these steps with your family or manager – it’ll keep the conversation focused and the paperwork tidy.
Step 1 – Define the Scope Clearly
Before you dial, write down exactly what you need – roof replacement on the milking shed, a new concrete slab for feed storage, or a barn extension. Note dimensions, 4×4‑only access and any seasonal windows you can’t miss, like finishing before lambing.
Why does this matter? A contractor who knows the exact footprint can size‑order steel, plan a delivery window and avoid a surprise extra‑trip that costs both time and diesel. It also gives you a solid baseline for quotes, so you’re not left comparing apples to apples.
Step 2 – Check Credentials and Local Experience
Ask for their licence, insurance and any rural certifications. In NSW a builder needs a Home Building Licence for work over $5,000. Look for evidence of similar projects – a sheep station near Bourke or a wheat farm in Armidale. A quick chat with a past client in your shire can tell you if they actually show up when the road is washed out.
Step 3 – Get Detailed, Itemised Quotes
When you get a quote, break it down: material, labour, travel, equipment and contingency. Ask why any labour premium exists – often it’s extra time for a generator or muddy site. Compare at least two quotes, but don’t pick the cheapest automatically; hidden fees can hide behind low prices.
A good rural building contractor will also give you a timeline that respects your farm’s calendar – for example, finishing roof work before the first heavy rains of spring, or scheduling concrete pours when temperatures sit between 15 °C and 25 °C.
Step 4 – Verify References and Past Work
Ask for at least three recent references on similar work. Call them and ask: Did the builder arrive on time despite weather? How did they handle a surprise rock outcrop? Were changes communicated clearly and billed fairly? If possible, visit a completed site – a quick walk‑around shows the quality of cladding seams, roof flashing and concrete finish.
Step 5 – Sign a Clear Contract
A solid contract spells out scope, price breakdown, payment milestones, insurance and a workmanship warranty. Include a weather‑delay clause like “if rain exceeds 48 hours, the schedule shifts at no extra charge”, and note the 4×4 access requirement so the builder commits to appropriate vehicles.
Don’t sign anything until you’ve read every line and asked for clarification on any jargon. If the builder hesitates, that’s a red flag – you deserve a partner who’s as transparent as a clear‑sky day over the paddock.
Final tip: treat the hiring process like you’d treat a critical piece of farm equipment – do regular maintenance, keep records, and replace it when it no longer meets your needs. The right rural building contractor will become a reliable part of your farm’s support crew, keeping the sheds standing and the business moving.
Step 5: Managing Construction Timelines in Outback Conditions
Out here, a sudden thunderstorm can turn a three‑day roof job into a week‑long scramble.
Do you ever feel like the weather is the boss you never hired?
Let’s break down a practical, hands‑on approach that keeps your project moving even when the sky decides to surprise you.
Map the season before you map the site
First, pull a simple climate calendar for your region – look for the rainiest months, the hottest weeks, and any bush‑fire restrictions.
In the New England highlands, for example, heavy downpours often hit in March and April, while the inland “dry” window runs from late May to early September.
If you can shift a shed roof replacement into that dry window, you shave days off the inevitable rain‑delay buffer.
Build a weather‑delay clause into the contract
A solid rural building contractor contract should spell out exactly how many extra days you get if rain exceeds 48 hours straight.
Ask your builder to write it in plain language: “If the site receives more than 48 hours of continuous rain, the schedule extends by one day per 12 hours of excess rain, at no extra cost.”
That tiny line saves you from endless phone calls and surprise invoices later.
Create a realistic buffer
Industry wisdom suggests adding a 10‑15 % time cushion for remote projects – that covers everything from a busted generator to a rock outcrop that needs blasting.
Take a $80 000 job as an example. A 12 % buffer means you budget an extra $9 600 of time, which often translates to a few extra days on the calendar.
It’s not about inflating costs; it’s about giving the crew breathing room so they don’t have to rush a roof in a gale.
Stage the work around critical farm events
Ask yourself: “When am I calving the herd? When does the wheat harvest roll through?”
Schedule the most weather‑sensitive tasks – like concrete pours or roof decking – well before those dates.
If you know a milking schedule can’t be interrupted, aim to finish the roof before the next milking round, even if that means starting a day earlier.
Use a simple on‑site checklist
Every morning, walk the site with a clipboard and tick off:
- Materials delivered and protected from moisture
- Generator fuel level above 50 %
- Access road cleared of recent wash‑outs
- Weather forecast for the next 24 hours
This habit mirrors the BOSSI rural project checklist used by many NSW contractors to keep nothing slipping through the cracks.

Track progress with a visual timeline board
Grab a whiteboard, divide it into weekly columns, and place colour‑coded magnets for each major task – “Foundation”, “Framing”, “Roof”, “Finishing”.
When a rain delay hits, simply slide the affected magnets forward. Everyone sees the new reality at a glance, and you avoid the “I thought we were on day 3” confusion.
| Phase | Key Action | Tip / Buffer |
|---|---|---|
| Planning | Check seasonal weather, lock dates | Reserve 10 % extra days |
| Site Prep | Secure access roads, protect deliveries | Morning checklist each day |
| Construction | Concrete pour, roof install | Weather‑delay clause in contract |
| Finishing | Seal flashings, final inspection | Allow 2‑day wrap‑up window |
Communicate like you’re on a 4×4 crew
When the forecast calls for a sudden downpour, send a quick text to the whole team: “Rain incoming – pause steel delivery, move to site safety.”
That same instant‑messaging mindset is how Outback Team Building keeps participants coordinated during a cardboard‑boat race when a gust threatens to capsize the craft (see their quick‑adapt exercise).
Clear, real‑time updates keep morale high and prevent the “I didn’t know the schedule changed” blame game.
Review and adjust after each major milestone
After the foundation, sit down with the builder, compare actual days spent vs. planned, and recalibrate the remaining schedule.
If you’re ahead, you might pull forward the roof crew; if you’re behind, consider a weekend shift or a temporary weather‑proof cover.
These tiny adjustments add up, turning a chaotic outback build into a predictable, budget‑friendly project.
Bottom line: treat your timeline like a living map, not a rigid spreadsheet. With a bit of foresight, a solid buffer, and daily communication, a rural building contractor can keep the project on track even when Mother Nature throws a curveball.
Step 6: Maintaining and Upgrading Completed Projects
You’ve just handed over a brand‑new shed or a refreshed homestead – but the job isn’t truly finished until the building stays solid for the next decade.
So, how do you keep that rural building contractor’s work from turning into another “repair later” headache?
1. Set a simple maintenance calendar
Grab a farm planner or a phone reminder and block out two quick checks each year – once after the wet season and once after the hottest summer.
During the post‑rain visit, look for water pooling around footings, rust on steel fasteners, and any loose roof flashings. In the summer sweep, inspect for warped timber, cracked concrete, and pest activity.
2. Do a “quick‑fix” walk‑around after every major event
Storms, heavy cattle traffic, or a sudden equipment spill can knock a loose bolt loose. A five‑minute stroll with a flashlight, a hammer, and a pair of gloves often catches issues before they become expensive replacements.
Ask yourself: “Did I hear a new creak after that thunderstorm?” If yes, mark the spot and schedule a fix.
3. Keep the building envelope sealed
The roof and walls are your first line of defence against wind, rain, and heat. Re‑apply a silicone sealant around roof penetrations every 3‑4 years, especially where pipes or vents break through the metal.
For steel cladding, a light coat of rust‑inhibiting paint every few seasons stops the red rust that eats away at fasteners – a tiny habit that saves hundreds down the track.
4. Schedule periodic upgrades, not just repairs
Think of upgrades as future‑proofing. Maybe your original metal roof is 15 years old; swapping to a colour‑bond panel with built‑in insulation can cut summer heat by a few degrees and lower your energy bills.
Or, if the concrete slab shows minor surface cracking, a polymer‑seal coating adds a protective skin that resists water ingress and chemical spills from farm chemicals.
5. Create a “maintenance log” that anyone on the farm can use
Put a weather‑proof notebook by the entrance or a simple spreadsheet on a tablet. Record the date, the issue spotted, who fixed it, and any parts used.
When the next seasonal worker comes around, they can glance at the log and know exactly what to look for – no guesswork, no missed steps.
6. Partner with your rural building contractor for annual check‑ups
Even the most diligent owner benefits from a professional eyes‑on‑site once a year. The contractor can spot hidden corrosion, verify that footings are still level, and recommend smart upgrades that fit your budget.
Because they already know the building’s history, the inspection is faster and cheaper than a brand‑new assessment.
7. Budget for a maintenance fund
Set aside a small percentage of your farm’s cash flow – 2‑3 % of the project cost works well – into a dedicated “building care” account. When a minor repair pops up, you won’t have to scramble for cash during a busy shearing week.
Having that buffer also means you can act quickly on upgrade ideas, like adding solar‑powered attic vents that extend roof life.
8. Use the right tools for the job
Never improvise a concrete repair with a garden trowel. Keep a basic kit: a cordless drill, stainless‑steel screws, a rust‑removal brush, and a quality sealant gun. When the right tool meets the problem, the fix lasts longer.
And if you ever wonder whether a DIY fix is safe, remember: a cheap shortcut today often turns into a costly rebuild tomorrow.
9. Document everything for resale value
Potential buyers love a well‑maintained property. A tidy log, photos of before‑and‑after upgrades, and receipts for sealant or paint work show that the building has been cared for by a professional rural building contractor.
That transparency can add thousands to the sale price, making your maintenance investment pay off twice.
Bottom line: treating maintenance as an ongoing habit, not an afterthought, keeps your farm structures strong, saves money, and gives you peace of mind when the next storm rolls in.
FAQ
What does a rural building contractor actually do for my farm?
Think of a rural building contractor as the handyman who knows the quirks of outback construction. They’ll inspect the structure, spot hidden damage, and then design a fix that works with your farm’s schedule – whether that’s a roof replacement before the shearing season or a concrete slab that can take a tractor’s weight. The goal is a durable solution that lets you focus on the cattle, crops, or the next big job.
How do I choose the right rural building contractor in NSW?
Start by checking their licence and insurance – a Home Building Licence is mandatory for work over $5,000 in NSW. Then look for local experience; a contractor who’s built sheds in Armidale or barns near Bourke will understand the soil, weather, and 4×4 access challenges you face. Ask for references from fellow producers, visit a recent site, and compare itemised quotes. The cheapest option often hides extra travel fees or sub‑par materials.
What should I expect in terms of cost and timeline for a typical shed renovation?
A modest shed upgrade – say new colour‑bond roofing and a reinforced concrete floor – usually runs between $15,000 and $30,000, depending on size and material choice. Build a 10‑15 % time buffer because remote sites can throw in surprise rock outcrops or a sudden rainstorm. In practice, a two‑week job can stretch to three weeks when you factor in travel, weather delays, and site clean‑up.
Do rural building contractors handle permits and compliance?
Yes, most reputable contractors will manage the paperwork for you. In NSW many small outbuildings qualify as exempt development, but once you exceed the 15 m² floor‑area or 7 m height limits you’ll need a Development Application or a Complying Development Certificate. A good contractor will submit the forms, attach site plans, and keep you in the loop so you don’t get caught off‑guard by council.
Can a rural building contractor work with limited 4×4 access?
Absolutely – that’s a core part of the service. Contractors equipped with 4×4 work trucks can haul steel sheets, concrete mixers, and tools over gravel tracks, river crossings, or steep ridges. They’ll plan deliveries around the safest routes, often using portable generators and off‑road ramps. The result is you get the same quality build whether your shed sits on a sealed road or a dusty paddock track.
How often should I schedule maintenance with my contractor?
Treat maintenance like a seasonal check‑up. A quick walk‑around after the wet season and another after the hottest summer months catches water pooling, rust, and cracked seals before they become costly repairs. Many owners set a semi‑annual appointment – roughly every six months – and keep a simple log of what was inspected, what was fixed, and any parts used. This habit also builds a maintenance fund over time.
What’s the best way to future‑proof my farm buildings against climate extremes?
Start with materials that shrug off heat, rain, and fire. Colour‑bond steel roofs reflect sun, while fire‑rated cladding protects against bush‑fire risk. Add ventilation gaps or solar‑powered attic vents to keep moisture from building up. Finally, ask your contractor to design slightly larger overhangs and a drainage ditch around concrete slabs – these small tweaks dramatically extend the lifespan of a structure when the weather turns nasty.
Conclusion
After we’ve walked through budgeting, material choices, permits and the day‑to‑day hustle of a remote build, the picture should feel a lot less hazy. You’ve seen why a seasoned rural building contractor matters – from hauling steel over a dusty track to tweaking a roof design so it won’t buckle in a sudden storm.
What’s the biggest takeaway? Treat every project like a seasonal farm chore: plan ahead, leave a buffer for rain or a busted generator, and keep a simple log of what was done. That habit alone saves you a handful of surprise invoices and a lot of sleepless nights.
And remember, you don’t have to go it alone. A contractor who knows the backroads of Tamworth, Armidale or Bourke can spot a hidden footings issue before it becomes a costly repair, and they’ll keep the work moving even when the road turns to mud.
Ready to put the plan into action? Grab a coffee, jot down the top three buildings that need attention, and give a local rural building contractor a call. A quick site visit can turn those notes into a solid quote and a timeline that fits around your shearing or harvest schedule.
Bottom line: with the right partner, a little foresight, and a maintenance habit built into your yearly calendar, your farm structures will stay strong, safe and ready for whatever the Aussie outback throws at them.


1 Comment