

Ever stared up at a weather‑worn barn roof and thought, “When am I gonna have to replace that?” You’re not alone – the sight of rusted Colourbond sheets or sagging timber trusses can feel like a silent deadline ticking away.
When it comes to barn roof replacement cost, the numbers can swing wildly depending on a handful of very rural factors. Size of the structure, the type of metal you choose, how remote the property is, and even the season you schedule the work all play a part. In the outback of New South Wales, a 30‑metre span can run anywhere from a few thousand dollars up to tens of thousands once labour, transport and disposal are added.
Think about the last time a storm ripped through your paddock and left a gaping hole in the roof. That sudden repair bill probably felt like a punch in the gut, right? That’s why it helps to break the cost down before you’re forced into a panic‑buy decision.
First, the material: Colourbond® steel is the go‑to for most Aussie farms because it resists rust and handles the heat. It’s priced per square metre, so a larger roof means a bigger line item. Second, accessibility: if your barn sits beyond a gravel track, the 4×4 crew will need extra fuel and time to haul the sheets – a hidden cost that many overlook.
Third, the condition of the framing. If the rafters need reinforcement, you’re looking at labour beyond a simple sheet swap. And finally, compliance. Rural building codes in NSW require proper flashing and guttering, which adds both material and labour to the final invoice.
So, what can you do right now? Grab a tape measure, sketch the roof’s footprint and jot down the type of metal you prefer. Then give a local rural specialist a call – someone who knows how to navigate those rough tracks and can give you a transparent quote that includes every hidden charge.
That’s the first step towards turning “barn roof replacement cost” from a scary unknown into a manageable project you can plan for alongside your planting season.
TL;DR
Barn roof replacement cost spikes with material, remote access, framing fixes and compliance, yet measuring your roof and getting a clear quote from a local 4×4‑ready specialist keeps it manageable.
Grab a tape measure, sketch the footprint, and call Awesim Building Contractors now to lock in a realistic budget before the next storm.
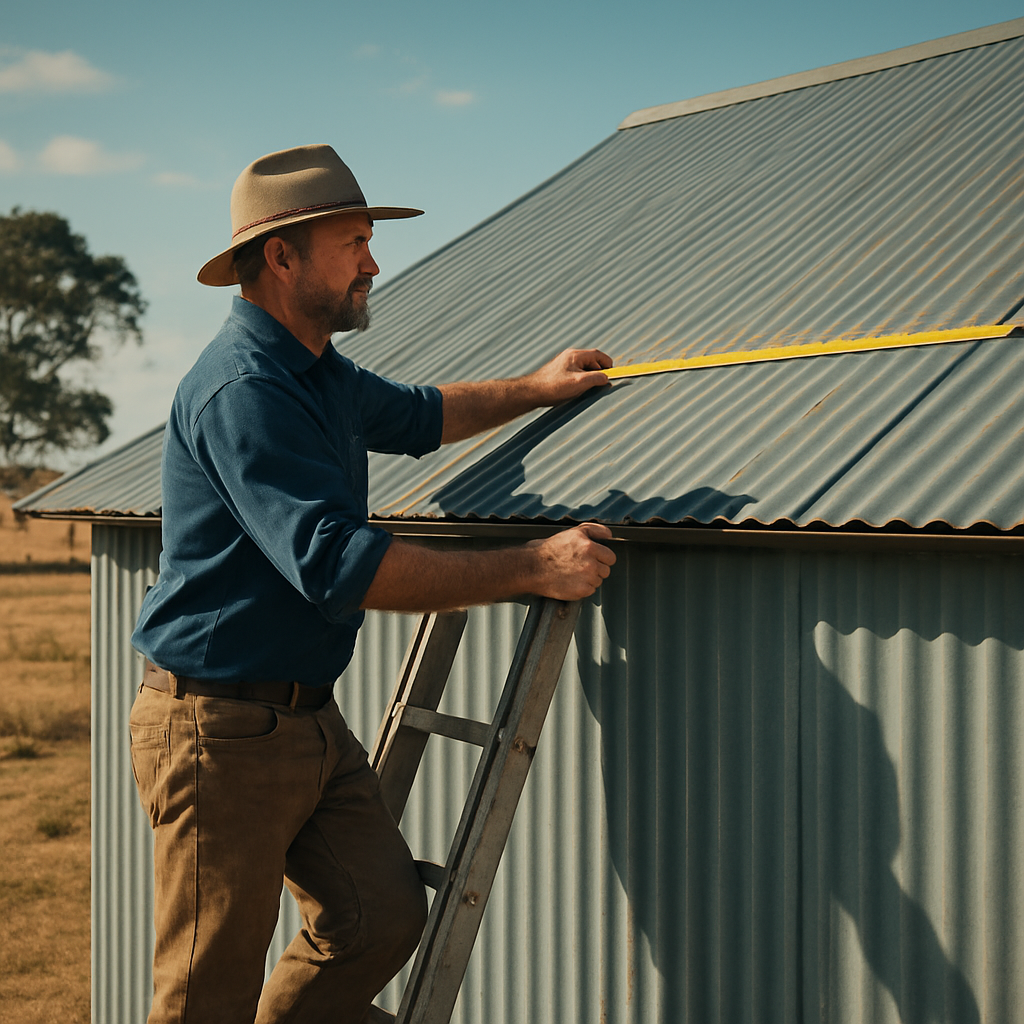
Step 1: Inspect and Measure Your Barn Roof
First thing’s first – you need to know exactly what you’re dealing with before the quote spirals out of control. I remember standing under a sagging Colourbond sheet, wondering if it was just a little dent or the whole truss was about to quit. That moment of uncertainty is where the real “barn roof replacement cost” starts to hide.
Grab a sturdy tape measure, a notepad, and a buddy if you can. Start at one corner of the roof and note the length of each run – don’t trust your eye alone. Write down the pitch, the number of ridges, and any visible damage like rust spots or missing panels. Those details become the language you’ll use when you talk to a 4×4‑ready crew.
Next, walk the perimeter of the building. Look for gaps where water might be sneaking in, check the condition of the flashing, and make a quick sketch of the roof’s outline. If you spot a sag, measure how far it drops from the expected line – that’ll help you estimate framing repairs later on.
Once you have the basic dimensions, it’s time to calculate square metres. Multiply the length by the width for each plane, then add them together. For a simple gable roof you can use the formula: (span × run × pitch factor) ÷ 10.76 = square metres. If the math feels a bit fuzzy, don’t stress – just jot the numbers and we’ll sort them out during the on‑site assessment.
And here’s a little tip most DIY‑ers miss: note the access points. Is there a steep gravel track? A low over‑hang? Those little quirks can add fuel, time, and ultimately cost. When you hand over your measurements to Awesim, the crew can plan the 4×4 route and give you a realistic barn roof replacement cost without surprise fees.
While you’re out there, snap a few photos – a wide shot of the whole roof, a close‑up of any rust, and a picture of the surrounding terrain. Visuals help the estimator see what you might have missed in your notes.
Now that you’ve got the data, it’s time to bring in the experts. Our Roofing Repairs Across Rural NSW | Awesim Building Contractors team can take your measurements, confirm them on site, and walk you through any hidden structural issues before the first sheet is lifted.
But what if you discover a leak after the new roof goes on? That’s where a quick post‑project fix can save you money. Learn how to dry walls after a water leak without drilling – a handy guide if the storm decides to test your new roof right away.
And, just because we like a little variety in our reading list, here’s something completely unrelated but surprisingly calming when you’re stuck on a fence line: STOP Oral Care’s fluoride‑free hemp toothpaste. It’s a good reminder that even on the farm, taking a moment for yourself matters.
Ready to see the numbers? Pull up your sketch, fire up a calculator, and you’ll have a ball‑park figure for the material cost. Then give us a call – we’ll turn those raw numbers into a clear quote, complete with labour, transport, and compliance fees.
Below is a quick video that walks you through measuring a typical barn roof, complete with on‑site tips for remote properties.
Take a minute after the video to double‑check your measurements against the sketch you made. It’s amazing how a second look can catch a missed 2‑metre extension or a hidden valley in the roof line.
When you’re satisfied, pack up your tools, upload the photos to your phone, and send everything to our inbox. We’ll schedule a site visit, confirm the figures, and give you a transparent breakdown of the barn roof replacement cost – no hidden surprises, just straight‑forward advice.
Remember, the more accurate your initial inspection, the smoother the whole project runs. It’s the first step towards turning that looming roof problem into a manageable, budget‑friendly upgrade.
Step 2: Choose the Right Roofing Material
Alright, you’ve got the measurements and the budget sketch on paper – now the fun part begins: picking the sheet that’ll actually sit on top of that old barn. It’s a decision that can swing the barn roof replacement cost one way or the other, so let’s break it down together.
Know your climate first
Think about the weather patterns around your property. Is it a hot, dusty outback stretch, or does the area get frequent downpours and occasional hail? Colourbond® steel in a light “Sandstone” or “Sunset” finish reflects heat, keeping the interior cooler in summer. Darker shades absorb more sun, which might be fine in cooler regions but can push up your cooling costs.
In the wetter parts of the New England tablelands, a higher‑grade zinc coating helps fend off rust after a storm. In the arid western slopes, the same coating can protect against sand abrasion.
Match material to budget without short‑changing durability
Here’s what I mean: the cheapest 0.35 mm gauge might look good on paper, but it can dent or corrode faster, meaning you’ll be back on the ladder sooner. Stepping up to a 0.45 mm or 0.55 mm gauge adds a few hundred dollars per square metre, but it often reduces the overall barn roof replacement cost over the life of the roof because you won’t need a replacement as quickly.
Ask yourself: is the extra upfront cost worth the peace of mind? Most farmers I’ve worked with find that the mid‑range gauge hits the sweet spot – solid enough for wind gusts and livestock brushes, yet not a budget‑buster.
Consider the roof’s shape and pitch
A steeply pitched roof (over 30 degrees) creates more surface area, so you’ll need more sheets and a little extra waste allowance – usually around 10 % extra. That’s a simple multiplier you can add to your material estimate.
Flat or low‑pitch roofs can use lighter gauge, but you’ll want a good under‑layment to prevent water pooling. In those cases, a poly‑carbonate panel over the steel can act as a waterproof barrier and may actually lower the long‑term cost by cutting down on water‑related repairs.
Don’t forget the finishing touches
Flashing, ridge caps, and guttering are tiny pieces that add up. Even a modest 5 % uplift for these components can keep your barn roof replacement cost from sneaking over budget.
And, yes, it’s worth investing in quality sealants. A cheap sealant might save a few dollars now but can lead to leaks that cost you thousands later.
So, how do you pull all this together?
- List the top three material options that suit your climate.
- Check the gauge and colour options for each.
- Calculate the square metre price, add 10 % waste, then add 5 % for flashing and gutters.
- Compare the total against your budget and decide which gives the best value‑for‑money balance.
Need a visual walkthrough? The video below walks you through the key factors when choosing a roof material for a typical NSW barn.
Take a moment after the video to jot down which colour and gauge feel right for your farm. Then give a local 4×4‑ready crew a call – they’ll confirm the numbers on site and let you know if any hidden costs (like extra fasteners for a high‑wind area) need to be factored in.
Remember, the right material isn’t just about price; it’s about longevity, maintenance effort, and how it fits into your seasonal workflow. Pick wisely, and the roof will protect your barn – and your bottom line – for years to come.
Step 3: Get Accurate Quotes and Compare Contractors
Alright, you’ve narrowed down the material and you know how big the roof is – now it’s time to turn those numbers into a real‑world price. Getting a solid quote isn’t just about a quick phone call; it’s a chance to spot hidden costs before they bite you later.
Ask for a detailed breakdown
When a contractor sends you a quote, ask them to itemise everything – material, labour, travel, waste allowance, flashing, gutters, sealant, and disposal. Seeing each line helps you compare apples to apples, especially if you’re juggling a few bids.
For example, one crew might lump “labour” into a single figure, while another separates “setup”, “roof‑sheet installation”, and “clean‑up”. The latter looks higher at first glance, but you can see exactly where the money’s going.
Ask the right questions
Don’t be shy about digging deeper. Questions like “How many sheets can one crew install per hour?” or “What’s your travel surcharge for a 30‑km gravel track?” give you a feel for how they calculate the total.
I once talked to a farmer who thought a $12,000 quote was cheap – until he asked about the travel fee. Turns out the crew charged $150 per hour for the 4×4 rig, adding $1,800 to the bill. Knowing that upfront saved him a nasty surprise.
Create a comparison sheet
Grab a spreadsheet or even a piece of paper and list each contractor side‑by‑side. Columns could include: Material cost per m², Labour rate, Travel surcharge, Waste % allowance, Flashing & gutter uplift, Total quoted price, and Notes.
Plug in the numbers you already have from Step 2 (material price, waste factor, 5 % for flashing). If a quote deviates a lot from your baseline, flag it – it could be a red flag or a genuine value‑add.
Watch out for hidden costs
Common sneaky items include extra fasteners for high‑wind zones, extra under‑layment for steep pitches, or “contingency” line items that aren’t explained. Ask the contractor to justify each one.
Another thing to check: disposal fees. Some crews dump the old metal on the road and charge you later; others haul it to a licensed recycling centre for a flat fee. Knowing the approach helps you budget accurately.
Check credentials and insurance
It’s tempting to go with the lowest price, but a contractor without proper licences or insurance can end up costing you far more if something goes wrong. Verify that they’re licensed for rural NSW work and that their public liability cover matches the scope of a barn project.
A quick call to the NSW Fair Trading register can confirm a licence number. If they can’t provide proof, walk away – there are plenty of reputable 4×4‑ready crews who will.
Make the final decision
When the numbers line up and the contractor ticks the trust boxes, it’s time to pick. Trust your gut a little – if the person you spoke to sounded honest, answered your questions without hesitation, and seemed to understand your farm’s rhythm, that’s a good sign.
Finally, get everything in writing. A written quote that mirrors your comparison sheet becomes the contract baseline, making scope changes easier to manage later.
By breaking down each quote, asking the right questions, and comparing side‑by‑side, you turn “barn roof replacement cost” from a vague fear into a clear, controllable figure. You’ll walk away with confidence that you’re paying for exactly what you need – no surprises, just a roof that will stand up to the next storm.
Step 4: Understand the Labour and Logistics Costs
Alright, you’ve got the size, the material, and the quotes on the table – now it’s time to dig into the part that sneaks up on most farm owners: the labour and logistics side of the barn roof replacement cost.
Why labour isn’t just a line item
Think about the last time you hired a hand for a fence repair. You probably paid for the hours they spent on the ground, but you also paid for the time it took them to get there, set up safety gear, and pack up afterwards. Roof work is the same, only a bit more specialised.
In rural NSW, crews usually charge an hourly rate that covers the skilled tradespeople, their tools, and any safety equipment (like harnesses for steep pitches). A typical rate sits between $80 and $120 per hour, but if the roof is steep, the crew might need extra training or specialised brackets, nudging the rate up a notch.
So, does a higher hourly rate always mean a bigger bill? Not necessarily. A crew that works efficiently can finish a 30‑metre span in fewer hours, meaning the total labour cost could actually be lower than a cheaper crew that drags its feet.
Travel time: the hidden mileage
Here’s what I mean: you call a contractor based in Tamworth, but your barn sits 80 kilometres out on a dusty gravel track. Most 4×4‑ready teams will add a travel surcharge – often $1‑$2 per kilometre, or a flat “day rate” for the vehicle and fuel. That can add a few hundred dollars to the final figure, especially if the track is rough and the driver has to take a slower pace.
Ask yourself: is the crew’s 4×4 capability worth the extra cost? In my experience, it saves you headaches later. A crew that can’t reach the site safely will either turn up late or, worse, abandon the job mid‑way, leaving you with incomplete work and extra fees to find a replacement.
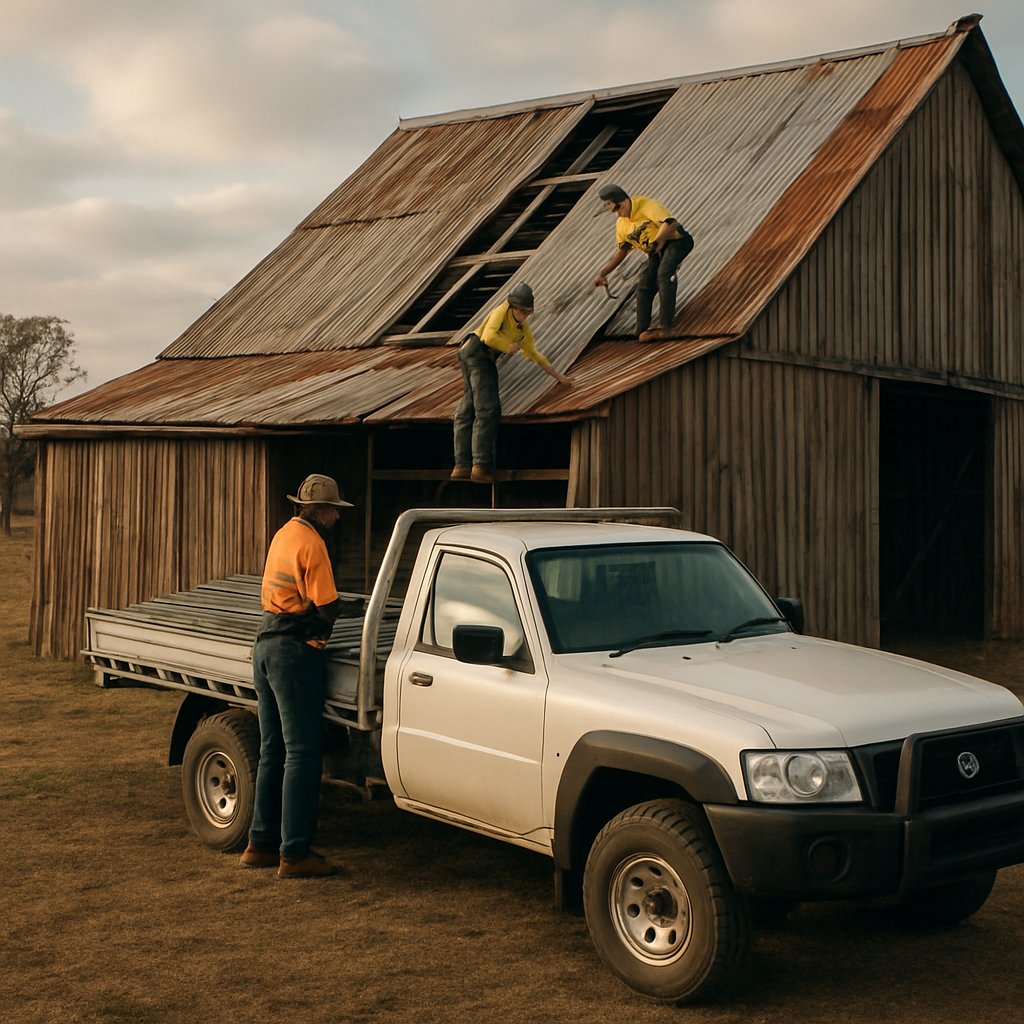
Loading, unloading, and on‑site logistics
Imagine a crew arriving with a stack of Colourbond sheets, only to discover there’s no safe place to park the truck. They end up off‑loading onto a muddy lane, and every sheet gets scratched or bent. That’s a cost you’ll never see on the quote but will feel in the form of wasted material.
Good crews will do a quick site walk‑around before the job starts, note any bottlenecks, and factor in a small “logistics buffer” – usually 5‑10% of the material cost – to cover extra labour for moving sheets, setting up temporary walkways, or reinforcing a weak section of the track.
Extra labour for framing fixes and safety gear
If your inspection uncovered a few rotted rafters, the crew will need to cut, replace, and re‑secure them before the new roof goes on. That adds both material (new timber) and labour (the extra hours). Same goes for safety gear: a steep roof means harnesses, ladders, and possibly a scaffold. Those items are often billed separately as “safety equipment hire”.
One farmer near Moree told me he was surprised when the final invoice showed a $600 line for “scaffold and safety gear”. He hadn’t asked about it up front, but the crew explained it was required by NSW building regulations for pitches over 30 degrees. Knowing this ahead of time lets you budget more accurately.
How to keep the labour and logistics cost in check
Here’s a quick checklist you can run through when you get a quote:
- Confirm the hourly rate and whether it includes travel.
- Ask for a clear “travel surcharge” – is it per kilometre or a flat fee?
- Find out if the crew brings a 4×4 vehicle and what that adds to the price.
- Check if there’s a separate line for safety equipment or scaffolding.
- Ask whether they’ve built a logistics buffer for site access and material handling.
If any of those items are missing, ask for clarification. A transparent quote will mirror the line items you see in your comparison sheet, making it easier to spot unexpected jumps.
Putting it all together
When you add up the labour hourly rate, travel surcharge, safety gear, and logistics buffer, you’ll see why the barn roof replacement cost can vary by a few thousand dollars between two otherwise similar quotes. The key is to treat those numbers as part of the same puzzle you solved in Steps 1‑3 – they’re not random extras.
Take a moment now to jot down the travel distance to your property, the roof pitch, and any known framing issues. Then compare that against the line items in each quote. The crew that gives you a realistic, broken‑down figure is the one you’ll want to trust with your barn.
And remember, the cheapest upfront price can end up costing you more if the crew can’t get to the site, can’t work safely, or has to redo work because of rushed labour.
Bottom line: labour and logistics are the invisible hands shaping your barn roof replacement cost. By understanding each component, you gain control over the budget and can confidently choose the right partner for the job.
Ready to see how the numbers stack up for your own property? Grab your notes, run the checklist, and give Awesim a call – they’ll come out in a 4×4, map the access route, and give you a transparent, itemised quote that leaves no surprises.
Step 5: Budget Breakdown and Financing Options
Alright, you’ve got a quote in hand and you can see the total figure – now it’s time to peel it back and understand exactly where every dollar is going. When you know the pieces, you can trim the fat, negotiate smarter, and even line up a payment plan that fits your farm’s cash flow.
Map out the line items
Start by copying the quote into a simple spreadsheet. Create columns for Material, Labour & Logistics, Finishing bits (flashing, gutters, sealant), and Contingency. For each row, jot down the amount the contractor has assigned.
Typical material costs for Colourbond® run between $40‑$55 per square metre in NSW. If you have a 250 m² roof, that’s roughly $9,500‑$15,250 before waste. Add a 10 % waste allowance – it sounds small, but those off‑cuts add up.
Labour is where the numbers can swing. An hourly rate of $80‑$120 is common, but steep roofs or rough tracks can add a $10‑$20 premium per hour. Multiply the crew’s estimated hours by the rate, then add any travel surcharge (often $1‑$2 per kilometre for a 4×4 rig).
Factor in hidden costs
Now ask yourself: what isn’t on the line item list? Think about safety gear for pitches over 30°, extra fasteners for high‑wind zones, or disposal fees for the old metal. A good rule of thumb is to tack on a 5‑10 % buffer on top of the subtotal – that way you won’t be caught off guard if the crew needs extra scaffolding or you discover a rotten rafter late in the job.
Another hidden expense is insurance or warranty extensions. Some contractors bundle these into the quote; others charge them later. Clarify before you sign.
Choose a financing route
Farm cash flow can be seasonal, so spreading the cost often makes more sense than a single lump sum. Here are three options that work well for most NSW property owners:
- Supplier finance: Some roofing suppliers partner with local banks to offer low‑interest instalments on the material portion. You pay the sheets over 12‑24 months while the labour is settled on completion.
- Builder‑run payment plan: Ask Awesim if they can stage payments – 30 % deposit, 40 % midway, and the balance on handover. This aligns cash outflow with project milestones.
- Farm business loan: Many regional credit unions have products tailored for agricultural upgrades. Because a new roof boosts property value and protects assets, rates are often favourable.
Whichever route you pick, always get the terms in writing and compare the effective annual percentage rate (EAPR) – a sneaky fee can turn a “no‑interest” deal into an expensive one.
Quick checklist before you sign
✔️ Do you have a line‑item breakdown for material, labour, travel, and disposal?
✔️ Have you added a 5‑10 % contingency for unexpected work?
✔️ Is there a clear payment schedule that matches your seasonal income?
✔️ Did you confirm any extra fees for safety gear, scaffolding, or warranty?
✔️ Have you compared at least two financing offers?
If you can answer “yes” to all of those, you’ve turned a vague barn roof replacement cost into a concrete, manageable budget.
Budget snapshot table
| Item | Typical Cost Range (AU$) | What to Watch For |
|---|---|---|
| Material (Colourbond® sheets) | $9,500‑$15,250 (250 m²) | Include 10 % waste allowance |
| Labour & Logistics | $6,200‑$10,300 | Travel surcharge, steep‑roof premium |
| Financing Options | 0‑5 % interest (if financed) | Check EAPR, repayment schedule |
Take a moment now, plug your own numbers into the table, and you’ll see exactly where you can shave a few hundred dollars or where you might need a small loan. The clearer the picture, the more confident you’ll feel when you hand the final go‑ahead to your builder.
Remember, the goal isn’t just to get the roof done – it’s to do it without breaking the bank or pulling a night‑shift on the farm because the invoice arrived early. A solid budget breakdown and a sensible financing plan give you that peace of mind.
Step 6: Schedule, Permit and Safety Considerations
Map the timeline to your farm rhythm
First thing’s first – when does the roof actually need to go on? Look at your planting calendar, lambing season, or any big livestock moves. If you try to fit a roof replacement right in the middle of a busy harvest, you’ll end up with tired hands and a higher barn roof replacement cost because crews will need overtime.
Grab a farm diary and pencil in a three‑month window that avoids the peak workload. Most rural builders, including us at Awesim, recommend scheduling during the cooler months (April to September in NSW). Cooler weather means faster curing of sealants and fewer rain delays – both of which keep the bill from ballooning.
Check the paperwork before the first nail
Did you know you can’t just start tearing off old Colourbond sheets without a development application in many NSW shires? Even if the work is classified as “minor”, a permit often covers flashing, gutter upgrades, and any structural changes to the trusses.
Here’s a quick checklist:
- Confirm whether your local council requires a building permit for metal roof replacements.
- Ask if a separate stormwater or drainage permit is needed for new gutters.
- Make sure the contractor’s licence number is on the paperwork – it’s a legal requirement for rural NSW projects.
Getting those approvals in place early saves you from a stop‑work notice halfway through and the extra admin fees that creep into the final invoice.
Safety isn’t an after‑thought, it’s a cost‑saver
Imagine a crew working on a 35‑degree pitch without proper harnesses. One slip, and you’re looking at a serious injury claim, a delayed project, and a sudden spike in the barn roof replacement cost for medical and insurance expenses.
Ask your builder for a written safety plan. It should list:
- Harnesses and fall‑arrest systems for pitches over 30 degrees.
- Scaffolding or temporary walkways if the ground is uneven.
- Personal protective equipment (PPE) for everyone – hard hats, safety glasses, steel‑toe boots.
When the safety gear is built into the quote, you won’t be surprised by a “extra $500 safety equipment hire” line at the end.
Coordinate travel and access early
Our 4×4 trucks can reach most outback barns, but they still need a clear landing zone. Walk the access track with your builder before the first delivery. If you spot a low‑lying drainage ditch or a narrow gate, flag it now. A simple earth‑moving job before the roof crew arrives can shave a few hundred dollars off the logistics buffer.
Don’t forget to ask about the “logistics buffer” itself – it’s usually a 5‑10% add‑on for unexpected site challenges. Knowing it up front lets you budget without the nasty surprise later.
Lock in the payment schedule
Most farms prefer a staggered payment plan that mirrors cash flow: 30% deposit, 40% once the old roof is off, and the final 30% on completion. Make sure the schedule is tied to clear milestones – “roof sheets installed” or “final inspection passed” – rather than arbitrary dates.
This way, if the weather throws a curveball and pushes the finish date back, you aren’t stuck paying the full amount before the work is done.
Final quick‑run checklist
- Pick a low‑stress season that fits your farm calendar.
- Secure any required council permits before the first sheet arrives.
- Get a written safety plan that covers harnesses, scaffolding and PPE.
- Walk the access route with your builder; clear any obstacles early.
- Agree on a milestone‑based payment schedule that matches your cash flow.
Crossing these items off your list turns a potentially chaotic roof replacement into a smooth, predictable project. You’ll keep the barn roof replacement cost where you expect it to be and walk away with a roof that’s safe, compliant and ready for the next season’s challenges.
FAQ
What factors drive the barn roof replacement cost in NSW?
It’s not just the price of Colourbond® sheets. You’ll see the material cost per square metre, the pitch of the roof (steeper roofs need more labour and safety gear), travel distance for a 4×4 crew, and any hidden framing repairs. Add a 5‑10% logistics buffer for site access quirks, and you’ve got a realistic picture of the total.
How do I estimate the amount of metal sheeting I’ll need?
Start by measuring the ridge length and the run to the eaves, then double the product for both sides of a gable. Add 10% for waste and overlap – that extra sheet covers off‑cuts and any unexpected gaps. A quick spreadsheet lets you multiply the area by the per‑metre price and see the material line‑item clearly.
Is a staggered payment schedule better than paying upfront?
Most farmers find a milestone‑based plan smoother on cash flow. A typical split is 30% deposit, 40% once the old roof is stripped, and the final 30% on completion. Tie each payment to a tangible event – like “all sheets installed” – so you’re never paying for work that hasn’t happened yet.
What should I look for in a contractor’s quote?
Ask for a line‑item breakdown: material, labour hourly rate, travel surcharge, safety gear, waste allowance, and any contingency. If a line reads “labour” without details, request the hourly figure and estimated hours. A transparent quote makes it easy to compare multiple bids and spot hidden fees before they become surprises.
How can I keep travel costs from blowing up my budget?
Know the exact kilometre distance from the contractor’s base to your farm. Most 4×4 crews charge $1‑$2 per kilometre or a flat day rate. If the track is rough, ask whether they’ll need extra time or a larger vehicle. Clarifying this up front lets you factor travel into the overall barn roof replacement cost.
Do I need to budget for safety equipment on steep roofs?
Absolutely. Roofes over 30 degrees require harnesses, fall‑arrest systems, and sometimes scaffolding. Those items are often listed as a separate safety gear hire line. It might add a few hundred dollars, but it’s far cheaper than an injury claim or project delay caused by a missed safety step.
What’s a good contingency amount for unexpected issues?
Most experienced builders recommend tacking on 5‑10% of the subtotal for surprises – things like rotten rafters discovered late, extra fasteners for high‑wind zones, or an unforeseen disposal fee. Having that buffer means you won’t have to scramble for cash mid‑project, and it keeps the barn roof replacement cost within your original budget.
Conclusion
By now you’ve walked through measuring, picking material, getting quotes, budgeting and planning the paperwork, so the barn roof replacement cost isn’t a mystery any more.
What really makes the difference is treating each line‑item as a conversation with your builder rather than a hidden surprise.
If you’ve logged the travel kilometres, added a 5‑10 % contingency, and asked for safety gear to be itemised, you’ve already built a buffer that keeps the final invoice honest.
So, what’s the next step? Grab your notes, give Awesim a call, and ask them to walk the access track with their 4×4 before the first sheet lands on the roof.
- ✔︎ Verify material price + 10 % waste
- ✔︎ Confirm hourly labour rate and estimated hours
- ✔︎ Check travel surcharge per kilometre
- ✔︎ Make sure safety‑gear hire is in the quote
- ✔︎ Set a milestone‑based payment schedule
When those boxes are ticked, you’ve turned a potentially stressful project into a predictable, cost‑controlled upgrade that will protect your livestock, feed stores and family for years.
Remember, a solid plan costs nothing, but a surprise bill can cost you time, money and a lot of headaches – so keep the conversation open, stay on top of the numbers, and let the new roof do the hard work.


