

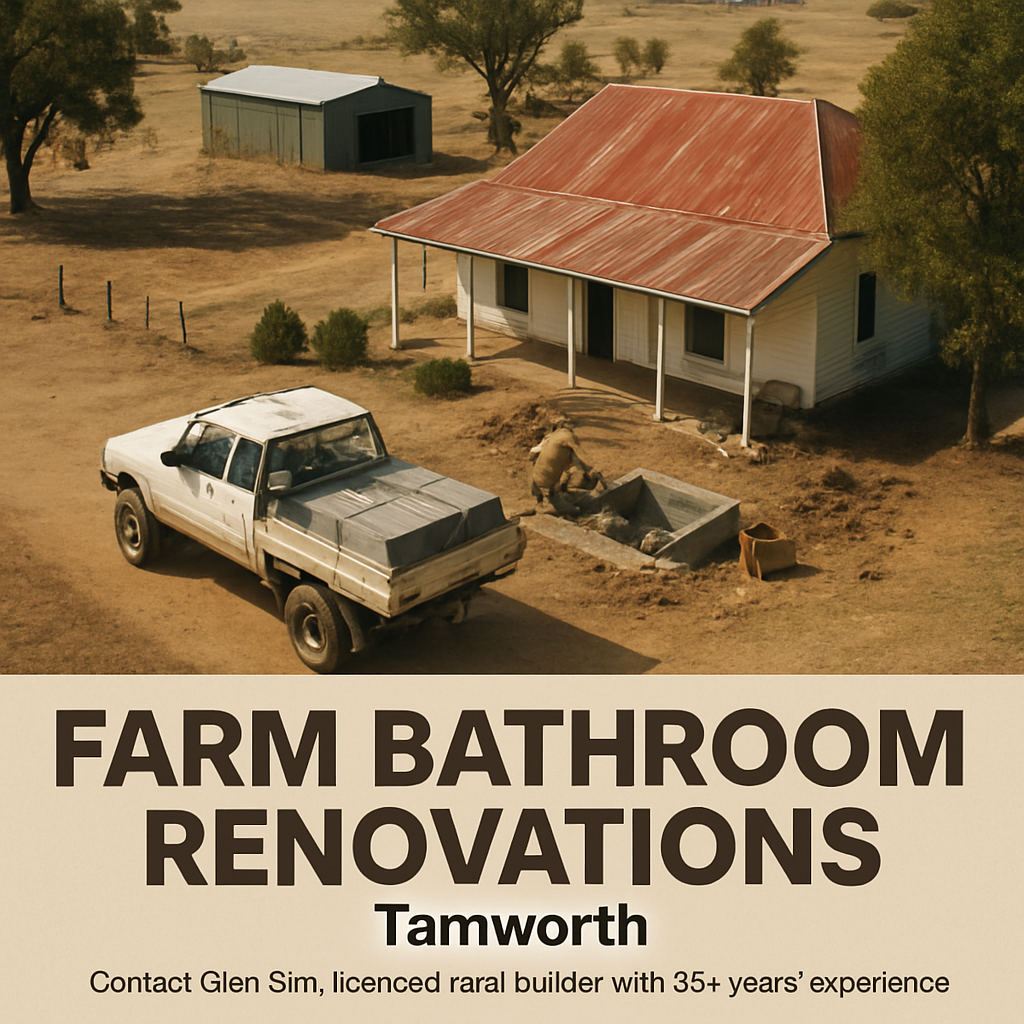
Picture this: you’ve just finished milking the cows, the sun’s sinking behind the paddock, and you step into your bathroom only to be greeted by cracked tiles and a leaky tap that’s been dripping all day. That frustration? It’s the exact moment many Tamworth farm families realise their bathroom needs a proper overhaul.
In rural NSW, bathroom renovations aren’t just about fresh paint and new fixtures – they’re about creating a space that can stand up to dust, humidity and the occasional stray dog that wanders in after a long day in the fields. That’s why we always start by looking at durability first.
What we’ve seen work best on a cattle station outside Gunnedah is swapping out standard wall tiles for a low‑maintenance porcelain that resists cracking when the temperature swings from scorching summer to frosty winter nights. Pair that with a quick‑drain floor system and you’ve got a bathroom that dries fast, even after a heavy rain that floods the yard.
But it’s not just the materials. Access is a huge factor. Some of our clients have narrow gravel tracks that a big truck can’t even navigate. That’s where our 4×4 crew comes in – we can haul all the supplies right to the site, set up a temporary work platform, and get the job done without you having to haul anything yourself.
So, how do you know where to start? First, make a quick checklist: are the existing pipes rusted? Do the tiles show wear around the shower area? Is the ventilation adequate for a humid climate? If you answer ‘yes’ to any of those, you’re ready to plan your bathroom renovations tamworth project.
Next, think about layout. On a farm house, you often need extra storage for towels, cleaning gear and even a small bucket for livestock water. Adding a built‑in bench or a sturdy linen cupboard can turn a cramped washroom into a functional hub that saves you time each morning.
Finally, budgeting. A typical bathroom renovation in Tamworth can range from $15,000 for a straightforward refresh to $35,000 for a full‑scale rebuild with high‑end fixtures. Keep a contingency of around 10 % for unexpected issues – like discovering hidden water damage once the walls come off.
We get it – tackling a bathroom on a working property feels like another full‑time job. That’s why our approach is hands‑on, practical and timed around your farm schedule so you can keep the herd moving while we give your bathroom a fresh start.
Ready to stop fighting the drip and start enjoying a clean, resilient space? Let’s dive into the details of planning, choosing materials and managing the build, so your bathroom renovations tamworth become a smooth, stress‑free experience.
TL;DR
If you’re a Tamworth farmer or regional homeowner, our practical guide shows how to plan, budget and execute bathroom renovations that survive dust, humidity and rugged farm life. Follow our step‑by‑step on‑site checklist, pick durable materials and rely on Awesim’s 4×4 access to keep costs predictable and downtime minimal throughout.
Step 1: Planning Your Bathroom Renovation
Ever walked into a bathroom that feels more like a dusty shed than a place to freshen up after a long day on the farm? That moment of frustration is the perfect cue to start planning – before you tear out tiles, you need a clear roadmap.
Take stock of what you’ve got
First, do a quick walk‑through and jot down every problem spot: rusted pipes, cracked floor tiles, missing vent fans, or even a leaky tap that’s been dribbling all week. Ask yourself, “If this part fails tomorrow, how badly will it affect my daily routine?” That honesty helps you prioritise the must‑haves versus nice‑to‑haves.
In our experience, rural bathrooms often suffer hidden water damage once the walls come off. A simple moisture meter can save you a few thousand dollars later, so grab one before you order any new fixtures.
Set a realistic budget
Budgeting on a farm isn’t just about the headline price. Add a 10 % contingency for surprise issues – like discovering a rusted joist behind the vanity. A typical bathroom renovation in Tamworth ranges from $25,000 for a modest refresh to $55,000 for a full‑scale rebuild. Break the total down into categories: demolition, plumbing, electrical, tiles, fixtures, and labour.
Don’t forget the cost of getting supplies to a remote site. Our 4×4 crew can haul everything directly to the property, but that convenience does carry a small transport fee. Factor that in early so you don’t get a nasty surprise when the invoice arrives.
Map out the layout
Next, sketch a rough floor plan on graph paper – or use a free phone app if you’re more comfortable with digital tools. Think about the flow: where do you need extra storage for towels, cleaning gear, or even a bucket for livestock water? A built‑in bench can double as a mud‑room seat, which is a lifesaver after a day in the paddocks.
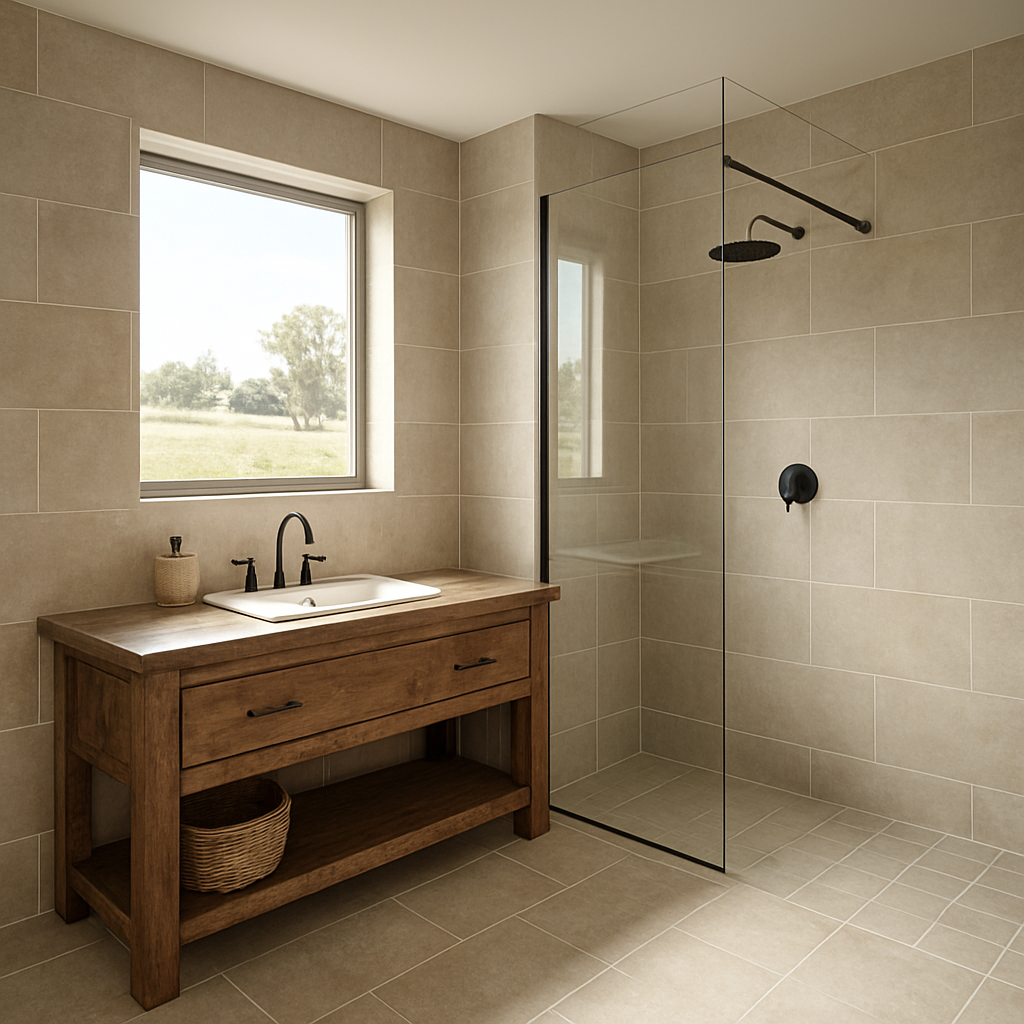
Consider the location of existing plumbing. Moving a waste line is pricey, so try to keep the toilet and shower close to where they already are. If you’re dreaming of a walk‑in shower with a low‑maintenance porcelain floor, make sure the floor slope and drainage are designed for fast drying – a crucial factor in humid rural climates.
For a deeper dive into layout considerations and material choices, check out our Bathroom Renovations Tamworth: A Practical Guide for Rural Homes. It walks you through the exact decisions we’ve helped dozens of farm families make.
Choose durable materials
Rural life throws a lot at your walls and floors: dust, humidity, and the occasional stray dog. Porcelain tiles, fibre‑cement wall panels, and water‑resistant paint are the go‑to picks for us. They won’t crack when the temperature swings from scorching summer to frosty winter nights.
If you need a reliable source for heavy‑duty paving or outdoor‑style flooring that can double up inside the bathroom, have a look at Texas Pavers Outdoor Living. Their product range includes low‑maintenance options that hold up under farm conditions.
Visualise the finished space
Seeing the end result before you start can keep you motivated. Below is a quick video that walks you through a typical rural bathroom makeover – from demo to the final polish.
Take notes on the finishes you like – the colour of the grout, the style of the vanity, even the type of lighting that doesn’t glare when you’re wiping the mirror after a rainy day.
Once you’ve nailed down the design, create a simple checklist: permits required? (Most NSW council jobs need a development application for major plumbing changes.) Suppliers confirmed? Timeline locked in? With that list in hand, you’ve turned a vague idea into a concrete plan that a builder can follow without endless back‑and‑forth.
Remember, the goal isn’t just a pretty bathroom; it’s a functional space that survives the rigours of farm life and saves you time each morning. When you walk into your new bathroom and it feels like you’ve stepped into a fresh‑aired outback oasis, you’ll know the planning paid off.
Step 2: Choosing Materials That Suit Rural Living
Alright, you’ve nailed the planning part, so now it’s time to talk about what actually goes into the walls, floor and fixtures. In a country bathroom, the right materials can mean the difference between a space that lasts ten years and one that needs a second renovation before the next season’s shearing.
First off, think about the climate swings you deal with out here in Tamworth – scorching summers, frosty winter nights, and the occasional heavy rain that turns a dirt track into a mud bath. You need something that won’t crack when the temperature jumps, and that won’t absorb water like a sponge.
Flooring that dries fast
Porcelain tiles are a farm‑yard favourite for a reason. They’re denser than standard ceramic, so they resist thermal expansion and won’t chip when a tractor wheel rolls by the doorway. Look for a slip‑resistance rating of at least 0.5 – that’s the benchmark most rural councils use for wet areas. A quick‑dry, cement‑based screed underneath the tiles adds an extra layer of stability and cuts drying time to under 24 hours.
Real‑world example: the Johnson family on a 200‑acre cattle station near Gunnedah swapped their old terracotta floor for a 600×600 mm porcelain tile with a matte finish. After the first rainstorm, the floor was dry to the touch within a day, and the tiles held up when a horse’s hooves tracked mud across the doorway.
Walls that breathe
In rural bathrooms, moisture can sneak behind plaster and cause mould faster than you can say “shearing season”. A waterproof membrane on the studs, followed by a moisture‑resistant plasterboard (often called “green board”), creates a barrier that lets the wall dry out without deteriorating.
Tip: Choose a board with a built‑in vapor barrier and pair it with a high‑quality silicone sealant around the bath and shower. It’s a small extra cost that saves you a lot of headache later.
Durable fixtures for a dusty environment
Stainless‑steel taps and fittings are a no‑brainer. They won’t rust when dust from the paddock gets kicked up and settles on the sink. Look for a 304 grade – it’s the marine‑grade steel that handles humidity like a champ.
One of our clients in Moree installed a brushed‑nickel vanity with integrated towel rails. The rails have a powder‑coat finish that’s been holding up against the occasional splash of rainwater that drips in from an open window.
Storage that survives the daily grind
Farm bathrooms double as utility spaces. A solid timber vanity with a sealed finish can hold buckets, cleaning supplies and even a spare pair of boots. If you’re after something lighter, consider a metal frame cabinet with a powder‑coated finish – it won’t warp if a bucket of water is left on top.Actionable step: Measure the width of your door and the height of your ceiling, then sketch a quick storage layout. Add a “what if” column for items you might need to store (e.g., livestock‑water bucket, cleaning chemicals). This simple table keeps you from buying a vanity that’s too small or too big for the space.
Finishing touches that match the farm aesthetic
Natural stone or reclaimed timber splashbacks add a rustic charm while being easy to wipe down. If you go for stone, seal it with a UV‑resistant coating – the Tamworth sun can fade lighter colours over time.
We recently fitted a reclaimed barn‑plank splashback for a family in Narrabri. The wood was treated with a clear, water‑based sealant, and it now looks like a piece of the homestead inside the bathroom.
Quick checklist before you order
- Floor: Porcelain tile, slip‑resistant rating ≥0.5, cement‑based screed.
- Walls: Waterproof membrane + moisture‑resistant plasterboard.
- Fixtures: 304 stainless‑steel taps, powder‑coated hinges.
- Storage: Sealed timber or powder‑coated metal, sized to door clearance.
- Finishes: Sealed natural stone or reclaimed timber splashback.
- Ventilation: Exhaust fan ≥50 m³/h plus ridge vent if roof is pitched.
Once you tick those boxes, you’ll have a bathroom that can handle the dust, the humidity and the occasional muddy boot. And because Awesim’s 4×4 crew can bring all those heavy tiles and stone right to your track, you won’t need to worry about logistics eating up your budget.
Bottom line: choose materials that are tough enough for farm life, but still look good enough to make you proud when you step in after a long day in the paddock. That’s the sweet spot for successful bathroom renovations tamworth.
Step 3: Hiring a Licensed Rural Builder
Let me be straight with you: a bathroom renovation on a farm is only as solid as the hands that build it. You’ve already picked the tiles, the splashback, the vent – now you need someone who actually knows how to get those materials onto a dusty track and install them without a hitch.
In our experience, the biggest mistake is assuming any builder can handle a remote job. A licensed rural builder brings three things you can’t fake: the legal right to work, the know‑how of farm‑specific challenges, and the 4×4 rig that can haul a tub up a gravel lane.
Why does licence matter? It’s not just a piece of paper – it proves the builder meets Australian standards, carries proper insurance, and is registered with the NSW Fair Trading board. That protects you if something goes wrong, and it means the work will pass any council inspection you need for your bathroom renovations Tamworth.
Check the credentials
Start with the basics. Ask for their licence number and pop it into the NSW Fair Trading online search. Look for a valid builder’s licence (class C or higher) and confirm it’s current – licences that have lapsed are a red flag.
Next, ask for proof of insurance: public liability and workers’ compensation. A solid rural builder will hand these over without hesitation. If they’re vague, walk away.
Ask the right questions
- How many bathroom projects have you completed on farms similar to mine?
- Do you have experience with 4×4 deliveries and setting up temporary work platforms?
- Can you provide references from other Tamworth or Gunnedah clients?
- What’s your typical timeline for a full‑scale bathroom rebuild?
Those questions do two things – they weed out newbies and they give you a feel for how comfortable the builder is with the quirks of rural life, like sudden rainstorms or narrow access tracks.
Make sure they can get to you
Even the best‑trained tradespeople can’t do the job if they can’t reach the site. Ask specifically about their 4×4 capability: do they own a 4WD with a winch? Have they hauled a pre‑fabricated vanity up a steep, unsealed road before? A builder who’s already navigated the Gunnedah gravel lanes will save you days of wasted trips.
Here’s a quick way to test it – give them a realistic load list (tiles, a bathtub, a vanity) and ask how they’d plan the delivery. If they can map out a route, talk about protecting the materials from dust and mud, you’re on the right track.
Below is a short video that walks through the key things to look for when hiring a rural builder. It’s worth a watch before you pick up the phone.
After you’ve watched that, take a moment to jot down any gaps you notice in the builder’s answers. Those gaps become your negotiation points when you move to the next step.
Get a detailed quote
A proper quote should break down every cost centre – demolition, plumbing, electrical, tiling, fixtures, and the 4×4 logistics surcharge. Ask for a line‑item sheet so you can see exactly where your money is going.
- Site access fee (covers fuel, vehicle wear)
- Material delivery schedule
- Labour rates per trade
- Contingency allowance (usually 10 % for hidden water damage)
If the builder lumps everything into a single “all‑in” figure without explanation, ask for clarification. Transparency now prevents surprise invoices later.
Protect yourself with a solid contract
Once you’ve settled on a builder, lock everything in a written contract. Include milestones (demolition, rough‑in, tiling, finishing) with payment tied to each stage. Add a clause that the builder must maintain their licence and insurance throughout the project.
And don’t forget a warranty clause – a reputable rural builder will stand behind their work for at least 12 months, covering any cracks or leaks that appear after you’ve moved the livestock out of the bathroom.
Bottom line: hiring a licensed rural builder isn’t just a box‑tick; it’s the safety net that lets you focus on the excitement of a fresh, farm‑ready bathroom. Grab your notebook, run through the checklist above, and you’ll be one step closer to a renovation that lasts as long as your property itself.
Step 4: Navigating Permits & Council Regulations
You’ve nailed the design, you’ve got the builder lined up, and now the paperwork looms. It feels like the part of the renovation that makes you want to hide under the kitchen sink, but it’s actually the safety net that keeps the whole project from grinding to a halt.
In rural NSW, council rules aren’t a one‑size‑fits‑all. Your property’s distance from town, the type of drainage you’re planning, and even the heritage status of the homestead can change which forms you need to fill out.
So, where do you start? First thing’s first – pop a quick call to your local council’s planning department. In Tamworth, the council website usually lists a ‘Renovations and Additions’ pack that tells you exactly which permits apply to bathroom upgrades.
Generally you’ll need two core approvals: a Development Application (DA) if you’re moving walls, adding a new drainage line or changing the roofline, and a Building Permit for the actual construction work. The DA is the council’s way of checking your plans won’t impact neighbours or flood zones – something we’ve seen trip up a few cattle stations near Gunnedah when the new shower waste pipe ran downhill towards the paddock drainage.
If your bathroom is just a cosmetic refresh – new tiles, fixtures, paint – you may get away with a ‘Complying Development’ certificate. That’s a faster route because the council assumes you’re staying within a set of predefined limits (no structural changes, no new plumbing penetrations). But double‑check the fine print: some councils still require a minor plumbing inspection if you replace a waste line.
Here’s a quick checklist you can print out and take to the council office:
- Confirm whether a DA or Complying Development is required.
- Gather a site plan showing existing and proposed walls.
- Note all plumbing changes (new waste pipe, valve, water‑heater location).
- Attach a certified engineer’s drawing if structural work is involved.
- Pay the application fee (usually $200‑$400 for a small bathroom).
- Schedule the mandatory inspections – rough‑in, waterproofing, final.
Tip: Keep a copy of every receipt and the council’s decision letter. If anything gets disputed later, you’ll have the paperwork ready.
A common pitfall on farms is overlooking the need for a separate storm‑water permit. Because many rural properties have large surface areas, the council may ask you to demonstrate how the new bathroom’s runoff will be managed – especially if you’re installing a high‑flow shower. In practice we’ve seen a simple soak‑away pit added behind the vanity, which satisfies the council and keeps the paddock dry.
Don’t forget the plumbing side of things. Even if you’ve hired a licensed rural builder, you’ll still need a qualified plumber to stamp the plans and carry out the final inspection. A local pro like Level Plumbing Tamworth can pull the required plumbing permit and certify that the waste and water lines meet the NSW standards – and they’ll often spot issues before the council does.
Once your permits are in hand, the council will issue a ‘Construction Certificate’ (CC). That’s the green light for your builder to start digging. Keep the CC on site at all times – inspectors will ask to see it during the rough‑in and final checks. If you lose it, you’ll waste a day waiting for a replacement, and that can throw your whole timeline off.
Pro tip: schedule the council inspections around your farm’s busiest periods. If you’re in calving season or a wheat harvest, ask the inspector to come early in the morning or late afternoon when the crew can work without disrupting the herd. A little timing tweak can save you a few extra days of lost productivity.
Step 5: Cost Comparison Table for Bathroom Renovations
Alright, you’ve walked through the planning, material picks, builder vetting and permits – now the part that makes most farm owners pause: the numbers. I get it, you’re staring at a spreadsheet and wondering if you’ve just imagined a $30,000 price tag for a bathroom that could’ve been done for half that.
Here’s the good news: you don’t need a crystal ball to estimate a realistic budget. In our experience, breaking the costs into three buckets – labour, materials and logistics – gives you a clear picture and helps you spot where you can save without compromising durability.
How we slice the budget on a typical Tamworth farm bathroom
First up, labour. Rural projects usually carry a slight premium because the crew has to travel, set up a 4×4 work platform and sometimes work around livestock schedules. Expect around 30‑35 % of the total spend to go to tradespeople – plumbers, electricians, tilers and the builder’s crew.
Materials are the next big chunk. Porcelain tiles, waterproof membranes, 304‑grade stainless fixtures and a sturdy timber or metal vanity all add up. In most mid‑range renovations we see 40‑45 % of the budget eaten here.
Finally, logistics. That’s the 4×4 delivery surcharge, fuel, site protection (dust‑covers, tarps) and any unexpected access fees. On remote properties it can be 15‑20 % of the total, but it’s a cost you can’t ignore – you’ve seen how a missed delivery can stall a whole week.
Does this line up with what you’ve heard? The numbers match the national averages for bathroom upgrades – the Australian average renovation spend sits around $36,000, with budget projects under $25,000 and premium builds climbing past $50,000.
Below is a quick‑look table that compares three typical spend levels you might consider for a rural bathroom in Tamworth. Use it as a checklist when you sit down with your builder or when you’re pulling quotes.
| Renovation Level | Typical Cost (AUD) | What’s Included |
|---|---|---|
| Budget Refresh | $15,000 – $22,000 | Cosmetic updates only – new vanity, paint, basic tiles, no structural changes. Minimal 4×4 logistics. |
| Mid‑Range Upgrade | $23,000 – $40,000 | Porcelain floor, waterproof wall membrane, upgraded fixtures, modest storage, 4×4 delivery and site set‑up. |
| Premium Build | $41,000 – $55,000+ | Full layout change, custom timber vanity, high‑end fixtures, under‑floor heating, extensive 4×4 logistics, professional design services. |
Tip: keep a 10 % contingency on top of whatever range you land in. Hidden water damage, a surprise rock outcrop, or an extra vent for that summer humidity can pop up – and it’s cheaper to have the buffer than to scramble for cash mid‑project.
Now, let’s make the numbers personal. Say you own a 250‑acre cattle station near Gunnedah and you’re eyeing a mid‑range upgrade. Your bathroom is 12 m². Using the table, you’d budget roughly $30,000 – $45,000. Break it down: $17,500 for labour, $9,000 for tiles, waterproofing and fixtures, and $3,000‑$4,500 for 4×4 logistics and a small contingency.
And here’s a quick checklist to run through before you sign any quote:
- Confirm the builder’s 4×4 capability and any extra travel surcharge.
- Ask for a line‑item quote that separates labour, material and logistics.
- Verify that the quoted tiles include slip‑resistance rating ≥0.5.
- Make sure waterproofing is listed as a separate scope – it’s non‑negotiable on farms.
- Check the warranty period on fixtures – 2‑year minimum is ideal.
When you hand this table to your builder, you’ll instantly see where they’re inflating costs or where you might be able to trade down a finish without losing durability. That’s the power of a transparent cost comparison – you stay in control, and the project stays on schedule.
Remember, the goal isn’t to skimp, it’s to get the best bang for your buck while still building a bathroom that can survive a dusty spring and a wet winter. With the right numbers in front of you, you can make that decision with confidence.
Ready to plug these figures into your own spreadsheet? Grab a pen, jot down the three levels, add your contingency and you’ll have a solid budget that matches the reality of farm life. From there, it’s just a matter of picking the right builder and getting the paperwork signed.
Step 6: Finishing Touches & Ongoing Maintenance
You’ve just watched the tiles settle, the new vanity sit pretty, and the fan hum away. It feels good, right? But a bathroom that looks great today won’t stay that way unless you give it a little love after the dust settles.
Seal the deal – literal sealing
First thing’s a must: check every joint, every edge, and every splashback for a fresh bead of silicone. We always use a marine‑grade, 100 % silicone that can handle the occasional splash of rainwater that sneaks in during a storm. It might look like a tiny detail, but a missed spot can turn into mould faster than a summer storm hits the paddock.
Grab a caulking gun, run a smooth line along the base of the vanity, around the bath, and where the wall meets the floor. Then smooth it with a wet finger – that little tactile step tells you you’ve got a solid seal.
Ventilation check‑up
Remember that exhaust fan we installed? It’s not a set‑and‑forget piece of kit. Every few months give it a quick once‑over. Remove the cover, vacuum any dust, and make sure the vent grille isn’t blocked by a stray bucket or a pile of cleaning supplies.
Tip: set a reminder on your phone for the first Monday after the harvest season. That’s when the humidity spikes, and the fan will be doing the hard work of keeping the walls dry.
Floor grit test
When the grout cures, do the good‑old “wet‑hand” test. Wet a small area of the floor, step on it, and see if you feel any slip. If the coefficient of friction feels off, sprinkle a non‑slip additive into the grout mix before it fully sets. It’s a tiny step that can save a fall later on.
Hardware tightening – the silent hero
Every bolt, every screw, every hinge should be revisited after the first week of use. The vibration from daily foot traffic can loosen things faster than you think, especially on a farm where boots kick up dust and moisture.
Grab an Allen key, tighten the towel‑rail brackets, the toilet seat bolts, and the cabinet hinges. A quick quarter‑turn now prevents a wobbly shelf later.
Cleaning routine that works with farm life
We get it – you’ve got livestock, a tractor, and a never‑ending to‑do list. The bathroom isn’t the first thing on your mind after a long day. That’s why a low‑maintenance routine wins.
Use a pH‑neutral cleaner once a week. Avoid harsh chemicals that can eat away at the waterproof membrane. For the splashback, a quick squeegee after each shower wipes away mineral build‑up before it becomes a stubborn stain.
Seasonal inspections
Twice a year – once after the wet season and once after the dry season – walk the bathroom like you’re doing a property inspection. Look for any water pooling at the base of the wall, any cracks in the tile grout, and any signs of rust on the fittings.
If you spot a tiny crack, seal it immediately. The sooner you act, the cheaper the fix.
Plan for the long haul
Every bathroom renovation, even the best‑built one, will need a touch‑up every 5‑7 years. Keep the original warranty paperwork handy – most fixtures come with a two‑year guarantee, but the waterproofing membrane often carries a five‑year warranty.
When the warranty expires, schedule a professional check‑up. A quick visit from a licensed plumber or our own team can spot hidden wear before it becomes a costly repair.
Quick checklist before you call it a day
- Silicone seal around all wet edges – fresh and smooth.
- Vent fan cleaned and tested.
- Grout slip‑resistance checked.
- All hardware tightened.
- Weekly pH‑neutral clean.
- Seasonal visual inspection.
- Warranty documents filed.
Stick to this list and your bathroom will stay as sturdy as the fence posts on your property. It’s not about perfection; it’s about keeping the little things in check so the big picture – a dry, safe, and comfortable space after a hard day’s work – stays intact.
And when you’re ready for the next upgrade – maybe a new shower screen or a solar‑powered heated towel rail – you’ll already have the maintenance rhythm down. That’s the real finishing touch: a bathroom that keeps giving, season after season.
FAQ
We’ve seen a lot of questions pop up as farmers and regional homeowners move through bathroom renovations tamworth. Below are the most common concerns, answered in plain language so you can keep the project moving without a headache.
How long do bathroom renovations tamworth typically take from start to finish?
In most rural projects we’re looking at 3‑4 weeks for a straightforward refresh – demolition, plumbing rough‑in, tiling, and finishing. If you’re re‑configuring the layout, adding a new waste line, or waiting on a 4×4 delivery, give yourself 5‑7 weeks. The biggest delays usually come from weather‑related access issues, so building a little buffer into the schedule helps avoid surprises. A clear timeline also lets you coordinate with farm chores and avoid clashing with peak harvest periods.
What are the most important waterproofing steps for a rural bathroom in Tamworth?
First, install a liquid‑applied membrane on all studs and behind the shower base – it creates a continuous barrier that stops water from seeping into the wall cavity. Second, use a “green board” plasterboard with an integrated vapor barrier for the wet walls, then tape and seal every joint with a marine‑grade silicone. Finally, run a bead of silicone around the tub, basin, and any pipe penetrations; this tiny step saves you from costly mould later.
How can I keep costs under control during bathroom renovations tamworth?
Start with a detailed line‑item quote that separates labour, material, and 4×4 logistics. Stick to the slip‑resistance rating you need (≥0.5) and avoid “premium” finishes that don’t add durability. Re‑use existing plumbing where possible and choose standard‑size fixtures – they’re cheaper and easier for a rural builder to fit. Finally, schedule deliveries during a dry spell to prevent weather‑related hold‑ups that can add extra hire charges.
Do I need a permit for bathroom renovations tamworth and how do I get one?
Yes, most structural changes – moving walls, adding a new waste pipe, or altering the roofline – require a Development Application from the Tamworth City Council. For a simple cosmetic update you can usually go through the “Complying Development” route, which is faster and cheaper. The easiest way is to call the council’s planning desk, ask for the bathroom‑renovation pack, and submit the plans with a certified engineer’s drawing if you’re touching any load‑bearing elements.
What fixtures work best for farm homes with dusty conditions?
Stainless‑steel, especially 304‑grade, is the go‑to because it won’t rust when dust settles on the surface. Choose brushed‑nickel or matte black finishes – they hide fingerprints and dust better than glossy chrome. For taps, look for ceramic‑disc cartridges; they provide a smooth, leak‑free flow and need less frequent cleaning. And don’t forget a high‑capacity exhaust fan; a 50 m³/h unit keeps the air moving and reduces the amount of dust that settles on the fixtures.
How often should I schedule maintenance after my bathroom renovation is complete?
We recommend a quick visual check after the first week of use, then again after the wet season and the dry season – basically twice a year. During each visit, look for cracked grout, loosened hardware, and any water pooling at the base of the wall. Re‑apply silicone where the seal looks thin, tighten any screws, and run the exhaust fan for at least 15 minutes after each shower to keep the moisture level low.
Conclusion
So you’ve walked through the flooring, the walls, the fixtures, the paperwork and the final polish – all for a bathroom that can survive a dusty spring, a wet winter and a tired pair of boots. If any part of that journey felt overwhelming, you’re not alone; most farm owners hit the same snags.
What matters most is keeping the basics top‑of‑mind: choose slip‑resistant porcelain, seal every joint with marine‑grade silicone, and make sure your 4×4‑ready builder has a valid licence and insurance. Those three steps alone cut down future headaches faster than any fancy finish.
And remember, a solid plan doesn’t end when the tiles are set. A quick visual check after the first week, a seasonal inspection after the wet and dry seasons, and a quarterly tighten‑up of hardware keep your bathroom humming year after year.
Does this sound doable? Absolutely. Grab a notebook, jot down the checklist we’ve outlined, and give a trusted rural contractor—like Awesim Building Contractors—a call to confirm they can roll a 4×4 rig into your driveway.
When you finish, you’ll walk into a space that feels as sturdy as the fence posts on your property and as comfortable as a cold drink after a long day in the paddock. That’s the real payoff of well‑planned bathroom renovations tamworth.


