

Ever stood on a dusty farm track, looking at the empty footprint where your new shed will sit, and wondered if the slab underneath will hold up for the next decade?
You’re not alone – the right concrete slab thickness for shed projects can feel like a guessing game, especially when the ground is a mix of red‑soil and hardpan.
In our experience, a one‑metre‑wide, 2.4‑metre‑long shed on a typical New South Wales farm needs a slab that’s at least 100 mm thick if the soil is well‑compacted, but that jumps to 150 mm when you’re dealing with looser, wetter ground.
Why does that extra 50 mm matter? Think of it like a pair of sturdy boots – the thicker the sole, the better the support on uneven terrain, and the less likely you’ll get a crack that spreads into a costly repair.
Most rural building codes in NSW set a minimum of 100 mm for light‑duty sheds, but they also require you to factor in the load – whether you’re storing feed bags, a tractor, or heavy livestock equipment.
A quick rule of thumb we teach our clients: add 25 mm for every additional 500 kg of static load you expect on the slab. So a shed that will hold a 2‑tonne combine harvester needs roughly 150‑160 mm.
Don’t forget the base preparation – a well‑leveled, compacted sub‑grade and a 25 mm‑wide sand or crushed rock blanket can make a 100 mm slab perform like a 125 mm one, especially after a wet winter.
If you’re unsure about your soil’s bearing capacity, a simple field test – using a 1‑metre square plate and a few kilos of weight – will give you a ballpark figure before we even pour concrete.
Bottom line: getting the concrete slab thickness for shed right the first time saves you time, money, and a lot of headaches when the rains come and the ground swells.
TL;DR
Choosing the right concrete slab thickness for shed ensures your farm building stays sturdy through wet winters, heavy equipment, and the inevitable settling of rural soils. Add 25 mm for each extra 500 kg load, prep a compacted base, and you’ll avoid costly cracks, keeping your shed functional on site for years.
Step 1: Assess load requirements and shed usage
First thing’s first – you need to know what’s actually going to sit on that slab. It’s tempting to just eyeball the shed dimensions and call it a day, but the truth is the concrete slab thickness for shed projects hinges on the heaviest thing you’ll ever park there.
Picture this: you’ve just finished loading a 2‑tonne combine onto the shed floor, the wheels thump down, and a few weeks later you notice a hairline crack spreading from the corner. That little crack? It’s a classic symptom of an underestimated load.
So, grab a notebook and write down every piece of equipment, storage load, and even seasonal items (like feed bags that get piled up in winter). Include the weight of any future upgrades – maybe you’ll add a solar array or a water tank down the line.
Step‑by‑step load tally
1. List every static load (tractor, feed bags, livestock equipment).
2. Estimate the weight of each item. If you’re not sure, a quick Google search or the manufacturer’s spec sheet will do.
3. Add up the totals – this is your baseline load.
In our experience working across Tamworth, Armidale, and the far‑west, the rule of thumb that saves most farmers money is simple: start with a 100 mm slab for light‑duty sheds, then add 25 mm for every extra 500 kg of static load.
Let’s run a quick example. You’ve got a 1.5‑metre‑wide, 3‑metre‑long shed. You plan to store:
- Two 600 kg feed bags (1,200 kg)
- A 750 kg small tractor
- A 300 kg set of tools and spare parts
Total static load = 2,250 kg. That’s 4.5 increments of 500 kg, so you’d add roughly 125 mm (4 × 25 mm = 100 mm, plus a half increment). Round up to 130 mm for safety, then you’re looking at a slab around 130–150 mm thick.
But don’t stop at numbers. Soil type plays a massive role. On a well‑compacted red‑soil, the slab will behave differently than on a looser, wetter clay. A quick field test – lay a 1‑metre square plate, load it with a few kilos, and watch for any noticeable settlement. If the plate sinks more than a few millimetres, you’re probably dealing with lower bearing capacity and should bump the thickness a bit more.
And here’s a little secret most DIY guides skip: a 25 mm sand or crushed‑rock blanket beneath the concrete can give you a performance boost equivalent to adding another 15 mm of slab thickness. It’s a cheap trick that pays off when the next big rain hits.
Now that you’ve got a solid load figure, it’s time to think about how the shed will actually be used day‑to‑day. Will livestock be moved in and out? Are you planning regular heavy equipment manoeuvres? Each of those activities adds dynamic stress that a static calculation alone can’t capture.
Dynamic loads are a bit trickier, but a good rule of thumb is to add another 10‑15 mm to your slab thickness if you expect frequent heavy vehicle traffic. It’s a small increase that dramatically improves fatigue resistance.
Finally, document everything. A simple spreadsheet with columns for “Item”, “Weight (kg)”, “Static/Dynamic”, and “Added Thickness (mm)” becomes a reference you can hand to the crew when the concrete arrives. It also helps when you discuss the project with a rural builder – they’ll appreciate the clarity and you’ll avoid any surprise upsells.
When you walk the site after the slab is poured, run a hand over the surface. It should feel solid, with no soft spots. If you spot any unevenness, flag it immediately – it’s cheaper to fix before the concrete cures fully.
Step 2: Determine soil bearing capacity and frost depth
Before you even think about mixing concrete, you need to ask yourself: can the ground under your shed actually hold the weight you’re planning to put on it? In rural NSW the answer isn’t always “yes” – soil can range from firm red‑soil on a hilltop to soft, water‑logged clay in a low‑lying paddock.
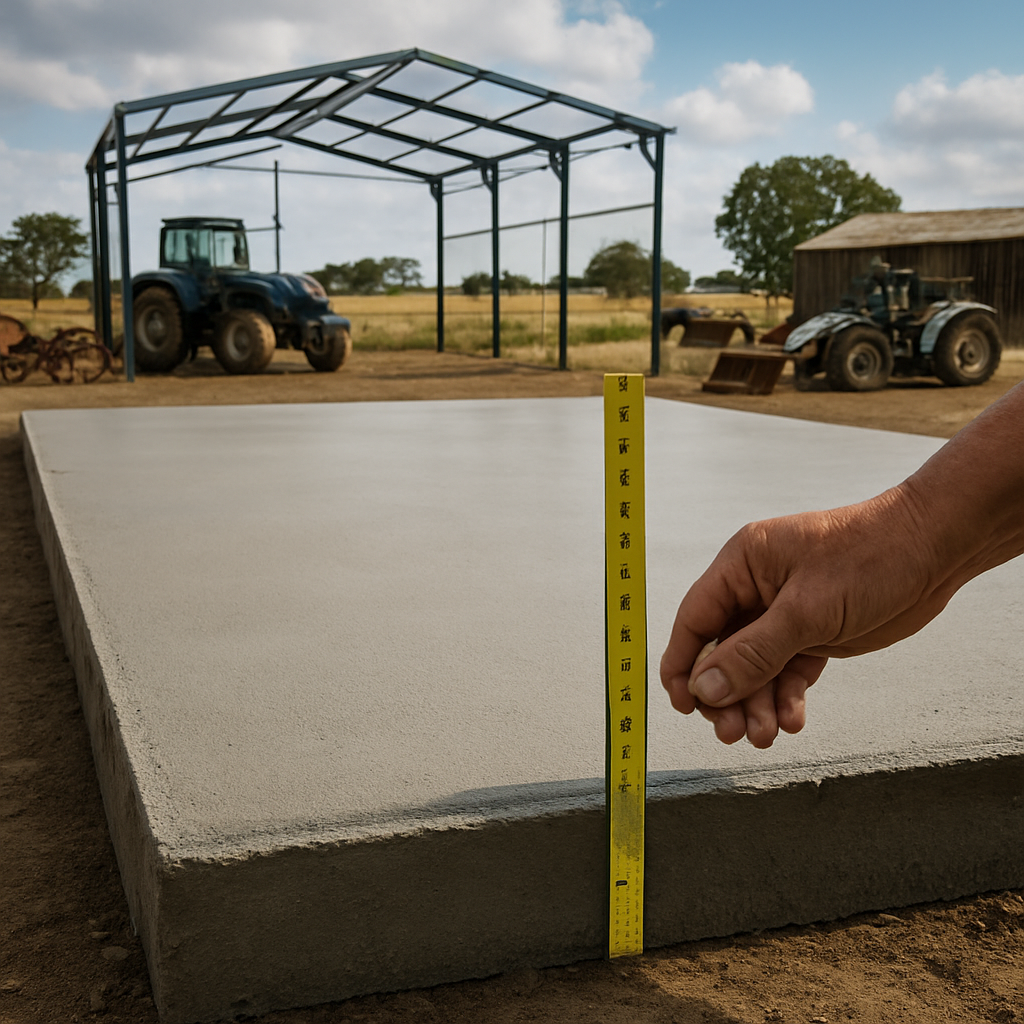
What we do at Awesim is start with a quick on‑site bearing‑capacity test. Grab a sturdy 1 m² steel plate (or a piece of plywood if you’re DIY‑ing), place it on the prepared sub‑grade, and load it with a known weight – a 50 kg bag of cement works well. Then measure how far the plate sinks. If the settlement is less than 3 mm you’re in the clear for a standard 100 mm concrete slab thickness. Anything more than that means you either need a thicker slab, a stronger base, or both.
How to run the test step‑by‑step
- Level the area and compact the sub‑grade to at least 95 % Proctor density.
- Lay the 1 m² plate and mark the corners.
- Place a 50 kg bag (or a small sandbag) in the centre and let it sit for 5 minutes.
- Use a ruler or a depth gauge to record the vertical movement.
- Repeat in two more spots around the footprint and average the readings.
That simple test gives you a ballpark figure of the soil’s bearing capacity, which for most farm sheds in the New England region should be around 150 kPa or higher. If you’re dealing with heavy equipment – a 2‑tonne tractor for example – aim for at least 200 kPa. The Building Institute’s guide notes that “a thickness of 100 mm is generally adequate for lightweight garden sheds, but thicker slabs (150 mm‑200 mm) are advisable for heavier loads” and backs that up with standard engineering tables.
Next up: frost depth. Even though much of NSW enjoys mild winters, the higher‑altitude spots around Armidale and Glen Innes can see the ground freeze to 300 mm or more. If the slab sits above the frost line, freeze‑thaw cycles will push the soil upward, causing the slab to heave and crack.
How do you find your local frost line? A quick call to your shire council will give you the design frost depth for the area. Alternatively, look at historic weather data – a rule of thumb is that a region with a minimum winter temperature below –2 °C usually needs a frost depth of about 300 mm. The Australian standards for frost depth also remind us that “in regions with freeze‑thaw cycles, deeper sections (at least below the frost line of about 300 mm in colder climates) may be necessary to prevent heaving.”
Adjusting concrete slab thickness based on the results
Combine the bearing‑capacity reading with the frost‑depth requirement and you have a clear formula:
Base thickness = 100 mm (minimum for light sheds) + 25 mm for every 50 kPa your soil falls short of the target + 25 mm for each 100 mm you need to go below the frost line.
For example, a farmer in Moree measures 4 mm settlement (≈180 kPa) – that’s 20 kPa shy of the 200 kPa goal for a tractor‑heavy shed. Add 10 mm. The frost depth there is only 150 mm, so no extra depth is needed. The final recommendation: a 130 mm concrete slab thickness, plus a 50 mm compacted gravel base and a 25 mm sand blanket.
In contrast, a cattle station near Glen Innes records 7 mm settlement (≈120 kPa) and a frost depth of 350 mm. That’s 80 kPa under the 200 kPa target (add 40 mm) and you need to go at least 200 mm below ground (add 200 mm). Result: a 340 mm slab – in practice you’d likely pour a 300 mm slab with a 100 mm sand‑crushed‑rock base to hit the required depth while keeping concrete costs reasonable.
Field‑tested tips you can start using today
- Always add a 25 mm‑wide sand or crushed‑rock blanket – it spreads point loads and improves drainage.
- Use a moisture‑resistant damp‑proof membrane over the sub‑base to stop upward water migration, which can weaken the slab in freeze‑thaw cycles.
- If your soil is high‑clay, blend in 10 % coarse sand during compaction to break up the shrink‑swelling cycle.
- Consider a low‑shrink concrete mix (20 MPa or higher) – it’s more forgiving if the ground moves a bit.
- Mark the slab outline with spray paint and a string line before you pour; it helps you keep the slab level even on a slight slope.
Bottom line: a solid understanding of both bearing capacity and frost depth lets you size the concrete slab thickness for shed projects with confidence. It saves you from surprise cracks after the first heavy rain or the first frosty night, and it means you’re not over‑building – every centimetre of concrete you add is a cost you actually need.
Step 3: Choose slab thickness based on shed size and purpose
Alright, you’ve already sized the load and checked the soil – now it’s time to match the slab thickness to the actual footprint and what you’ll be doing inside the shed. Think of it like picking the right pair of boots: a small garden tool shed needs something light, but a livestock‑handling shed or a feed‑store with a water tank deserves a sturdier sole.
1. Measure the shed’s dimensions first
Grab a tape measure, walk the perimeter and write down the length and width in metres. For most farm sheds we see three size buckets:
- Mini‑shed: up to 2 m × 3 m (e.g., a tool crib or a small workshop)
- Standard shed: 3 m × 6 m to 4 m × 8 m (typical feed‑store or equipment bay)
- Large utility shed: 5 m × 10 m or bigger (tractor bays, cattle‑handling pads, or combined workshop‑storage)
Why does the footprint matter? Bigger slabs spread the load over a larger area, which can let you trim a few millimetres off the thickness if the soil is good. Conversely, a compact shed on soft clay will need extra depth to avoid “pudding‑like” flex under a single heavy point load.
2. Align thickness with purpose
Ask yourself what the shed will actually host. Here are three real‑world scenarios we’ve seen across the New England region:
| Use Case | Typical Size | Recommended Thickness |
|---|---|---|
| Tool & seed storage (light loads) | 2 m × 3 m | 100 mm – 120 mm |
| Feed‑bag rack + water tank (moderate static load) | 3 m × 6 m | 130 mm – 150 mm |
| Tractor bay + livestock handling (heavy dynamic loads) | 5 m × 10 m | 180 mm – 220 mm |
Notice the jump from 120 mm to 150 mm once you cross the 500 kg‑plus threshold. That’s the same 25 mm rule we mentioned earlier, but now it’s tied directly to the shed’s purpose.
3. Factor in point‑load equipment
If you’ll be parking a 2‑tonne tractor directly on the slab, add a dedicated 25 mm “extra” layer for each wheel’s contact patch. In practice we recommend a 150 mm base plus a 25 mm reinforced strip (using steel‑rebar or mesh) under each wheel bay. This approach spreads the stress and keeps the rest of the slab at a lower, cost‑effective thickness.
Here’s a quick checklist you can run on site:
- List every piece of equipment and its weight.
- Identify which items are static (always there) vs. mobile (rolling).
- Apply 25 mm for every 500 kg of static load beyond the base 100 mm.
- Add an extra 25 mm for each set of wheels that will sit on the slab.
- Cross‑check against the table above for a sanity‑check on size versus purpose.
4. Adjust for local climate quirks
In the high‑altitude parts of Armidale, frost can push the ground up 300 mm. If your shed sits on a slope, you’ll want the slab to dip below that frost line – typically another 25 mm for every 100 mm of depth you need to go. For a 4 m × 6 m shed in a frost‑prone area, we often end up with a 200 mm slab on top of a 100 mm compacted gravel base.
When the season swings to heavy summer rains, a well‑graded sand blanket (25 mm) acts like a “shock absorber” for the concrete. That’s why you’ll see us always pairing the slab with a moisture‑resistant damp‑proof membrane – it stops water from wicking up and causing freeze‑thaw damage later.
5. Real‑world tip from the field
One of our clients in Moree wanted a 3 m × 5 m shed to store both a 1.2‑tonne ute and a 2 000‑litre water tank. We calculated 165 mm of concrete, but the soil was a soft, loamy mix that settled 5 mm in our plate test. We bumped the slab to 190 mm and added a 50 mm crushed‑rock base. The result? No cracks after two wet winters and the tank sits perfectly level.
Another example: a cattle‑handling shed near Glen Innes, 6 m × 10 m, with a built‑in feed‑mixing station weighing 800 kg. We went with a 210 mm slab, reinforced with a 12 mm steel mesh grid, and placed 30 mm of sand under the mixing station’s footings. Six months later, the concrete still looks brand new.
6. When to call in the pros
If the math starts to look messy – say you have a mixed‑use shed with both heavy equipment and a future solar‑panel array – it’s worth a quick on‑site chat with us. We can run a more precise bearing‑capacity test, tweak the slab depth, and even suggest a post‑tensioned slab if you’re pushing the limits. Concrete Slabs for Rural Properties | Awesim Building Contractors has a full rundown of the options.
And don’t forget about safe storage for any concrete additives or sealants you’ll use on the job. A reliable supplier like Adesatos offers specialised containers that keep chemicals secure on remote sites.
Bottom line: match the slab thickness to the shed’s footprint, the loads you’ll place on it, and the local climate. Follow the checklist, use the table as a quick reference, and you’ll end up with a slab that feels as solid as a well‑built fence post – no surprise cracks, no wasted concrete, just a shed that does its job for years to come.
Step 4: Prepare the site and pour the concrete
Alright, you’ve nailed the load calculations and know exactly how thick your concrete slab needs to be. Now it’s time to roll up the sleeves, get the ground ready, and actually pour the slab – the part where the magic (and the mess) happens.
Clear the footprint
First thing’s first: strip the area of anything that could get in the way. Think weeds, rocks, old fence posts, or that abandoned wheelbarrow you never got around to fixing. A clean canvas makes it easier to see level changes and prevents unwanted voids under the slab.
Tip: walk the perimeter with a flat piece of timber. If you spot any high spots, flag them with spray paint – you’ll be coming back to those later.
Excavate to the right depth
How deep should you dig? A good rule of thumb is the concrete thickness plus at least 100 mm of sub‑base material. So, if you’re pouring a 150 mm slab, aim for a total depth of about 250 mm (150 mm concrete + 100 mm crusher‑dust or gravel). This gives the slab room to sit on a stable base and helps with drainage.
We often recommend a mini‑excavator for anything larger than a 3 m × 3 m shed – they dig straight down and give you a flat, even pit. If you’re on a tighter budget, a mini loader with a ripper attachment can do the job, but it may take a few extra passes to get a uniform depth.Master Hire’s guide to digging a shed slab breaks down the pros and cons of each machine.
Build a solid sub‑base
Once you’ve reached the target depth, spread a 100 mm layer of compacted crusher‑dust or well‑graded gravel. This layer does three things: it evens out minor dips, it provides a drainage pathway, and it prevents the soil from sucking moisture up into the concrete.
Use a plate compactor – the kind with a vibrating plate – and make at least three passes, overlapping each pass by half the plate width. You’ll hear a satisfying thump when the material feels truly solid.
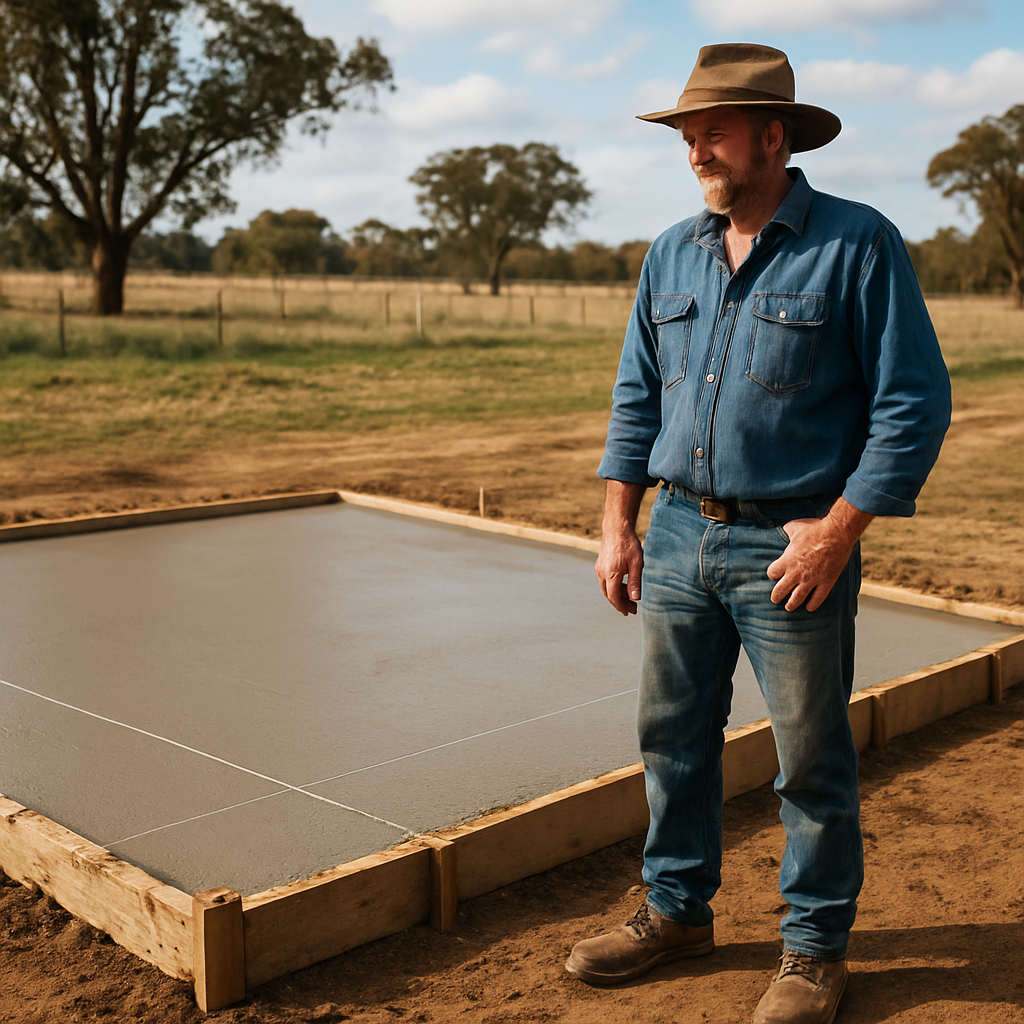
Set up the formwork
Formwork is the wooden (or steel) frame that holds the concrete in place while it cures. Measure the exact dimensions of your shed footprint, cut straight 90 mm timber to size, and screw the pieces together at the corners. Make sure the inside edges are perfectly square – a quick diagonal check will tell you if the corners are true.
Brace the forms with 2 × 4 stakes driven into the ground every 600 mm. Then, use a spirit level or a laser level to confirm the top of the forms are level from end to end. A level slab means you won’t have a wonky floor later on.
Lay reinforcement
Even if you’re only going for a 100 mm slab, a 12 mm steel mesh or rebar grid adds tensile strength and helps control cracking. Position the mesh on top of the sub‑base, leaving a 25 mm gap between the mesh and the ground – this ensures the concrete fully encases the reinforcement.
Secure the mesh with wire ties at each intersection. If you’re dealing with heavy point loads (like a tractor wheel), consider a double layer of mesh under those wheel bays.
Mix, pour, and finish
When the mix arrives, give it a quick stir to eliminate any settlement that may have occurred during transport. Pour the concrete starting at one corner and work your way across, using a shovel to push the mix into the corners and a screed board to level it off.
Don’t rush the screeding – a slow, steady push will pull the concrete to the top of the form and eliminate air pockets. Once the surface is even, use a bull float to smooth out any lines left by the screed.
For the final finish, a steel trowel or a power trowel will give you a flat, hard‑wearing surface. If you plan to place a shed floor covering later, a light broom finish can add a bit of slip resistance.
Curing – the secret to durability
Concrete doesn’t just harden on its own; it needs moisture to cure properly. Cover the slab with a plastic sheet or a curing blanket for at least 48 hours, then keep it damp for the next week if the weather’s hot and dry.
Remember, the stronger the cure, the less likely you’ll see cracks when the first rain hits.
So, what should you do next? Grab a cup of tea, double‑check your formwork, and get ready to pour. With a well‑prepped site and a careful pour, your concrete slab thickness for shed will hold up for years to come.
Bottom line: preparation is half the battle. Clear, level, compact, reinforce, and cure – repeat those steps and you’ll walk onto a slab that feels as solid as a farm fence post.
Ready to see the finished slab in action? Keep an eye on the next step where we walk you through post‑pour inspections and the first load test.
Step 5: Cure, finish and inspect the slab
Now that the concrete is in place, the real secret to a slab that lasts decades is what you do next.
Curing might sound like a fancy term, but it’s just keeping the slab moist long enough for the chemistry to finish.
Grab a large sheet of 0.2 mm polyethylene or a commercial curing blanket and drape it over the whole surface right after the final screed.
Why does that matter? Without that moisture barrier the top layer can dry out too fast, leading to surface cracks that spread down into the slab.
We always recommend at least 48 hours of continuous cover, even if the sky looks clear.
If you’re in a hot, dry stretch of the New England region, add a second layer of damp‑proof membrane underneath the sheet, or mist the slab a few times a day.
After the first two days, you don’t have to keep the plastic on forever – just keep the slab damp for the next five to seven days.
A simple way is to sprinkle water with a hose or use a fine‑mist sprayer, making sure you’re not creating puddles but just a light sheen.
Think of it like tending a newborn calf: you’ve got to keep it hydrated until it’s strong enough to stand on its own.
Now, onto the finish. The look you choose depends on how you’ll use the shed floor.
If you plan to roll heavy equipment across it, a smooth, dense finish from a steel trowel gives the best wear resistance.
If you’ll be walking in boots or storing feed bags, a light broom finish adds a bit of slip resistance without sacrificing durability.
Here’s a quick finish checklist:
- Start with a bull float right after screeding to level the surface.
- Let the concrete set for about 30 minutes, then pull the float across once more to close micro‑holes.
- When the surface holds a fingernail imprint, move on to a steel trowel for a smooth finish or a broom for texture.
- Edge the slab with a wood float to round off the perimeter and prevent chipping.
- Clean any bleed water with a damp sponge before it dries to avoid dust spots.
Once the surface is level, let it set for about 30 minutes, then pull the float across once more to close any micro‑holes.
When the concrete is firm enough to hold a fingernail imprint, move on to the trowel or broom.
Now the inspection phase – this is where you catch anything before the slab hardens completely.
First, walk the slab with a straight 2 m level board; any high spots will show as gaps underneath.
Second, use a steel ruler or a straightedge to check for surface depressions deeper than 3 mm – those are potential water‑traps.
Third, look for surface cracks. Hairline cracks are normal, but if you see anything wider than 0.3 mm, it’s worth sealing immediately with a concrete crack filler.
Don’t forget to check the edges where the formwork was removed – the joint should be smooth, not jagged.
A quick tip: run a piece of 2 mm thick metal flashing along the perimeter; if it catches on a high spot, sand it down before the cure finishes.
Finally, mark the slab with a permanent reference point – a small steel tag or a painted dot – so you have a benchmark for future inspections.
Why is that useful? Years down the line you can measure any settlement against that original reference and know if the slab is moving.
If you spot movement beyond a few millimetres, it’s often a sign of ground heave or insufficient base compaction, and you might need a specialist to assess.
Remember, the concrete slab thickness for shed you chose – whether 100 mm, 150 mm or more – only performs as well as the cure, finish, and inspection you give it.
A common mistake we see on farms is skipping the extended damp period because the weather looks fine; the slab looks dry, but a few weeks later the cracks appear when a heavy rain hits.
So, to keep your shed floor solid for the next ten years, stick to this post‑pour routine: 48 hours covered, keep damp for a week, finish appropriately, and run a thorough inspection before the cure is complete.
And if you ever feel unsure, give us a call – we’ve helped dozens of growers across Tamworth, Moree and Inverell keep their concrete slabs crack‑free.
Conclusion
We’ve taken you from the first load‑list on the farm to the final inspection of a crack‑free floor, all with one goal in mind: a concrete slab thickness for shed that stands up to NSW weather and heavy equipment.
Remember, the right thickness is the foundation of every future repair you avoid – a few extra millimetres now save you a day’s downtime and a bag of repair costs later.
In practice you’ll: assess every load, test the bearing capacity, add the 25 mm increments for weight and frost, prep a compacted sub‑base, pour, cure for at least 48 hours, then run a level board check before the concrete sets.
One habit we swear by is marking a permanent reference point on the cured slab. A simple steel tag or painted dot lets you spot settlement years down the line before it becomes a problem.
If any of those steps feel fuzzy, grab a notebook, measure your shed footprint, and give us a call. We’ll swing by, run a quick plate test, and confirm the exact concrete slab thickness for shed you need.
That’s the peace of mind every farmer deserves – a solid floor, a solid plan, and a partner who knows the land.
FAQ
What concrete slab thickness for shed is ideal for a small tool shed?
For a lightweight tool or seed‑storage shed you’ll usually be fine with a 100 mm‑120 mm slab. The key is a solid, well‑compacted sub‑base and a bit of reinforcement – a 12 mm mesh works nicely. If your soil is firm red‑soil and you’re not planning to park any heavy machinery on it, those dimensions give you a floor that won’t flex under a few bags of seed. And because the slab is thin, you’ll save on material and pour time.
How do I know if my soil needs a thicker slab?
Do a simple plate test: place a 1 m² steel plate on the prepared sub‑grade, load it with a 50 kg bag of cement, and measure settlement after five minutes. If it sinks less than 3 mm you’re in the clear for the base 100 mm slab. Anything more suggests the soil is soft or prone to swelling, so add 25 mm for every 50 kPa you fall short of the 150 kPa target. In practice that often means bumping the slab to 150 mm or more.
Can I adjust slab thickness after the pour?
Once the concrete has set, you can’t really “add” thickness without breaking the existing floor. What you can do is apply a bonded overlay – a thin (30‑40 mm) concrete topping that’s glued to the cured slab with a bonding agent. It’s a good rescue if you discover you need extra strength after the fact, but it adds cost and prep time. The safest route is to get the thickness right the first time, using the load and soil data we discussed.
What reinforcement works best with different slab thicknesses?
For slabs up to 130 mm, a single layer of 12 mm welded wire mesh spaced at 150 mm is plenty. When you step into the 150 mm‑220 mm range – think tractor bays or livestock handling pads – we like to double up: a mesh layer plus a 10 mm rebar grid at 200 mm centres. And for anything over 250 mm, especially where point loads hit the same spot repeatedly, a combination of #4 rebar in the wheel bays and mesh throughout the slab gives the best crack‑control.
How does frost depth affect the concrete slab thickness for shed?
Even though much of NSW has mild winters, high‑altitude spots like Armidale can see the ground freeze 300 mm deep. If your slab sits above the frost line, freeze‑thaw cycles push the soil up and can crack a thin slab. The rule of thumb is to extend the slab (or at least the base concrete) at least 25 mm for every 100 mm you need to go below the frost line. So a 200 mm frost depth usually means a minimum 225 mm concrete thickness, plus a well‑compacted gravel base.
Is a 25 mm increase really necessary for every 500 kg of load?
In our experience that 25 mm rule of thumb works like a safety valve. The extra centimetre spreads point loads and gives the concrete more room to absorb stress without cracking. If you’re only adding a few feed bags (say 200 kg) you could get away with a slightly thinner slab, but the margin is thin and farms love a little over‑engineering. It’s a cheap insurance policy – a few extra millimetres now saves you a whole slab replacement later.
What maintenance steps keep my slab from cracking over time?
First, mark a permanent reference point on the cured slab – a steel tag or painted dot – so you can spot settlement early. Second, keep the surrounding ground well‑drained; a simple French drain or a sloping perimeter prevents water from pooling and pushing the slab up. Third, avoid sudden heavy loads right after a rainstorm – let the soil dry a bit before parking a tractor. Finally, an annual visual check for hairline cracks and a quick sealant touch‑up will extend the life of any concrete slab thickness for shed you’ve built.
Common Mistakes to Avoid
Skipping the Soil Test
It’s tempting to eyeball the ground and say, “looks firm enough”. But without a proper bearing‑capacity test you’re guessing. We’ve seen a farmer in Moree pour a 120 mm slab, only to watch it flex under a 2‑tonne tractor a few weeks later. The soil settled 8 mm in the plate test – a clear sign they needed an extra 25‑30 mm of concrete and a better sub‑base.
Action step: do the 1 m² plate test (50 kg bag, 5‑minute wait) and record settlement. If it exceeds 3 mm, add 25 mm for every 50 kPa you’re short of the 150 kPa target.
Under‑estimating Frost‑Heave
Even in milder NSW zones, frost can push the soil up 200‑300 mm. A common slip‑up is pouring the slab right at the surface, assuming the frost line won’t matter. In Glen Innes a 180 mm slab cracked after the first winter because the base sat just 50 mm above the frost depth.
Fix it: check your local frost line (shire council or historic data) and add 25 mm of concrete for every 100 mm you need to go below it. That extra depth can be the difference between a solid floor and a cracked mess.
Forgettting the Sand Blanket
Many DIYers think a plain gravel base is enough. In reality, a 25 mm sand or crushed‑rock blanket spreads point loads and improves drainage. One of our clients in Tamworth skipped it, and after a heavy rain the slab developed hairline cracks around the feed‑bag rack.
Simple fix: lay a uniform 25 mm sand layer on top of the compacted sub‑base before you pour. It’s cheap, quick, and works like a shock absorber.
Wrong Reinforcement Strategy
Using a single layer of 12 mm mesh for a 200 mm slab that will hold a tractor is a recipe for early cracking. We’ve watched a 150 mm slab in Inverell split along the mesh lines after just a few months of heavy wheel traffic.
What to do: double‑up the mesh or add #4 rebar under each wheel bay. The extra tensile strength keeps the concrete from pulling apart when the wheels flex the slab.
Rushing the Cure
Concrete needs moisture to gain strength, but a lot of farmers pull the plastic sheet off after 24 hours to get the job done fast. The result? Surface cracks that later widen with rain.
Pro tip: keep the slab covered for at least 48 hours, then mist it lightly for a week if the weather’s hot. The extra curing time can boost strength by up to 10 % according to Australian builders guidelines.
Neglecting the Edge Finish
Most people focus on the centre of the slab and forget the perimeter. Sharp edges chip easily, letting water seep in and freeze.
Easy fix: round off the edges with a wood float and apply a thin sealant strip along the joint. It adds a few extra minutes but saves you a costly repair later.
Not Planning for Future Loads
Farm operations change – today you might store a feed bag, tomorrow you add a water tank. Building the slab for today’s load only can leave you scrambling when the next upgrade arrives.
Checklist: list current equipment, add a 25 mm increment for each anticipated future load, and factor that into your slab thickness now. It’s cheaper to over‑engineer a bit than to pour a new slab next season.


2 Comments