

Picture this: you’re standing on the dusty edge of your property, the old shed roof sagging, the kitchen floor creaking, and you wonder if it’s time to call in a farm renovation builder nsw.
That moment of realisation hits every farmer in Tamworth, Dubbo or Armidale – you love the land, but the buildings are starting to feel like a liability instead of a asset.
I’m Glen, and after 35 years swinging a hammer across the outback, I’ve learned that a solid renovation isn’t just about new timber or fresh paint; it’s about keeping your day‑to‑day life running while the walls go up.
So, what does a farm renovation builder nsw actually do? We start by listening to the stories you tell about your daily routine – the early‑morning milking, the late‑night stock checks, the family meals in a kitchen that’s seen better days. From there we map out a plan that fits your budget, your schedule and the quirks of rural NSW weather.
Think about it this way: a renovation is like a well‑timed rainstorm. Too much at once and you drown in chaos; too little and you’re stuck forever. The trick is pacing the work, ordering materials early, and coordinating with local councils for permits before the first spade hits the ground.
And here’s a little secret most city‑based builders won’t tell you – we know the back‑roads, the soil types, the best times to pour concrete in Gunnedah, and the right kind of rust‑proof hardware for a cattle‑heavy yard.
That’s why a specialised farm renovation builder nsw can save you time, money and a heap of headaches. You’ll end up with a stronger shed for your machinery, a kitchen that can handle a Saturday barbie, and a homestead that feels safe enough to welcome guests.
Ready to turn that sagging roof into a sturdy shelter? Let’s dive in and explore the steps you need to take, from budgeting to choosing the right contractor, so you can get back to the work you love without worrying about the walls around you.
TL;DR
A farm renovation builder NSW like Awesim turns sagging sheds, rusty kitchens and weather‑worn homesteads into sturdy, functional spaces without disrupting your daily farm routine.
We map out a budget‑friendly plan, handle permits, source rust‑proof materials and coordinate work so you get back to the land you love, faster and cheaper.
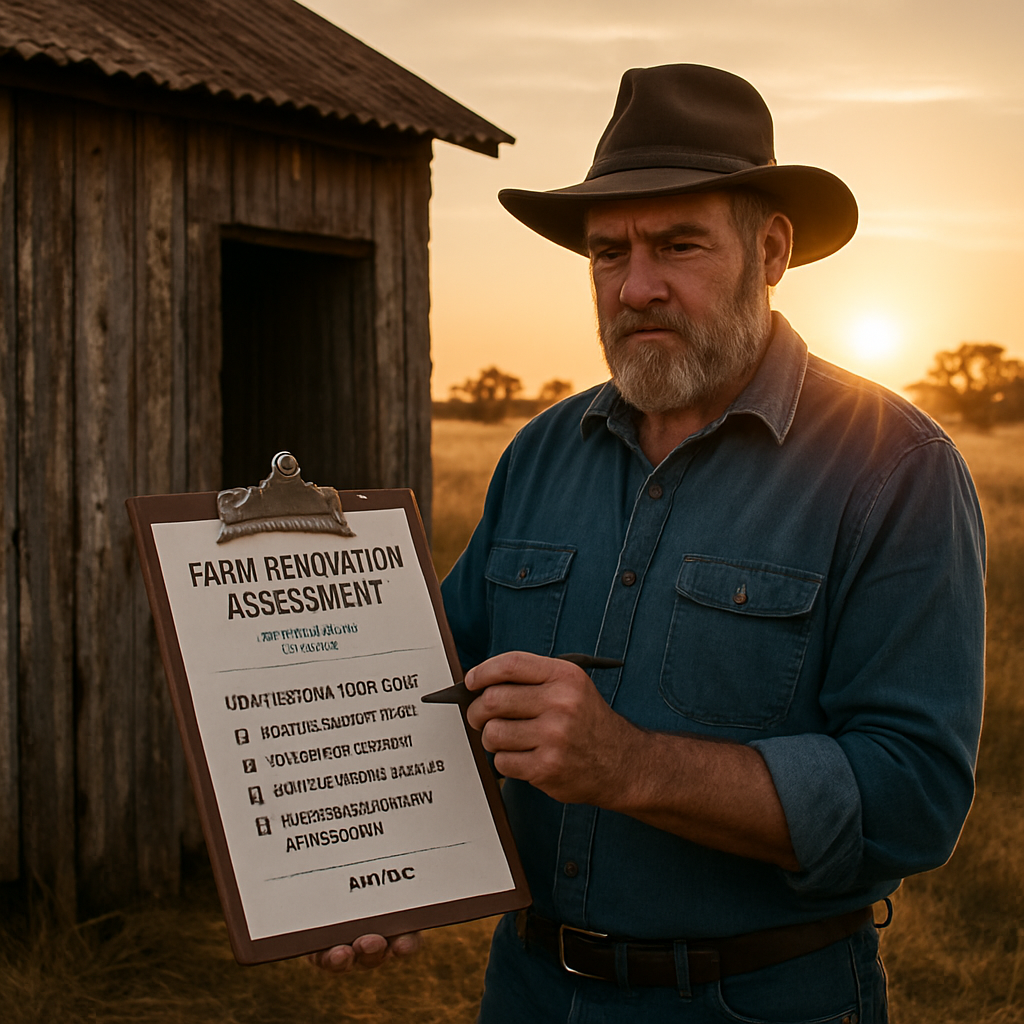
Step 1: Assess Your Farm Renovation Needs
First thing’s first, you’ve got to know exactly what’s biting you. Is it a sagging shed roof that’s threatening your tractor, a kitchen that leaks every time it rains, or a homestead wall that’s been whispering ‘fix me’ for years? Pinpointing the pain points stops you from chasing every shiny idea that pops up on a DIY forum.
Grab a notebook – or better yet, fire up a notes app on your phone – and walk the property at sunrise when the light is soft and the cattle are still settling. Jot down every crack, rust spot, any area that slows your daily routine. I always ask myself, “If I had to run the whole farm tomorrow without this building, what would break first?” That simple question brings the real priorities into focus.
Next, think about the future. Are you planning to expand the herd, add a processing shed, or maybe set up a larger family kitchen for those weekend barbies? Your renovation needs should line up with those growth plans, otherwise you’ll end up doing a half‑measure that needs another round of work in two years.
Now, budget talk. I know budgets feel like a tightrope over a deep gorge, but you can tame it by breaking the project into bite‑size chunks. Start with a rough total – say, $50k for a medium shed and kitchen combo – then allocate percentages: 40% for structural work, 30% for waterproofing and cladding, 20% for fittings, and 10% for contingency. This rough split gives you a sanity check before you chase quotes.
Speaking of permits, in NSW, most farm renovations over a certain size need council approval, especially if you’re touching the roof line or adding a new footpath. A seasoned farm renovation builder nsw will already know the paperwork checklist, but it still helps you to budget the admin fees.
Another practical step is to assess your own skill set. Are you comfortable handling a demolition of an old shed wall, or would you rather have the crew do it while you focus on keeping the milking schedule? Knowing where you can roll up your sleeves saves you money and prevents a half‑finished job that drags on.
Create a simple checklist. I like to break it into three columns: ‘Must‑have’, ‘Nice‑to‑have’, and ‘Can‑wait’. Must‑have covers structural integrity, weatherproofing, and safety. Nice‑to‑have might be upgraded lighting or a stainless‑steel kitchen bench. Can‑wait includes cosmetic paint colours or decorative cladding that you can add later.
Here’s a quick visual you can sketch on the back of that notebook: a rough floor plan with zones marked ‘critical’, ‘secondary’, and ‘future’. This map becomes the reference point when you sit down with a builder and explain exactly where the work needs to start.
When you’ve got that list, it’s time to compare it against what local experts offer. Our own practical guide for rural property upgrades walks you through the same assessment steps and shows how a farm renovation builder nsw can translate your list into a realistic schedule.
Check out this quick video for a visual walk‑through of the assessment process.
Finally, give yourself a deadline. Nothing moves faster than a date on the calendar. Mark the day you want the first concrete slab poured, or the day the new kitchen cabinets arrive. Having that target pushes you to finalise the assessment, lock in permits, and get those quotes in hand.
Step 2: Secure Planning Permits & Approvals
Alright, you’ve mapped out what needs fixing – now the paperwork. That moment when you stare at the council form and wonder if you’ll need a PhD in bureaucracy is totally normal.
Know what you actually need
In NSW, most farm renovations that touch the roof line, change the footprint, or add a new shed over a certain size trigger a development application (DA). Smaller projects can often roll under the complying development standards, meaning you skip the full DA and just lodge a simpler certificate.
But you’ll never know until you check the Rural Housing Code for your land parcel. The code sets maximum shed footprints and total building area – handy numbers that keep your project from over‑reaching the council’s limits.
Gather the right paperwork
Start with a clear set of drawings. Even a rough sketch from Step 1, with dimensions, elevations, and where services (electric, water, drainage) will run, makes the council’s job easier.
Next, pull together these basics:
- Site plan showing the property boundary and existing structures.
- Proposed floor plans and elevations.
- Engineering sign‑off for any structural changes.
- Soil assessment if you’re on acid‑sulphate ground – a qualified expert can certify that no extra management plan is needed.
- Compliance statement referencing the relevant Rural Housing Code clauses.
And don’t forget the fee schedule. Council application fees can bite, so budget a few hundred dollars up front.
Talk to the right people
Before you file anything, give your local council a quick phone call. A planning officer will confirm whether your project qualifies as complying development or needs a full DA. In my experience, a five‑minute chat saves weeks of back‑and‑forth later.
If you’re in a larger R5‑zoned area, you might be able to take advantage of the newly proposed larger shed size limits (still under consultation). Keeping an eye on those updates can mean you design a bigger shed without extra paperwork.
Submit and stay on top
When you’re ready, lodge the application online – most NSW councils use the Council’s e‑portal for tracking.
After submission, you’ll get a “public notice” period. Neighbours get a chance to comment. If they raise concerns, be ready to tweak the design or provide extra evidence (like a wind‑load report).
While you wait, keep the momentum going on the site. Order long‑lead items such as steel beams or pre‑fabricated shed kits. That way, once the permit is signed off, you can swing the hammer without delay.
Checklist before you break ground
- Confirm DA or complying development approval is granted.
- Read any conditions attached – often they include stormwater management or heritage checks.
- Secure a complying development certificate (CDC) if applicable.
- Arrange insurance that covers the construction phase.
- Notify any utility providers (electric, water) about the upcoming works.
And remember, a farm renovation builder nsw like us at Awesim can handle the whole paperwork trail for you. We’ve got the relationships with council officers, the templates for soil assessments, and the know‑how to keep your project on schedule.
So, what’s the next move? Grab those sketches, give the council a call, and start ticking off the items on this list. Once the approvals are in hand, the real building can begin – and you’ll be one step closer to that sturdy shed or modern kitchen you’ve been dreaming about.
Step 3: Choose Materials & Design Options
Now that the council’s nod is in the bag, the fun part begins – picking what actually goes into the walls, roof and floor. It’s a bit like choosing the right breed of cattle: you want something that’ll thrive in the local climate, stand up to wear and still look good on the farm.
First, think about the climate bucket you’re in. A dusty Gunnedah summer, a frosty Armidale night, or the occasional flood‑plain soak in Bourke – each scenario pushes a different material to the front of the list.
Durable roofing for outback weather
If you’ve ever watched a corrugated iron roof buckle after a heavy wind, you’ll know why colour‑matched steel decking is worth the extra dollar. It’s rust‑proof, low‑maintenance and can handle the sudden gusts that sweep across the New England tablelands.
But don’t write off classic galvanized iron just yet. It’s cheap, easy to source in Tamworth, and with a proper under‑coat it can last 20‑plus years. The trick is to pair it with a quality ridge cap and proper flashing – otherwise you’ll end up with leaks that feel like a slow drip in the night.
Walls that breathe and hold up
For shed walls, many of us in rural NSW favour metal stud framing with insulated sheeting. The studs keep the structure light enough for a quick erection, while the insulated panels give you a thermal break – perfect for keeping a workshop warm in winter without cranking up the heater.
If you’re renovating a homestead kitchen, timber block walls still have a place. A locally sourced hardwood, such as spotted gum, resists termites and adds that warm, country feel you see in many farmhouses around Dubbo.
And here’s a tip: always ask your builder to seal the timber with a UV‑stable, water‑based stain. It looks natural, lets the wood breathe and won’t peel like cheap oil‑based paints.
Flooring that takes a beating
Concrete slabs are the workhorse for any shed that houses heavy machinery. A 150 mm thick slab with a proper sub‑base and reinforcement mesh will stop cracks from spreading when a tractor rolls over it.
For a kitchen, consider a brushed concrete finish topped with a slip‑resistant epoxy. It’s easy to clean, resists staining from sauces, and can handle the occasional dropped pan without a dent.
Do you ever wonder whether you need a full concrete floor for a small tool shed? In many cases a compacted gravel base with a timber frame is enough – just be sure the ground is well‑drained and you’ve laid a weed‑membrane underneath.
Design details that save you time
Door and window placement can make or break the workflow in a farm shed. Position doors on the leeward side to keep dust out, and line up windows with natural light paths to reduce the need for harsh LED fixtures.
Ventilation is another hidden hero. A simple ridge vent combined with side eaves lets hot air escape in summer while drawing cool breezes in winter – a passive system that costs pennies but pays off in comfort.
Finally, think about future expansion. Leaving extra joist spacing or a “soft wall” on one side means you can bolt on a new bay later without tearing down the whole structure.
| Material | Why choose it | Best for |
|---|---|---|
| Colour‑matched steel decking | Rust‑proof, low‑maintenance, handles high winds | Sheds and large roofs in windy regions |
| Metal stud framing with insulated sheeting | Lightweight, quick to erect, provides thermal break | Workshop walls, farm sheds |
| Spotted gum timber | Termite‑resistant, natural aesthetic, durable | Homestead kitchens, heritage‑style buildings |
Bottom line? Match the material to the job, the climate and your long‑term plans. A savvy farm renovation builder nsw will guide you through each choice, source the right suppliers and make sure every nail ends up where it should.
Ready to lock down your material list? Grab a notebook, sketch the layout, and give us a shout – we’ll help you pick the perfect combination so your renovation runs smooth as a well‑oiled combine.
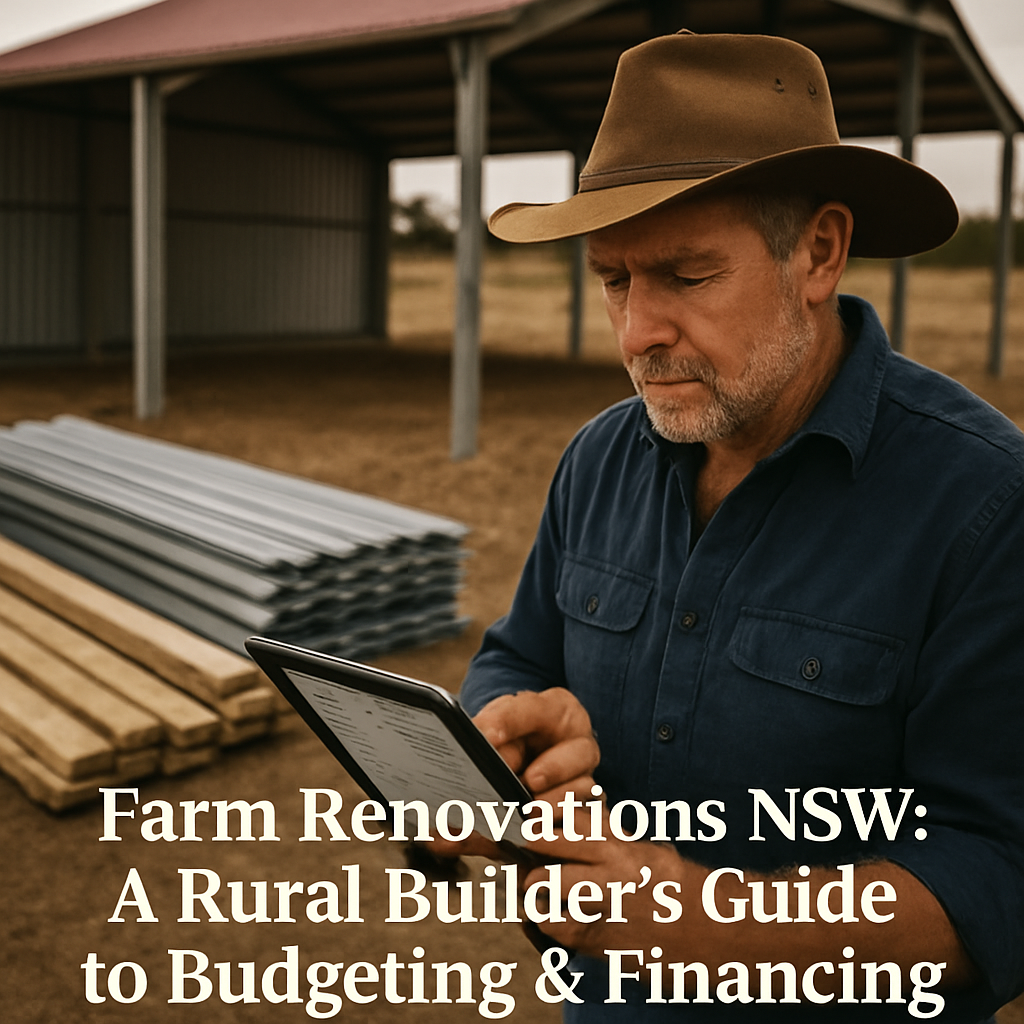
Step 4: Budgeting and Financing Your Project
Alright, the plans are drawn, the permits are in the mailbox, and now it’s time to ask the big question: how much will this actually cost? If you’ve ever watched a drought drain your water tank, you know budgeting on a farm is about staying ahead of the surprise.
Set a realistic budget framework
Start with the three‑pillars most builders in NSW swear by: labour, materials, and soft costs. Take your rough estimate from Step 1 – say $70 000 for a combined shed and kitchen – and break it down. Roughly 40 % goes to structural labour (bricklaying, framing), another 35 % to the actual material list (steel decking, timber, concrete), and the remaining 25 % covers permits, site surveys, insurance and that inevitable coffee‑break overtime.
It sounds tidy on paper, but the reality is a bit messier. That’s why I always ask my clients to write the numbers down on a whiteboard, then step back and ask, “If the price of steel spikes next month, where can I shave a few hundred?”
Financing options that work on the farm
Not every farmer has a six‑figure cash reserve, and that’s okay. Rural banks in Tamworth, Dubbo or Gunnedah often have a “farm renovation loan” that lets you spread the outlay over 3‑5 years with interest rates tied to the seasonal cash flow.
Another route is a line of credit linked to your property’s equity – think of it like a tractor loan, but for bricks. It gives you the flexibility to pay for materials as they arrive, then settle the balance once the shed is up and you’re back to full productivity.
And don’t forget government grants. The NSW Rural Assistance Program sometimes offers a modest match‑fund for energy‑efficient upgrades, like insulated sheeting or solar‑powered lighting. A quick chat with your local council can uncover a hidden dollar.
Build a contingency cushion
Even the best‑planned project hits a snag – unexpected rock, a delayed delivery, or a sudden rise in diesel prices. The rule of thumb I use is a 10‑15 % contingency reserve. If your base budget is $70 000, set aside $7 000‑$10 500 in a separate account. Treat it like a feed reserve: you only dip in when the weather forces you to.
When you do need to use it, note exactly why. That record becomes a goldmine for the next project and helps your farm renovation builder nsw fine‑tune future quotes.
Track costs like you track livestock
Every time you purchase a bag of cement, log it in a simple spreadsheet – column for item, cost, invoice number, and date. It’s the same habit you use to record a ewe’s weight; the consistency stops small leaks from becoming a flood.
Use a free app like Google Sheets on your phone. Snap a photo of the receipt, enter the amount, and you’ll have a live tally that matches the builder’s invoice at the end of the month.
Tips to keep the numbers in check
- Order long‑lead items (steel beams, pre‑fabricated kits) early; bulk discounts are common in regional suppliers.
- Negotiate a fixed‑price contract for the core scope. Variable‑price items can be limited to “extras” like extra lighting or decorative cladding.
- Ask your farm renovation builder nsw for a cost‑plus breakdown before signing – transparency builds trust.
- Schedule a mid‑project review. Pause the work, compare actual spend to the budget, and adjust the plan before you’re knee‑deep in extra costs.
Bottom line? A solid budget isn’t a static spreadsheet; it’s a living document that grows with the project, just like your herd. By carving out realistic categories, exploring farmer‑friendly financing, and keeping a tidy record, you’ll avoid the dreaded “budget blow‑out” that can turn a smooth renovation into a sleepless night.
Step 5: Managing Construction & Site Logistics
Alright, the plans are signed, the budget’s locked, and the council paperwork’s in the drawer – now the real hustle begins: keeping the construction site humming without derailing your daily farm life.
First thing’s first, map out a simple site logistics plan. Grab a sheet of graph paper or open a digital map and mark the main access road, water tanks, power points, and any high‑traffic animal routes. Seeing the flow on paper helps you spot bottlenecks before the first wheel turns.
Set up a staging area
We always carve out a staging zone a short distance from the build – think of it as the project’s kitchen counter. It’s where you dump deliveries, store cut‑offs, and park the crew’s trucks. Keep it on level ground, away from drainage paths, and make sure it’s fenced off so curious cattle don’t wander in.
Why does this matter? Because a tidy staging area cuts down on material handling time, reduces damage risk, and stops you from having to chase tools across muddy paddocks every afternoon.
Schedule deliveries around farm routines
Ask yourself: when are the milking runs, when does the feed truck come, when are the shearing crews on site? Slot big deliveries for those quiet windows – early mornings or mid‑afternoons when the herd’s settled. A well‑timed delivery means you won’t have to pause the build to herd cattle around a stack of steel beams.
Pro tip: ask your supplier to call 30 minutes before arriving. That quick heads‑up lets you clear the path and avoid the dreaded “blocked access” call from the builder.
Manage waste and hazardous materials
Construction on a farm often uncovers old insulation, pipe lagging, or even asbestos‑containing sheeting. You don’t want that stuff sitting around, so arrange a licensed waste pick‑up before the job kicks off. The NSW Environment Protection Authority provides a list of facilities that accept household asbestos, which is a handy reference for safe disposal according to the EPA’s asbestos disposal guide.
Keep a sealed, clearly labelled container on site and train the crew to place any suspect material inside straight away. This not only keeps the site clean but also protects your workers and neighbours from exposure.
Coordinate crew shifts with daylight
Rural NSW can surprise you with sudden clouds or early dusk. Plan the bulk of heavy framing and concrete pours for the longest daylight hours – usually 8 am to 3 pm in winter, later in summer. If you need night work, invest in portable LED floodlights that mimic natural light; they reduce eye strain and keep the quality of finish high.
And remember, the crew’s break schedule should line up with your own farm breaks. A short coffee together at 10 am or a shared lunch under a shade tree builds rapport and keeps everyone on the same page.
Protect your existing structures
While you’re adding a new shed or expanding a kitchen, the old buildings are still in use. Cover windows with protective sheeting, seal doorways with temporary weather‑proof tape, and place sandbags around any drainage points that could be disturbed.
One farmer told me he once had a rainstorm hit the site just as a roof was being lifted – his quick‑set tarpaulins saved the livestock shelter from a costly leak. Small habits like that save headaches later.
Keep communication crystal clear
Set up a daily 10‑minute huddle on the site. Use a whiteboard to note what’s finished, what’s arriving tomorrow, and any issues that need a decision. Write the key points in plain language – “trailer blocked at gate, need alternate route” – and send a quick text recap to anyone off‑site, like your farm manager or the accountant tracking expenses.
When a surprise pops up – say a broken concrete pump – having that open channel means you can decide on the spot whether to rent a replacement or pause for a day, rather than watching the clock tick and the budget swell.
Final checklist before you call it a day
- Staging area cleared and fenced.
- All deliveries scheduled around animal movements.
- Hazardous waste container labelled and lined up for pick‑up.
- LED lighting ready for any after‑hours work.
- Protective covers on existing structures.
- Daily huddle notes logged and shared.
Managing construction logistics on a farm isn’t about fancy software; it’s about common sense, a bit of foresight, and treating the site like a living part of your property. When you blend those habits with a reliable farm renovation builder nsw, the project stays on track, your animals stay safe, and you’ll still have time to enjoy a cold drink at sunset when the day’s work is done.
Step 6: Post‑Renovation Maintenance & Compliance
Why maintenance matters right after the build
When the dust settles and the last nail is hammered, you might feel a wave of relief – the shed is standing, the kitchen looks brand new, and the council paperwork is signed off. But that moment is also the perfect reminder that a building, like a herd, needs regular care to stay healthy.
Think of it this way: you wouldn’t let a brand‑new tractor sit idle for months without checking the oil, right? The same logic applies to any farm renovation. A quick post‑build walk‑through can catch tiny cracks, loose brackets, or a roof panel that didn’t seat properly before they become expensive headaches.
Step‑by‑step post‑renovation checklist
1. Final inspection with your builder. Schedule a snag‑list walk‑around within a week of practical completion. Grab a clipboard, walk the site, and note anything that looks out of place – a squeaky door, a drip in the new ceiling, or a missing screw. Your farm renovation builder NSW should sign off on each item or arrange a fix.
2. Document everything. Take photos of each room, each exterior wall, and every connection point (electrical, water, ventilation). Store the images in a folder labelled by date – it makes warranty claims a breeze and gives you a visual record for future upgrades.
3. Review warranties and guarantees. Most materials – steel roofing, timber cladding, concrete slabs – come with a manufacturer’s warranty. Write down the expiry dates, who to call, and any maintenance steps required to keep that warranty valid (e.g., repainting timber after two years).
4. Register the work with council. In NSW, certain renovations need a compliance certificate after completion. Your builder should submit the final as‑built drawings and any testing reports (like structural load checks). Keep a copy of the compliance certificate on site – it’s your proof that the building meets the Rural Housing Code.
5. Set up a seasonal maintenance calendar. Rural weather can be unforgiving. Schedule a quick spring check to clear gutters, a mid‑summer inspection of roof fastenings, and an autumn review of drainage around the foundation. A 15‑minute walk every few months keeps problems from snowballing.
Practical tips for everyday upkeep
Start by treating the new structure like you would any other piece of farm equipment. A weekly visual scan – “does anything look wet, rusted, or loose?” – is all it takes. If you spot water pooling near a wall, clear the area and consider adding a low‑cost French drain; it’s easier to do now than when the soil starts eroding.
For metal roofs, a gentle wash with a low‑pressure hose and a mild detergent removes salt‑laden dust that can accelerate corrosion. Follow up with a rust‑inhibiting spray every two years – it’s a tiny investment compared with a full roof replacement.
Timber components love a good coat of UV‑stable stain every 3‑4 years. It keeps the colour even and the wood breathing, especially on sheds that store machinery where heat builds up quickly.
Compliance beyond the build
NSW councils often require ongoing compliance for things like fire safety, stormwater management, and biosecurity. Make sure you have a working fire extinguisher in each new workshop and that any fire‑break clearance around the building meets the local council’s guidelines.
If your renovation involved new drainage or earthworks, keep the drainage plans handy. During heavy rains, a quick check of the outlet points can reveal blockages before they cause flooding.
Finally, remember that any future alterations – say adding a solar array or extending the shed – will need to reference the original compliance documents. Having them organised now saves you weeks of paperwork later.
Quick‑reference maintenance cheat‑sheet
- Week 1: Walk‑through snag list with builder, photo log, warranty register.
- Month 1: Submit as‑built and compliance certificates to council.
- Quarterly: Visual scan for water, rust, loose fittings; clear gutters.
- Bi‑annual: Clean roof, inspect fasteners, apply rust inhibitor.
- Every 3‑4 years: Re‑stain timber, review drainage, test fire safety equipment.
Sticking to this rhythm means your renovation stays as solid as the ground it sits on, and you avoid surprise repair bills that can eat into your farm’s cash flow.
So, after the final hammer falls, treat the building like any other part of your operation – check it, care for it, and it’ll keep working for you season after season.
FAQ
What should I look for when hiring a farm renovation builder nsw?
First, check they’re licensed and have a solid track record in rural NSW. Ask to see recent projects – a shed in Gunnedah, a kitchen in Dubbo – and talk to the owners if possible. Look for a builder who understands farm logistics, like timing deliveries around livestock runs, and who offers a clear, fixed‑price quote that includes site cleanup. A good farm renovation builder nsw will also handle council approvals for you, so you don’t get stuck chasing paperwork.
How long does a typical farm renovation project take in NSW?
Timing depends on scope, but most medium‑size projects finish in 8‑12 weeks. A simple shed extension might be wrapped up in three to four weeks, while a full kitchen‑and‑workshop remodel can stretch to three months, especially if you’re waiting on council approvals or specialist steel deliveries. To keep things on track, set milestone dates – foundation, roof‑up, interior fit‑out – and review progress with your builder every fortnight.
What are the most common compliance issues for farm renovations in NSW?
The biggest hiccups usually involve fire‑break clearances, stormwater drainage, and the Rural Housing Code’s building footprint limits. Many owners forget to submit a compliance certificate after the work is done, which can lead to fines later. A seasoned farm renovation builder nsw will run a pre‑audit before you finish, making sure fire extinguishers are installed, gutters are clear, and the as‑built plans match council records.
Can I DIY parts of the renovation to save money?
You can tackle non‑structural tasks like painting, installing shelving, or laying down a gravel base, but leave anything that affects the building’s load‑bearing capacity to the pros. In NSW, the council will only sign off a project if a licensed builder stamps the structural drawings, so trying to DIY the frame could void your compliance certificate and end up costing more in the long run.
How do I budget for unexpected costs during a farm renovation?
Build a contingency fund of around 10‑15 % of the total contract and keep it in a separate account – treat it like a feed reserve you only dip into when needed. Track every invoice in a simple spreadsheet, and compare it weekly against your budget. If a line item spikes, ask your builder for a cheaper alternative before you approve the extra spend.
What ongoing maintenance does a renovated farm building need?
Treat the new structure like any piece of farm equipment – give it a regular once‑a‑season check‑up. Inspect roof fasteners after a storm, clear gutters before winter rains, and re‑apply a UV‑stable stain to timber every 3‑4 years. Test fire extinguishers annually and keep the compliance certificate handy for any future extensions. A quick 15‑minute walk every quarter catches rust, water ingress, or loose brackets before they become costly repairs.
Conclusion
Wrapping up, you’ve seen how a seasoned farm renovation builder nsw can turn a rundown shed into a reliable workhorse without council red tape. We’ve walked through assessing needs, locking in permits, picking the right materials, budgeting smartly, managing the site, and keeping the building in top shape after the last nail is hammered.
If you’re wondering what to do next, start with a quick walk‑around, jot down the three‑to‑five biggest pain points. That list becomes the roadmap for your builder and instantly gives you a clear scope and realistic budget.
Remember, a solid contingency fund and regular quarterly check‑ups are as essential as the concrete slab beneath your shed. Treat maintenance like you’d tend to livestock – a little attention now saves a lot of hassle later.
When you’re ready to bring a true farm renovation builder nsw on board, give Awesim a call or message us. We’ll sit down, map the timeline, and ensure every step fits your farm routine – so you can watch progress while still handling daily chores.
So, take that first step today – a simple phone call could be the start of a stronger, more productive farm for years to come.
We’re here to help you today.


