

Imagine stepping into a farmhouse kitchen where the scent of fresh coffee mingles with the faint smell of weathered timber, and you instantly feel the blend of old‑world charm and modern comfort.
Sounds like a dream, right? But the truth is you can create that vibe without tearing your whole house apart or blowing the budget.
I’ve spent three decades fixing barns, renovating homesteads across Tamworth and the New England region, and I’ve seen the same three tricks turn a drab kitchen into a place you actually look forward to cooking in.
First, think about the layout as a conversation between the stove, the island and the family. Open‑plan flow feels natural when the work triangle is short – you’re not hunting across the room for a pot while the kids chase the dog.
Second, let the materials tell a story. Reclaimed barn wood for cabinets adds character, while a simple white‑washed finish on the walls keeps the space bright and forgiving when dust settles from the out‑back.
Third, don’t forget the little touches that make daily life easier – think sturdy, easy‑clean flooring that can take a tractor boot, hidden storage for feed bags, and LED lighting that mimics natural daylight, so you can see the colours of fresh produce even on a rainy day.
You might be wondering whether all this is realistic on a remote property where the nearest supplier is a two‑hour drive away. The good news? With a reliable rural builder like Awesim, we can source locally available timber, schedule deliveries around weather windows, and keep the project on track without you having to quit the farm.
So, if you’ve been daydreaming about swapping that cracked linoleum for a warm, inviting space that still stands up to the rigours of farm life, stay with me – the next few sections will walk you through practical farmhouse kitchen renovation ideas you can start planning today.
TL;DR
Ready to turn your tired farm kitchen into a bright, rugged haven? Our farmhouse kitchen renovation ideas blend reclaimed timber, smart layout and durable finishes for real‑world Aussie farms.
Follow our step‑by‑step guide, save time and money, and finish with a space that works as hard as you do every day on the property.
Idea 1: Open‑Plan Layout with a Rustic Island
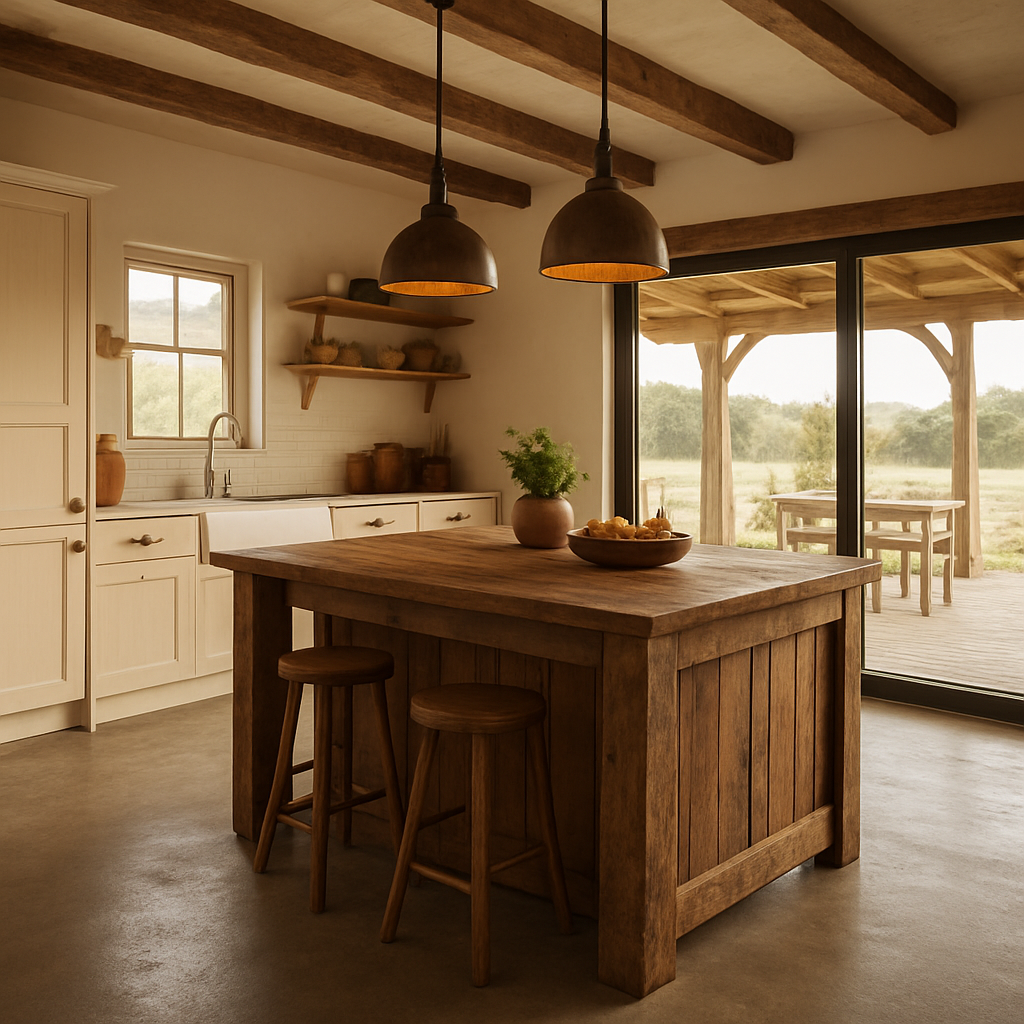
Picture this: you walk into a kitchen where the cooking zone, the island, and the family zone flow like a well‑timed waltz. No walls blocking sightlines, just an open‑plan canvas that lets the morning sun spill over reclaimed timber and the aroma of fresh brekkie drift across the room.
Why does an open‑plan feel so natural on a farm? Because the work triangle – stove, sink, fridge – stays tight, meaning you spend less time chasing pots and more time watching the kids or the dog chase the rabbit outside. A rustic island becomes the heart‑beat, a sturdy slab of reclaimed barn wood that can survive a stray boot or a stray egg.
Here’s a quick checklist for the island itself:
- Choose a thick slab (at least 40mm) for durability and a solid feel.
- Integrate a deep sink or prep well on one side – perfect for washing produce straight from the paddock.
- Add open shelves or metal hooks for hanging pots, ladles, or even a few garden tools you need handy.
Now, think about the floor. Farm life means mud, dust, and sometimes a stray tractor boot. A polished concrete floor with a matte seal is both slip‑resistant and easy to mop. Pair it with a few area rugs for comfort – just make sure they’re washable.
When you’re planning the layout, don’t forget storage that actually works. A clever tip is to tuck a pull‑out pantry under the island – it keeps dry goods out of the way but within arm’s reach. If you’re short on space, check out smart storage ideas for small bathrooms – many of the same space‑saving principles apply to kitchens.
And while you’re at it, think about the finishing touches. A brushed‑nickel faucet gives a nod to rustic charm without looking dated. Warm LED strips under the island countertop add a subtle glow for late‑night cooking without harsh glare.
Want to see how the island can become a multi‑tasking hub? Below’s a short video that walks you through a real‑life install on a NSW farm property.
Notice how the builder left a gap for a built‑in chopping board – a tiny detail that saves you a whole board on the countertop. It’s the kind of practical thinking that separates a good kitchen from a great one.
Once the island is in place, you’ll want the rest of the space to feel cohesive. That’s where a solid Kitchen Renovations for Rural Homes partner comes in – they know how to source locally‑sourced timber, coordinate deliveries around the rainy season, and keep the build on schedule even when the nearest supplier is two hours away.
Don’t forget the outdoors. An open‑plan kitchen often opens onto a patio or covered deck, turning dinner into an al‑fresco experience. If you’re thinking about extending that flow, the porcelain pavers guide offers solid advice on choosing a surface that won’t crack under a heavy farm table or a stray wheel.
Finally, if your cabinets are looking a bit tired after years of exposure, a fresh coat can work wonders. The cabinet resurfacing services from Dublin Respray specialise in giving old wood a modern finish without the cost of full replacement – a handy trick for the budget‑savvy farmer.
Bottom line: an open‑plan layout with a rustic island isn’t just a design trend; it’s a functional response to the way farm families move, work, and live together. Start with the island, plan for rugged flooring, and layer in smart storage, lighting, and outdoor continuity. You’ll end up with a kitchen that feels as sturdy as a barn but as welcoming as a Sunday breakfast on the porch.
Idea 2: Reclaimed Timber Cabinetry
Ever walked into a kitchen and felt the story of the wood before you even opened a drawer? That moment of recognition is exactly what reclaimed timber cabinetry gives you – a piece of the farm’s past, fresh‑finished for today’s chores.
Think about the old shed that’s been standing for decades, its boards soaked in sun and rain. Those boards have character you can’t buy off the shelf, and they’re surprisingly tough when you treat them right. That’s why reclaimed timber is a top farmhouse kitchen renovation idea.
Why reclaimed timber works on a farm
First, the wood is already proven durable. It survived seasons, wind and the occasional stray cattle hoof. Second, the patina you see – nail holes, knots, subtle colour shifts – tells a story that a brand‑new plank can’t. Third, using what’s on‑site cuts transport costs, which matters when your nearest supplier is two hours away.
But let’s be honest: raw reclaimed boards need a bit of love before they become cabinets. Here’s the simple process I always follow on a rural job.
1. Source responsibly
Ask your local shed‑demolition crew or a neighbour who’s clearing out an old barn. Look for timber that’s been kiln‑dried or at least air‑dried for a year. That reduces the risk of future warping when you mount heavy pantry shelves.
2. Clean and stabilise
Give each board a good brush‑off, then run a mild detergent solution. After it dries, run a coat of penetrating epoxy stabiliser – it seeps into the grain and locks in moisture.
3. Design for farm life
Plan deeper drawers for feed bags, reinforced hinges for heavy pots, and a soft‑close system that can survive a quick slam when you’re juggling a lamb and a ladle. Remember to leave a small over‑hang on the top cabinet to catch stray tools.
So, what does a finished reclaimed cabinet look like? Picture a warm, honey‑coloured façade with subtle grey streaks, paired with brushed‑copper handles that echo the colour of a sunrise over the paddocks.
Here’s a quick visual walk‑through of a recent project in Inverell – we turned a 30‑year‑old barn wall into a full‑height pantry, complete with pull‑out spice racks and a hidden wine cooler.
Notice how the video shows the grain running the length of each door. That linear flow not only looks sleek but also guides the eye across the room, making a modest kitchen feel larger.
Practical tips for your own reclaimed cabinet project
• Measure twice, order once – remote deliveries are pricey, so double‑check your dimensions on‑site before you place an order.
• Seal every surface – a marine‑grade polyurethane finish protects against splashes, mud and the occasional splash of milk.
• Match hardware to the farm vibe – oil‑rubbed bronze or aged iron handles complement the weathered look and are easy to maintain.
• Plan for expansion – if you think you’ll need more storage next year, leave a gap in the back wall for a future add‑on. It’s easier to bolt on than to remodel later.
And finally, don’t forget the emotional payoff. When you open a reclaimed cabinet and smell that faint hint of pine, you’re reminded of the very land you work on. It’s a daily nod to the generations that built the farm before you.
Ready to give your kitchen that authentic, time‑worn charm while keeping it rugged enough for farm life? Grab a piece of timber, follow the steps, and watch your farmhouse kitchen renovation ideas come to life.
Idea 3: Vintage Farmhouse Sink & Fixtures
When you picture a farmhouse kitchen, the sink often steals the show. It’s the place you rinse fresh eggs, soak muddy boots, or pour a kettle of tea while the sun drifts over the paddocks.
A vintage‑style apron‑front sink paired with period‑correct fixtures instantly adds that lived‑in charm without feeling contrived. Think deep, porcelain‑white basin with a slightly rounded edge, a brass or oil‑rubbed bronze faucet, and maybe an exposed pipe that looks like it’s been there for generations.
But why bother with a vintage look when a modern stainless steel basin will do the job?
Because on a farm the sink does more than hold water. It becomes a workbench, a cleaning station, and sometimes a makeshift trough for a stray lamb. A deep, wide basin means you can dump a bucket of feed without splashing the floor, and a high‑arc faucet lets you rinse large pots without juggling the hose.
Here are three vintage‑inspired sink choices that blend durability with that old‑world feel.
1. Classic Apron‑Front Porcelain Sink
The apron‑front design dates back to the 1800s, when copper was scarce and potters crafted large, single‑piece basins for farmhouses. Modern reproductions use reinforced porcelain that resists chips, and the deep bowl holds at least 30 litres – perfect for soaking a bucket of mud‑covered tools.
Installation tip: sit the sink on a sturdy timber frame that’s anchored to the wall studs. A simple timber apron can be stained to match your reclaimed cabinets, keeping the visual flow seamless.
2. Reclaimed Galvanised Steel Basin
If you love the patina of weathered metal, a reclaimed galvanised steel sink brings that industrial farmhouse vibe straight from an old milking shed. The metal is naturally rust‑resistant, and a light oil coat keeps it from developing aggressive corrosion.
Pair it with a brushed‑copper bridge faucet – the kind that arches over the basin and adds a splash of colour without looking flashy. The bridge design spreads water evenly, making it easier to rinse large trays of produce.
Maintenance note: wipe the surface with a damp cloth after each use and re‑oil the metal twice a year. A quick oiling session takes five minutes and keeps the sink looking like it’s been there for a century.
3. Farmhouse‑Style Bridge Faucet with Pull‑Down Sprayer
A high‑arc bridge faucet made from oil‑rubbed bronze or aged iron not only looks authentic, it also gives you the reach you need for those oversized pots and the occasional bucket of water for livestock cleaning. The pull‑down sprayer adds modern convenience without breaking the vintage vibe.
Pro tip: choose a faucet with a ceramic disc valve. It prevents drips, saves water – a big win when you’re on a remote property where every litre counts – and it lasts longer than cheap rubber washers.
So, how do you decide which vintage sink fits your farm kitchen?
Start by looking at the tasks you do most. If you spend hours washing large trays of veg, the deep porcelain basin wins. If you need a sink that can double as a wash‑down station for muddy boots, the galvanised steel option shines. And if you love the drama of an oversized faucet but still want the convenience of a sprayer, the bridge faucet with pull‑down is the sweet spot.
Installation on a remote farm can feel daunting, but with a 4×4 crew you’ll have the right tools on site, and the sink’s weight is manageable once the base frame is secured. Most vintage‑style basins weigh between 50‑80 kg, so a couple of helpers and a hoist are enough.
A quick checklist before you order:
- Measure the exact cut‑out opening – aim for a 2‑cm gap around the rim for sealant.
- Confirm countertop thickness – vintage basins sit best on 30‑40 mm slabs; thicker tops may need a custom adapter.
- Choose a faucet finish that complements the sink – brass for porcelain, oil‑rubbed bronze for steel.
- Plan the back‑plumbing route early – a wall‑mount valve saves space and keeps the look tidy.
- Schedule delivery with your 4×4 crew so heavy items arrive on‑site without a hitch.
In short, a vintage farmhouse sink and the right fixtures can turn a functional space into the heart of your homestead. Pick the style that matches your daily rhythm, protect it with regular oiling or sealing, and you’ll have a centerpiece that ages beautifully while standing up to the toughest farm chores.
Idea 4: Heritage‑Style Colour Palette
Ever walked into a kitchen and felt like you’d stepped back onto the homestead porch, yet still had all the modern comforts you need? That feeling is what a heritage‑style colour palette does – it wraps you in familiar, warm tones while keeping the space fresh enough for daily farm life.
Think about the moment you first saw the soft, weathered cream on a farmhouse’s front wall, or the muted olive that reminded you of the surrounding paddocks. Those colours aren’t just pretty; they’re a visual cue that says, “you’re home.”
So, how do we translate that nostalgia into a kitchen that works for a busy rural household?
Why heritage colours click on a farm
First, they play nicely with natural light. A lot of our NSW properties have big south‑facing windows that let in gentle daylight. Light, muted shades bounce that light around, making the room feel larger – a real plus when you’re juggling feed bags and a toddler’s snack station.
Second, they hide the inevitable dust and grime that comes with a working farm. A warm beige or soft sage doesn’t scream “need to wipe it down” the way a stark white can.
And finally, they blend seamlessly with reclaimed timber and metal fixtures we love to use in farmhouse renovations.
Top heritage palette combos
Here are three tried‑and‑tested pairings that have worked on properties from Tamworth to Bourke. Each one leans on the colour trends highlighted by Australian retailers, which show that neutral bases paired with earthy accents are still the go‑to for 2025 kitchen colour trends.
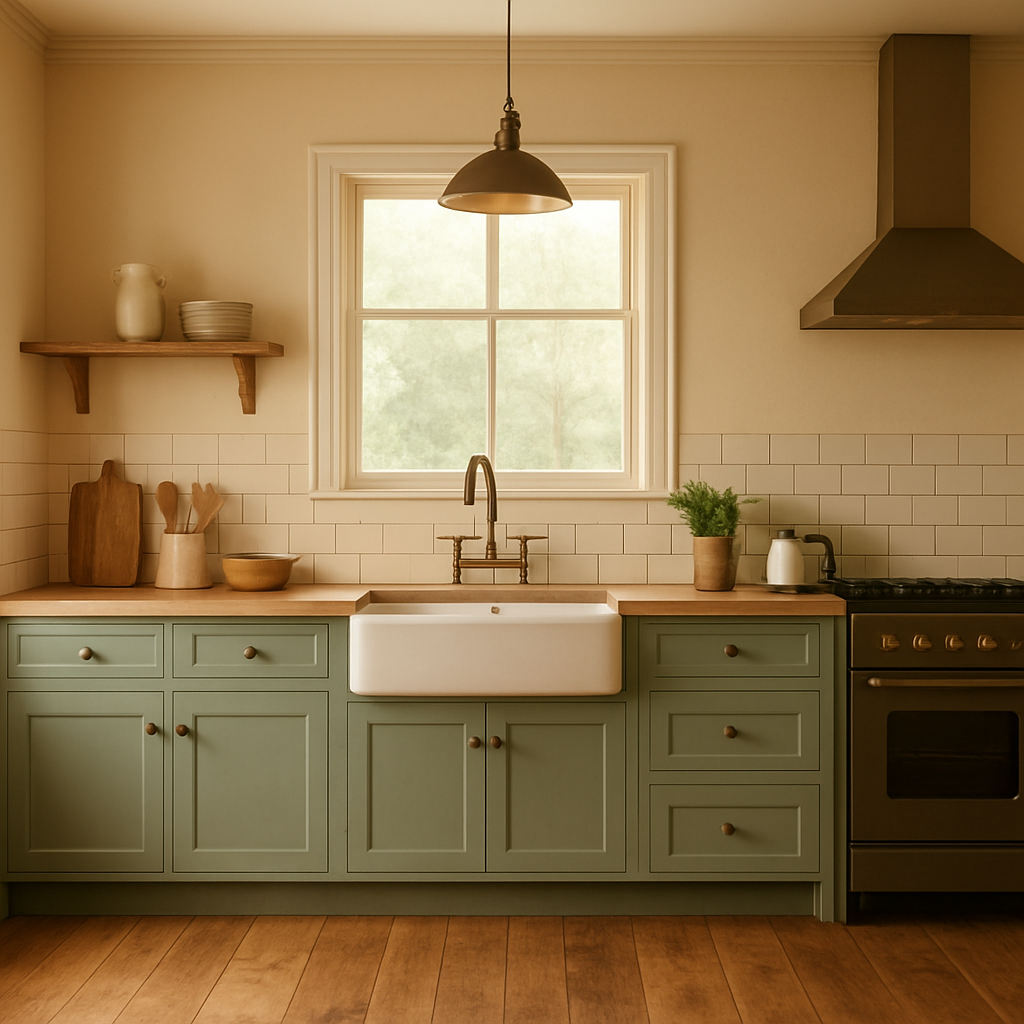
- Cream & Sage – Cream walls with sage lower cabinets create a calm, earthy backdrop. Add brushed bronze hardware for a subtle pop.
- Warm Taupe & Dusty Olive – Taupe on the ceiling and upper cabinets keeps the space bright, while olive on the island brings depth and a nod to the surrounding bush.
- Soft Grey & Muted Clay – Light grey walls feel airy; a muted clay benchtop anchors the room with a hint of rustic warmth.
Which of these feels like your kitchen’s personality?
Putting the palette to work
Start small. Paint a single accent wall in your chosen heritage hue – it’s a low‑risk way to test the vibe. Then roll the colour down to cabinetry or the island.
When you pick cabinets, think matte finishes. They hide fingerprints from muddy hands and look less “showroom” than high‑gloss.
Flooring? A natural stone or weathered timber floor in a light honey tone ties the whole palette together without competing for attention.
Don’t forget the small stuff: backsplash tiles in a subtle pattern, vintage‑style brass tapware, and open‑shelf wood that matches the cabinet colour. These details keep the heritage theme cohesive.
Need a quick sanity check? Grab a paint chip, hold it against a reclaimed timber sample, and imagine the two side by side in the late afternoon light. If it feels like a gentle hug, you’ve got a winner.
And remember, colour isn’t set in stone – you can always refresh with a new accent wall or change hardware later on.
Now that you’ve got the palette basics, let’s break down the decision points so you can pick with confidence.
| Element | Heritage Colour Option | Practical Tip |
|---|---|---|
| Walls | Cream or soft grey | Use a low‑sheen paint to hide dust; accent one wall in sage for depth. |
| Cabinetry | Sage, dusty olive, or warm taupe | Choose matte finishes; pair with brushed bronze handles for durability. |
| Benchtop | Muted clay or natural stone | Opt for stone that resists stains; seal regularly to handle farm spills. |
Bottom line: a heritage‑style colour palette isn’t just about looking pretty – it’s about creating a kitchen that feels lived‑in, resilient, and welcoming for the whole family. Pick a base that works with your natural light, layer in earthy accents, and you’ll end up with a space that ages as gracefully as the farm itself.
Idea 5: Integrated Pantry & Utility Space
Ever feel like you’re juggling flour, feed bags and the occasional stray cat while trying to find a free countertop? That’s the moment an integrated pantry and utility zone swoops in like a quiet hero.
On a farm, the kitchen isn’t just a place to make toast – it’s a staging area for everything from morning coffee to post‑harvest clean‑up. Merging the pantry with a utility nook keeps the chaos in one tidy corridor and frees up the main cooking zone for family time.
Why it works on a working farm
First, you get a dedicated dry‑storage wall that can hold bulk grain, canned goods and those big sacks of animal feed without crowding the fridge. Second, a utility sink right next to the pantry means you can rinse produce or mop up a muddy boot without splashing the benchtop. Third, the whole setup becomes a single “back‑of‑house” that you can close off with a simple barn‑door style latch when the kids are over.
Think about the moment you pull a pot of soup from the stove, set it on the island, and then need a place to stash a bag of potatoes. With the pantry right beside the prep area, you don’t have to sprint across the room – you just slide the bag onto the low pantry shelf and keep the flow smooth.
Design tips that survive the outback
- Go deep, not high. Farm families tend to store large containers, so aim for shelves that are at least 60 cm deep. It feels like a mini‑walk‑in pantry without taking up extra wall space.
- Use sturdy, moisture‑resistant panels. Cedar or pressure‑treated timber with a marine‑grade sealant will shrug off splashes and the occasional stray rain.
- Install a utility sink with a high‑arc faucet. The extra reach lets you clean muddy boots or large vegetable bins without the water spilling over the edge.
- Include pull‑out bins for bulk items. Sliding drawers make it easy to grab a sack of flour without bending down to the floor.
- Add a rolling cart. A sturdy steel or timber cart on wheels can double as a mobile prep station, and you can tuck it into the pantry when you’re done.
Now, you might be wondering how to fit all that when the kitchen is already tight. The trick is to treat one wall as a “zone wall” – the pantry occupies the lower half, the utility sink sits in the middle, and upper cabinets continue the look of the rest of the kitchen.
Real‑world example from Inverell
We recently helped a cattle station near Inverell where the original pantry was a cramped cupboard behind the fridge. The family needed space for feed bags, a large tub for washing produce, and a place to stash seasonal preserves.
We stripped the wall back, added a 2.2‑metre deep pantry unit with three pull‑out bins, and slotted a 900 mm stainless‑steel utility sink with a brushed‑copper bridge faucet. The result? The owner told us he now loads feed bags straight from the barn into the pantry, washes them in the same sink he uses for vegetables, and never steps on a sticky floor again.
He also loves the simple barn‑door latch that keeps the pantry closed when you’re entertaining – it feels like a little secret room that only the family knows about.
Actionable checklist
- Measure the wall you’ll convert – aim for at least 2.5 m in length to accommodate deep shelves and a sink.
- Choose a moisture‑resistant finish – marine‑grade polyurethane on timber, or metal panels with a powder‑coat.
- Plan the plumbing early – a nearby hot‑water line and a waste line with a vent will save a lot of re‑work.
- Sketch a layout that keeps the sink centre‑aligned with the main prep zone for easy transfer of items.
- Order pull‑out drawer kits that can handle 30‑kg loads – you’ll thank yourself when you’re hauling heavy sacks.
- Consider a sliding barn‑door or pocket door to hide the pantry when you’re entertaining.
- Schedule the install during a dry spell – our 4×4 crew can bring all materials to remote sites without delay.
Bottom line: an integrated pantry and utility space turns a chaotic farmhouse kitchen into a streamlined workhorse. It respects the rhythm of farm life, gives you extra storage without sacrificing style, and keeps the heart of the home clean and functional.
Idea 6: Natural Stone Countertops with Slip‑Resistant Finish
Picture this: you’re rolling out a fresh batch of dough, the kids are perched on the counter, and a stray splash of water lands right where you’re kneading. If the surface is slick, that moment turns from cosy to chaotic in a split second.
That’s why a slip‑resistant natural stone countertop isn’t just a pretty face – it’s a work‑horse built for farm life.
Natural stone brings the timeless look you love – think granite, limestone or sandstone – but the raw surface can be as slick as a wet river stone. The fix? A honed‑or‑textured finish that gives you grip without sacrificing the stone’s natural charm.
Why slip‑resistance matters on the farm
A farm kitchen sees more mud, feed bags and wet tools than your average city flat. One misstep on a slick slab can send a heavy sack of feed tumbling, or worse, cause a slip that bruises a knee. A textured stone surface adds micro‑abrasions that keep boots, slippers and even bare feet steady when you’re juggling a bucket of milk and a sack of seed.
Choosing the right stone
Granite is tough, but it can feel cold under a farmer’s boots. Limestone offers a softer hue that mirrors the pale wheat fields outside, yet it’s more porous – you’ll want a sealed, slip‑resistant grade. Sandstone, with its natural grain, gives a subtle texture straight out of the outback, and when honed it stays firm under wet hands.
When you’re ordering, ask your stone supplier for a ‘honed‑plus’ or ‘flamed’ finish. Honed‑plus leaves a matte surface with fine cross‑hatch lines – perfect for a farmer’s kitchen where you need grip but not a gritty feel. Flamed finish uses high heat to crack the surface, creating a rugged texture that’s ideal if you expect a lot of water or oil spills.
Installation tips that survive the outback
- Seal the stone on all sides – moisture can creep up the edges and make the surface slick.
- Use a non‑slip epoxy grout that matches the stone colour; it adds grip without clashing.
- Leave a 3‑mm expansion joint around the perimeter; the stone will move with temperature swings.
- Ask the installer to sand‑back the edges after cutting – a smooth edge can become a hazard when wet.
- Combine the stone with a sturdy under‑bench – a timber frame on 4×4 studs resists the heavy loads of feed sacks and prep work.
A slip‑resistant stone top also plays nice with other farmhouse touches. Pair it with a brushed‑copper apron‑front sink, and the warm metal highlights the stone’s earthy tones. Add a simple steel range hood – the matte finish won’t reflect the occasional splash, and you’ll still get that rugged farm aesthetic.
Think about maintenance. A good seal lasts three to five years in a dry NSW climate, but on a dusty cattle station you’ll want to re‑apply sooner. A quick wipe‑down with a pH‑neutral stone cleaner keeps the surface looking fresh, and you’ll avoid the dreaded chalky residue that can make even a textured slab feel slippery.
Bottom line
A slip‑resistant natural stone countertop gives you the timeless farmhouse look, the durability to survive a farm’s daily grind, and the safety you need when you’re juggling mud, milk and feed. Pick the right finish, seal it well, and you’ll have a surface that ages gracefully while keeping your feet firm on the job.
FAQ
What are the most practical farmhouse kitchen renovation ideas for a remote NSW property?
When you’re on a farm miles from the nearest supply centre, durability and simplicity win the day. Start with a sturdy reclaimed‑timber island that can bear feed sacks and tools – the kind of board that’s already survived years of weather. Pair it with a slip‑resistant stone countertop that you can seal every few years, so mud and milk won’t turn the surface into ice. Add a high‑arc bridge faucet; it reaches deep pots without you having to tip the sink. Finally, choose matte‑finished cabinets – they hide dust and fingerprints, which is a blessing when you’re constantly wiping boots on the floor.
How do I choose the right countertop material that fits both style and farm life?
The key is to balance look with slip resistance. Granite looks gorgeous, but it can feel like a freezer under boots. A honed‑plus limestone or flamed sandstone gives you that natural stone charm while providing micro‑textured grip for wet boots or spilled milk. Whatever you pick, insist on a full seal on the slab, edges and back side – moisture loves to creep up the sides and make the stone slick. A quick wipe‑down with a pH‑neutral cleaner every few weeks keeps the finish honest without stripping the seal.
Can I install a farmhouse sink in a tight kitchen space without sacrificing functionality?
Absolutely, as long as you plan the cut‑out and support frame correctly. An apron‑front porcelain sink with a deep bowl lets you dump a bucket of feed or a tray of veggies without splash‑back. Mount it on a timber apron that matches your reclaimed cabinets, and you’ll have a seamless look that also adds a little extra countertop width. If headroom is limited, a compact bridge faucet with a pull‑down sprayer gives you reach without a massive arm.
What lighting options work best for a farmhouse kitchen that gets a lot of natural dust?
Think layered lighting that can be cleaned quickly. Pendant lights with brushed‑copper or oil‑rubbed bronze finishes add warmth and can be wiped with a damp cloth. Under‑cabinet LEDs are hidden from dust and give you task lighting right where you chop. For overhead, a simple matte‑black semi‑flush fixture won’t reflect dust particles the way a glossy dome would, and it still spreads even light across the room.
How can I make sure my renovation stays on budget when material deliveries are delayed on remote roads?
The trick is to build flexibility into the schedule and the order list. Order the heaviest items – stone slabs, timber beams, large appliances – first, because they need the 4×4 crew to haul them in. Keep a shortlist of local alternatives, like a nearby quarry for stone or a regional timber yard, so you can switch if the main supplier can’t get through a flood‑prone track. Also, break the project into clear phases; finish the structural work before the decorative details, so you’re not paying for extra labour while waiting on a colour swatch.
Is it worth hiring a rural specialist like Awesim Building Contractors for a farmhouse kitchen renovation?
In my experience, a builder who knows how to navigate gravel tracks, schedule around shearing season and source local materials can save you weeks of frustration. Awesim’s 4×4 fleet means they can deliver stone, timber and fixtures straight to a remote homestead, and their knowledge of NSW building codes keeps the paperwork smooth. Plus, they understand that a kitchen isn’t just a pretty space – it’s a work hub that has to survive mud, boots and the occasional stray lamb.
Conclusion
So, you’ve walked through a dozen farmhouse kitchen renovation ideas – from reclaimed timber cabinets to slip‑resistant stone tops, vintage sinks and heritage colour palettes.
What matters most is that every choice feels like it belongs on your farm, can survive a muddy boot and still looks warm at the end of a long day.
Remember to keep flexibility in the schedule – order the biggest items early, keep a local backup supplier, and break the build into phases so you’re never stuck waiting for a colour swatch.
A rural specialist like Awesim Building Contractors can navigate gravel tracks, bring the 4×4 crew right to your homestead, and make sure every code box is ticked – saving you weeks of headaches.
Finally, don’t forget the little details – brushed‑copper hardware, a textured backsplash, and a sturdy floor that can handle a herd of curious kids. Those finishing touches turn a functional space into a place you’ll actually love to linger in.
Take action today
Pick the one or two ideas that solve your biggest pain point, sketch a quick layout on a napkin, and give Awesim a call for a on‑site quote. A small step now means a kitchen that works for you tomorrow.


1 Comment