

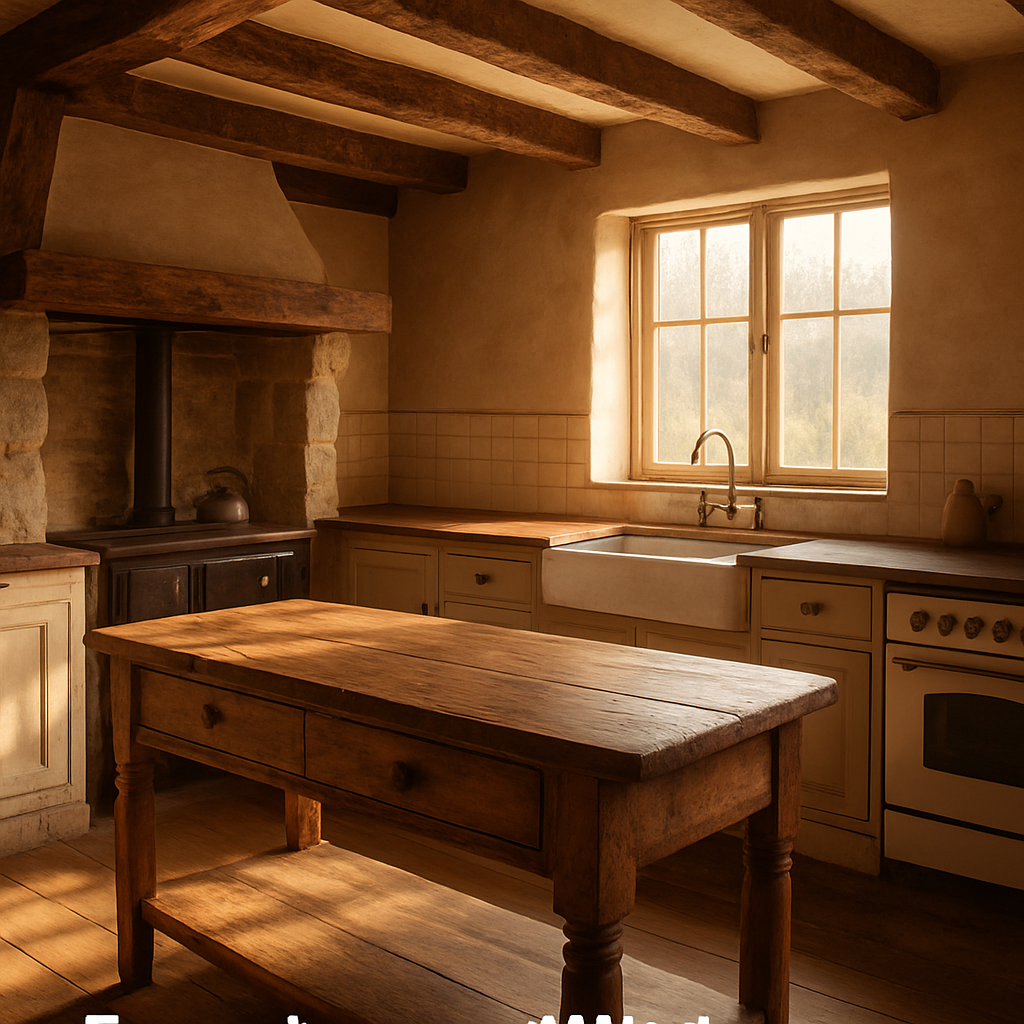
Imagine walking into your farmhouse kitchen at sunrise, the light spilling over reclaimed timber benches and a polished stone countertop that’s seen more dust than a city café.
You’ve probably felt that tug—something’s missing, but you’re not quite sure if it’s the layout, the colour palette, or the way the old timber doors creak when you open them.
That feeling’s the heartbeat of farmhouse kitchen renovations nsw; it’s the moment you realise a fresh start could also keep the charm you love.
I’m Glen, and after 35 years of building sheds, barns and homesteads across Tamworth and the wider NSW countryside, I’ve seen countless kitchens transform from cramped, utilitarian spaces into warm, functional hubs where families gather after a long day on the paddock.
What makes a farmhouse kitchen truly work here isn’t just the aesthetics—it’s the practicality of rural life. You need a layout that can handle a big family breakfast, a sturdy workbench for chopping veg, and finishes that stand up to dust, spills and the occasional splash from a rain‑soaked coat.
So, what should you look for when you start planning?
First, think about flow. A good farmhouse kitchen in NSW often follows a “work triangle” that links the fridge, stove and sink, but with enough breathing room for a pot‑hoising kettle and a sturdy wooden table where kids can do homework.
Second, choose materials that marry style and durability. Wide‑plank hardwood floors, locally sourced stone slabs and slip‑resistant tiles keep the space looking great even when the weather turns muddy outside.
Third, don’t forget storage that respects the farm vibe—open shelving made from reclaimed beams, metal hanging racks for copper pots, and a pantry that feels more like a cosy cupboard than a sterile cupboard.
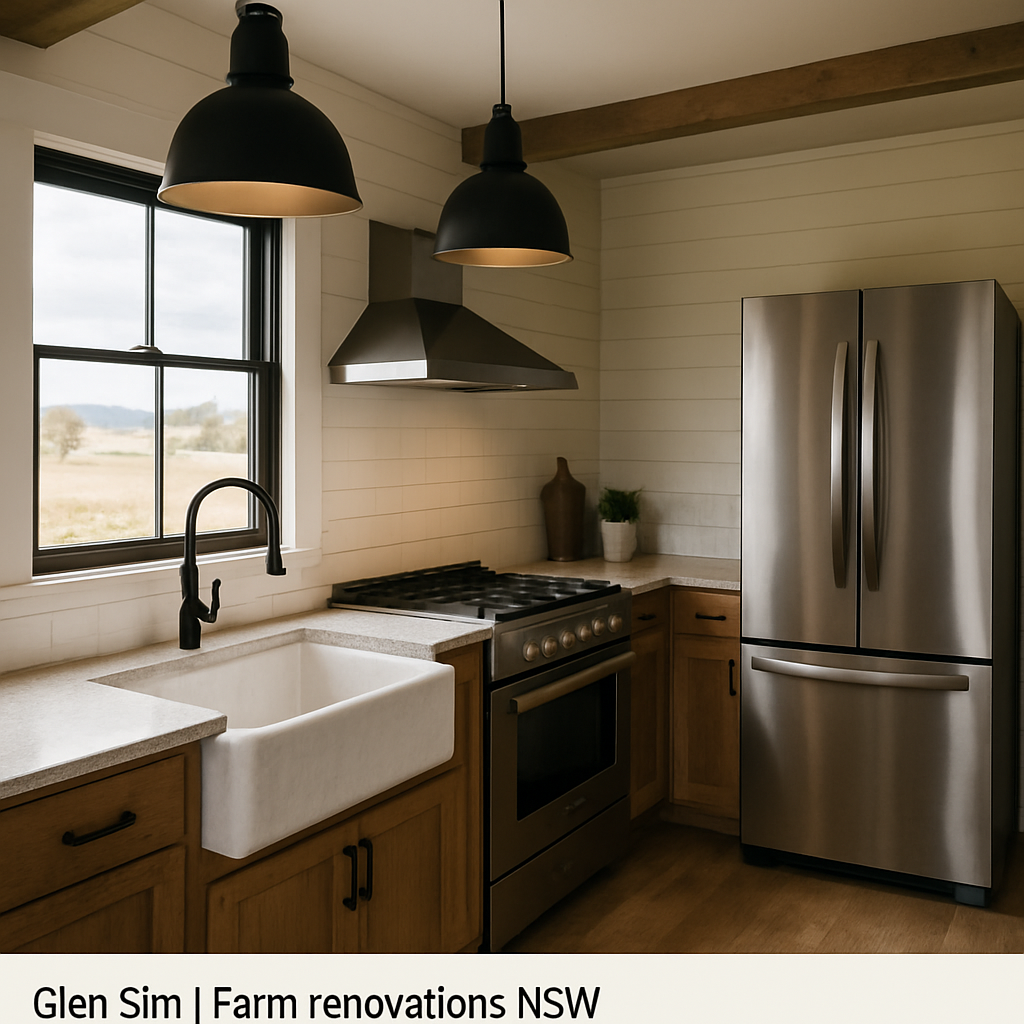
And of course, lighting matters. Natural light through a large sash window, complemented by pendant lights with an industrial finish, gives the room that inviting glow at dusk.
If you’re wondering whether you can pull this off without a massive budget, the answer is yes. Small tweaks—like swapping out cabinet handles for wrought‑iron pulls or adding a fresh coat of chalk paint—can make a huge difference.
Ready to turn that vision into reality? Let’s dive into the steps that will guide your farmhouse kitchen renovations nsw, from budgeting and design to choosing the right tradespeople who understand the quirks of rural NSW construction.
TL;DR
If you’ve dreamed of a warm, functional farmhouse kitchen renovations nsw that stands up to NSW country life, our step‑by‑step guide shows how to blend timeless style, rugged materials and smart budgeting for lasting results.
Follow Glen’s proven tips to transform your space without breaking the bank and enjoy family meals for years.
Step 1: Assessing Your Farmhouse Kitchen – Layout, Heritage & Budget
Alright, let’s roll up our sleeves and take a good look at where you’re starting. Before any paint or timber goes up, you need a clear picture of the kitchen’s current layout, the heritage bits you want to keep, and the budget you’re comfortable working with.
Grab a tape measure, a sketchpad, and a cuppa. Walk the room and note the distances between the fridge, stove, and sink – that classic work triangle. In a farmhouse kitchen, you’ll often want a bit more breathing room for a sturdy workbench or a kids‑size table, so add an extra metre or two to each side of the triangle in your notes.
Next, think about traffic flow. Where do you enter from the mudroom? Which door swings open onto the patio? Sketch the main pathways and spot any tight corners that could trip a wet boot. If a door hits a cabinet, that’s a red flag you’ll want to fix in the design stage.
Now, heritage. Many NSW farm homes have original features – reclaimed timber beams, a stone hearth, or those charming sash windows that let the sunrise flood the room. List each element that holds sentimental value. Ask yourself: does it need restoring, protecting, or can it be showcased as a focal point? For example, a weathered timber bench can be sanded and sealed, turning a worn piece into a statement.
If you’re not sure whether a feature is worth keeping, take a photo and compare it to a modern counterpart. Sometimes a simple chalk‑paint refresh does the trick, but other times you might need a specialist carpenter to reinforce a load‑bearing beam. The key is to balance authenticity with durability – you don’t want a beautiful old cabinet that collapses under a pot of stew.
Budget time – this is where most folks feel the pinch. Start with a rough spreadsheet: list must‑haves (new sink, stovetop, flooring), nice‑to‑haves (pendant lights, custom cabinets), and outright non‑essentials (marble countertops, high‑end appliances). Assign a realistic cost range to each line item based on local supplier quotes.
A handy rule of thumb for rural NSW projects is to set aside about 10‑15 % of the total budget for unexpected items – think of those hidden water‑damage patches or the extra timber needed after a storm. When you’re juggling a farm schedule, those surprise costs can pop up when you least expect them.
Once you have the numbers, rank them. Anything that protects the heritage or improves functionality moves to the top. If the total still overshoots, look for swaps: replace a premium stone splashback with a durable, locally‑sourced tile, or opt for a pre‑finished timber cabinet instead of a custom‑built piece.
Finally, create a timeline that matches the farming calendar. Avoid major demolition during lambing season or the wettest months in the northern tables. A phased approach – first the plumbing and electrical, then the floors, and finally the finish work – keeps the kitchen usable for the family and reduces downtime.
So, where do you start today? Grab that measuring tape, walk the space, jot down the heritage gems, and draft a budget spreadsheet. You’ll be surprised how quickly the fog lifts and the renovation path becomes crystal clear.
Step 2: Choosing Materials That Stand Up to NSW Outback Conditions
Now that you’ve mapped out the space and the budget, the next big question is: what’s going to survive the dust, the heat and the occasional summer storm? That’s where the right material choices make the difference between a kitchen that ages gracefully and one that needs a rescue mission every few years.
Flooring that takes a beating
In the outback, you’ll hear the boots, the wheel‑barrow, the mud‑splashed boots of a morning milking crew. Wide‑plank hardwood looks gorgeous, but untreated timber will swell when a sudden rain hits the mudroom floor. I always recommend a seasoned, oil‑finished hardwood or a slip‑resistant porcelain tile that mimics timber grain. The oil finish lets the wood breathe, while the tile gives you the look of timber without the warping.
And don’t forget the grout – a sealed, epoxy‑based grout resists staining from spilled red wine or that stubborn tomato sauce you love to make on weekends.
Countertops that can handle heat and humidity
Stone slabs are a farmhouse favourite, but a cheap marble will etch when a hot pot lands on it. I lean towards locally sourced sandstone or engineered quartz with a matte finish. Both stand up to the intense sun that bounces off the wide‑open NSW sky, and they’re easy to wipe clean after a rainy‑day cook‑off.
If you’re chasing a more rustic vibe, a reclaimed timber butcher block can work – just seal it with a food‑safe oil every six months, and you’ll have a surface that ages like a fine wine.
Cabinetry built for the bush
Standard MDF cabinets will swell when the humidity spikes after a storm. Solid timber, especially cedar or ironbark, not only looks the part but also expands and contracts without cracking. Choose dovetail or mortise‑and‑tenon joinery – it’s a bit of an old‑world technique, but it holds up when a heavy farm‑hand pulls a drawer full of pots.
And for the hardware, go for brass or wrought‑iron pulls. They won’t rust the way cheap zinc does when the kitchen gets a bit of damp from a leaky roof.
Wall finishes that breathe
Paint might seem like the easiest route, but in a kitchen that sees a lot of splash, a breathable, washable limewash or a high‑quality acrylic emulsion works best. They let the walls “breathe” when the humidity jumps after a summer shower, and you can spot‑clean them with a damp cloth.
If you’re after that rustic charm, consider reclaimed timber paneling on one accent wall. Seal it with a clear marine‑grade varnish – it’ll survive the occasional splash from a rain‑soaked coat you hang up.
Windows and ventilation – the unsung heroes
Many farmhouses have original sash windows. They’re beautiful, but single‑glazed glass can turn the kitchen into a sauna in January. Upgrading to double‑glazed sash windows keeps the heritage look while cutting down on heat gain and condensation.
Don’t forget a roof vent or a powered extractor fan. In the outback, dust loves to settle on surfaces, and a good airflow keeps the air fresh and the surfaces cleaner.
Practical checklist before you buy
- Test a sample of any flooring for moisture absorption – a quick 24‑hour soak will tell you if it swells.
- Ask the supplier for UV‑resistance data on stone or quartz – the outback sun is relentless.
- Check that cabinet timber is kiln‑dried; it’ll stay stable year after year.
- Ask for a warranty that covers warping or cracking for at least five years – a sign of confidence from the supplier.
When you line up these choices, think about the daily rhythm of farm life. Does the material stand up to a muddy boot, a hot pot, a sudden downpour? If you can answer “yes” with confidence, you’ve got a winner.
Bottom line: pick materials that blend the farmhouse aesthetic with the rugged demands of NSW’s outback, and you’ll end up with a kitchen that feels warm, looks timeless, and survives the next season’s surprise.
Step 3: Design Options – Open‑Plan vs Traditional Farmhouse Kitchens
When you get to the layout stage, the big question is: do you want the kitchen to spill out into the dining and living areas, or keep it a separate, cosy nook that feels like a true farm kitchen?
Both approaches have their own rhythm. An open‑plan space lets the morning sun bounce off the stone bench and warm the whole room, which is great when you’re serving a big breakfast for the crew. But a traditional closed‑in kitchen can act as a buffer against the dust that rides in on muddy boots, and it keeps the cooking smells where you want them.
Open‑Plan Layout Benefits
Think about the flow on a busy Saturday. You’re flipping pancakes at the stove while the kids are doing homework at the island, and the partner is pouring coffee at the breakfast bar. No walls to trip over – you can keep an eye on everyone. Open spaces also make the room feel larger, which is a bonus if your farmhouse sits on a modest plot.
From a resale angle, buyers in regional NSW often look for that airy feel, especially if the property is close to towns like Tamworth or Dubbo. They picture a space that can host a family gathering or a community meet‑up without feeling cramped.
Traditional Farmhouse Layout
Now, picture the classic farmhouse kitchen: a solid timber door, a hearth or range cooker, and a separate pantry that smells of cedar. This setup creates a dedicated work zone where you can hear the sizzle without the rest of the house picking up the heat. It also protects the rest of the home from dust, which is a real plus when the property sits on a dusty paddock.
Traditional layouts often include a “work wall” with deep cabinets and a butler’s pantry. That extra storage is a lifesaver for bulk buying in the outback, where you might stock up on flour, canned goods, and spare parts for the tractor.
Choosing What Fits Your Farm Life
Here’s a quick way to decide. Grab a sheet of paper and draw two simple floor plans – one open, one closed. Mark where the main traffic routes are: from the mudroom, from the laundry, from the patio. Walk the imagined path in your mind. Does a wall feel like a barrier, or does it feel like a protective shield?
Next, consider climate. In the hotter parts of NSW, an open plan can turn the kitchen into a sauna unless you’ve got a good extractor and maybe a ceiling fan. In cooler regions, a closed kitchen can hold the warmth, making it cosy for winter meals.
And don’t forget heritage elements. If your homestead has original timber beams or a stone hearth, you might want to showcase them behind a glass partition rather than hiding them behind a wall. That gives you the best of both worlds – open sightlines with a practical barrier.
If you need a hand visualising these options, our team at Kitchen Renovations for Rural Homes can sketch out 3‑D layouts that factor in the outback’s unique challenges.
Quick Comparison Table
| Feature | Open‑Plan | Traditional |
|---|---|---|
| Family Interaction | High – everyone stays in view | Moderate – kitchen is a separate hub |
| Dust & Odour Control | Lower – needs strong ventilation | Higher – wall acts as barrier |
| Heritage Showcase | Visible via open sightlines | Can be highlighted behind a feature wall |
| Space Perception | Feels larger, airy | Feels cozier, defined |
| Resale Appeal | Popular with modern buyers | Appeals to traditional buyers |
Bottom line: there’s no one‑size‑fits‑all answer. Your decision should echo how you live day‑to‑day on the farm. If you love a bustling, shared space, lean open. If you need a sturdy, protected cooking zone, stick with the classic farmhouse feel. Either way, a thoughtful layout will make your farmhouse kitchen renovations nsw both beautiful and built to last.
Step 4: Essential Appliances & Fixtures for Rural Kitchens
Now that you’ve nailed the layout and material choices, let’s talk about the heart of any farmhouse kitchen – the appliances and fixtures that keep the daily grind humming on a rural NSW property.
In the bush, you need gear that can take a beating from dusty boots, sudden temperature swings and the occasional power flicker. Below is a practical, step‑by‑step guide to picking the right pieces for your farmhouse kitchen renovations nsw.
Stove & Cooktop
First up, the stove. A gas‑powered range is a favourite on farms because you can fire it up even if the electricity drops. Look for a double‑oven model with a heavy‑duty cast‑iron frame – it’ll stand up to the weight of big roasting pans and the occasional stray hammer when you’re moving livestock feed nearby.
If you prefer electric, choose an induction cooktop with a sealed glass surface. It’s easy to wipe down after a mud‑splashed boot and it heats quickly, which is a blessing when you’re juggling a breakfast for the crew and a lamb roast at the same time.
Refrigeration
Next, refrigeration. A commercial‑grade fridge with a robust compressor handles the extra door openings that come with a busy farm kitchen. Stainless‑steel panels resist rust from the salty outback air, and a frost‑free freezer means you won’t have to defrost every month.
Consider a side‑by‑side unit with a built‑in ice maker – perfect for chilling large batches of homemade jam or keeping a stock of frozen meat cuts. A backup generator inlet on the fridge can be a lifesaver during those occasional power cuts.
Dishwasher & Utility
Dishwashers are often overlooked, but a high‑efficiency, under‑counter model saves you endless hand‑washing after a weekend barbeque. Look for a machine with a soil sensor; it adjusts water temperature and cycle length based on how dirty the pots are, which conserves water in drought‑prone regions.
A separate utility sink with a deep basin and a pull‑out tap gives you a sturdy space for pre‑washing large trays, cleaning muddy boots or rinsing garden tools before they go back into the shed.
Ventilation & Extractor Fans
Dust and odour can travel fast in an open‑plan layout, so a powerful extractor fan is non‑negotiable. A ceiling‑mounted, variable‑speed fan with a stainless‑steel duct can pull hot air and cooking fumes straight outside, even on windy days.
If you have a traditional closed kitchen, a wall‑mounted range hood with a charcoal filter adds an extra layer of protection, especially during winter when you’ll be using the stove more often.
Lighting Fixtures
Good lighting does more than make the space look pretty – it’s essential for safety when you’re chopping with a sharp knife after a long day in the paddock. Combine ambient LED downlights with task‑focused pendant lights over the island or workbench.
Choose fixtures with IP65 rating so they’re dust‑proof and can handle occasional splashes from a rain‑soaked coat hanging on the back of the door.
Plumbing Fixtures
For the sink, a deep stainless‑steel basin with a pull‑down sprayer is a farm favourite. The sprayer can rinse out grit from veg or clean a bucket of water without you having to lift heavy pots.
A dual‑handle mixer with a ceramic disc valve prevents leaks and stands up to the high‑pressure water that can come from a well or reticulated system common in rural NSW.
Quick Checklist
- Choose a gas‑range or induction cooktop with heavy‑duty construction.
- Pick a commercial‑grade fridge with stainless finish and backup power option.
- Install a high‑efficiency dishwasher with soil sensor.
- Add a deep utility sink and pull‑out tap.
- Fit a variable‑speed extractor fan or range hood with charcoal filter.
- Layer lighting: LED downlights + pendant/task lights, IP65 rated.
- Use a deep stainless sink with pull‑down sprayer and ceramic‑disc mixer.
Once you’ve ticked these boxes, you’ll have a kitchen that not only looks the part but can survive the daily rhythm of farm life – from early‑morning milking runs to late‑night dinner parties under the stars.
Step 5: Planning Permits, Licences & Hiring the Right Rural Builder
Why permits matter in a farmhouse kitchen reno
First thing’s first – you can’t just swing a hammer and expect everything to fall into place. In NSW, any change that touches walls, plumbing or electrical usually needs a council sign‑off. Skipping that step can mean a fine, a forced tear‑down, or worse, a safety hazard when the next rainstorm hits.
From my 35 years on the ground, I’ve seen a simple wall removal turn into a months‑long headache because the homeowner never asked for a building permit. The cost of a standard kitchen permit sits between $500 and $1,500, depending on the scope according to recent cost breakdowns. It’s a small price to pay for peace of mind.
Checklist for licences and council approvals
Grab a notebook and tick these boxes before you call anyone:
- Determine if you’re moving any plumbing lines – you’ll need a licensed plumber and a council plumbing consent.
- Are you knocking down a non‑load‑bearing wall? Then you’ll need a structural engineer’s sign‑off and a building permit.
- Electrical work above $3,000 requires a licensed electrician and an electrical compliance certificate.
- Heritage‑listed properties? You may need a heritage overlay approval before touching original timber beams or stone hearths.
- Confirm that any gas appliances are installed by a gas‑licensed contractor; the gas licence number must be recorded on the compliance certificate.
Once you have the paperwork sorted, keep copies in a dedicated ‘renovation folder’ – you’ll thank yourself when the council asks for evidence during a future property sale.
Finding a builder who gets rural NSW
Not every city‑based contractor understands the quirks of a farm kitchen – think dusty boot traffic, high‑pressure well water and the occasional power cut. Look for a builder who lists “rural” or “farm” in their portfolio, and who knows the local council’s timelines. A good sign is a history of projects in Tamworth, Dubbo or the New England region.
Ask to see references from other farm owners. If they can walk you through a recent kitchen that still has a pull‑down sprayer and a dual‑handle ceramic‑disc mixer, you’ve hit the sweet spot.
Interview questions & red‑flags
When you sit down with a potential builder, keep the conversation relaxed but focused. Here are a few things to ask:
- “What’s your experience with council permits for kitchen remodels in rural NSW?” – a vague answer is a red‑flag.
- “Can you provide a written estimate that separates labour, materials and permit fees?” – transparency prevents surprise costs.
- “Do you have a licence for gas, electrical and plumbing work, or do you subcontract those trades?” – you want a single point of contact.
- “How do you protect the existing heritage features during demolition?” – you’ll know if they respect the original timber beams or stone hearth.
Take note of how quickly they respond to emails and whether they use plain language or a wall of jargon. The right builder will explain things like “load‑bearing wall” in a way that feels like a chat over a cuppa.
Putting it all together – a simple action plan
1. Map your scope. Sketch the walls you want to move, the new appliances, and any heritage bits you’re keeping.
2. Check permits. Call your local council (or swing by the office) with your sketch and ask which permits apply. Note the fees.
3. Gather quotes. Get at least three written quotes that break down permits, licences and labour. Compare not just price but how clearly they outline each step.
4. Choose the builder. Pick the tradesperson who demonstrates rural experience, clear communication and a realistic timeline that fits your farming calendar (avoid peak lambing or harvest weeks).
5. Sign a detailed contract. Include a clause for unexpected site conditions – a 10‑15 % contingency is standard practice in outback projects.
6. Schedule inspections. Arrange the council’s progress inspections at the right milestones – after structural work, after plumbing, and at final sign‑off.
Following these steps means you won’t be caught off guard by a surprise council notice or a builder who disappears halfway through. Your farmhouse kitchen will stay on budget, on time, and most importantly, built to handle the everyday rhythm of country life.
FAQ
What are the first things I should check before starting farmhouse kitchen renovations nsw?
First, walk the kitchen with a tape measure and note the exact size of the work triangle – fridge, stove, sink – because that’ll tell you where you can gain breathing room. Next, list any heritage features like timber beams or a stone hearth; decide if they need restoring or just protecting. Finally, pop a quick budget spreadsheet together, flagging a 10‑15 % contingency for hidden issues that always pop up on a farm.
Do I need a council permit for a kitchen remodel in rural NSW?
Yes, almost any change that touches walls, plumbing or electrical will require a council permit. A typical kitchen permit runs between $500 and $1,500, depending on scope, and it saves you from costly stop‑work orders later. Call your local council with a simple sketch, ask which permits apply, and keep the paperwork in a dedicated folder so you can hand it over at each inspection stage.
How can I choose materials that survive the outback’s dust and heat?
Look for things that breathe and resist warping. Oil‑finished hardwood or slip‑resistant porcelain tiles mimic timber but won’t swell when a mud‑splashed boot tracks in moisture. For countertops, go with locally sourced sandstone or engineered quartz with a matte finish – they handle scorching pots and UV‑exposure without etching. And always seal timber shelves with a marine‑grade varnish so a splash of rain‑soaked coat won’t ruin them.
What’s the best way to protect heritage features during demolition?
Cover them first. Use breathable drop cloths or plywood sheets to shield original beams, stone hearths or sash windows from dust and impact. If a wall needs removal, hand‑saw around the feature rather than using a hammer drill – it reduces vibration that can crack old timber. And keep a photo record before and after; it helps the builder respect the details and gives you a reference for future maintenance.
Which appliances are most practical for a farm kitchen?
Go heavy‑duty. A gas‑range with a cast‑iron frame keeps cooking going during power cuts, and a double‑oven lets you roast a lamb while baking biscuits. Choose a commercial‑grade fridge with stainless steel panels and a frost‑free freezer – it handles frequent door openings and the salty outback air. Add a deep utility sink with a pull‑down sprayer; it rinses muddy boots or garden tools without a second basin.
How do I find a builder who truly understands rural NSW renovations?
Start by hunting for portfolios that mention “rural” or “farm” projects in towns like Tamworth, Dubbo or Armidale. Ask for references from other farm owners – a builder who can walk you through a recent kitchen that still has a working pull‑down sprayer is a good sign. During the interview, ask about their experience with council permits, heritage overlays and how they protect existing timber beams during demolition.
What’s a realistic timeline for a farmhouse kitchen renovation on a working farm?
Plan around the farming calendar. Aim to finish demolition and structural work before the wet season or lambing period, when crews are hard to find and you can’t afford a kitchen out of action. A typical timeline runs 8–10 weeks: two weeks for demolition and permits, three weeks for flooring and cabinets, two weeks for plumbing and electrics, and the final week for finishing touches and inspections. Build in a few buffer days for unexpected weather.
Conclusion
So, you’ve walked through every step of farmhouse kitchen renovations nsw – from sizing the work triangle to picking out dust‑proof flooring and hunting down a builder who gets farm life. It feels a bit like planning a big family dinner, doesn’t it?
Here’s the bottom line: keep the heritage bits you love, choose materials that breathe, and protect your timeline with a solid permit plan. When you blend those basics with a bit of Aussie grit, the kitchen will not only look gorgeous but also survive the next rainy season and the daily boot traffic.
Want to make the next move feel doable? Grab a notebook, sketch a quick “before‑and‑after” layout, and flag three priority items – maybe a gas range, a double‑door fridge, or a sturdy utility sink. Those three wins will give you instant momentum.
Remember, a good rural builder will talk in plain language, show you real photos of past farm kitchens, and respect your budget’s 10‑15 % contingency. If you feel that vibe, you’re probably looking at the right partner.
Finally, give yourself a realistic deadline that works around lambing or harvest times. A little extra buffer can save a lot of stress when the weather turns.
Ready to turn the vision into a kitchen that feeds both your family and your farm? Let’s have a chat and get the first shovel in the ground.


1 Comment