

Ever walked into your kitchen and thought the benchtop just isn’t cutting it anymore?
Maybe it’s cracked from the last storm or faded after years of flour dust, and you’re tired of the stubborn stains.
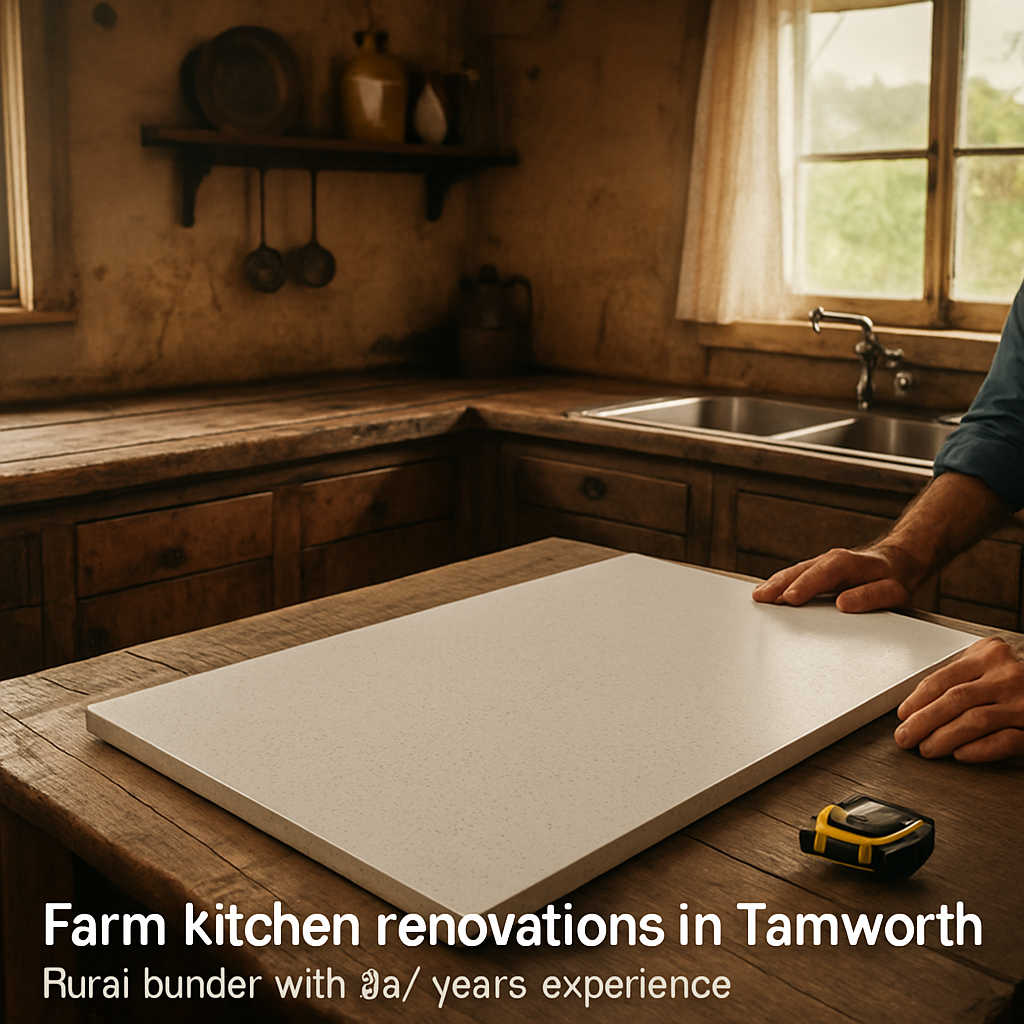
If you’re a farm family in Tamworth, you know the kitchen is the hub where you refuel after early‑morning mustering.
That’s why a kitchen benchtop replacement Tamworth isn’t just cosmetic – it’s about durability, easy cleaning, and keeping everyone safe from splinters or water damage.
After 35 years driving my 4×4 to remote homesteads, I’ve seen timber tops swell after rain and laminate crack under a shearer’s lunch box.
We start by standing with you, feeling the surface and asking: what daily tasks does this benchtop need to survive?
Then we match the job to a material – solid timber for warmth, engineered stone for heavy chopping, or low‑maintenance quartz that won’t etch.
Because we’re based in Tamworth, we can drop a sample on your table the same day, let you test it with a splash of water.
Measurements are taken quickly, often from the back of our 4×4 while the kids watch the dog chase a rabbit, so there’s no long site visit.
Installation fits around your harvest or calving schedule; we protect surrounding floors, cut the new slab to fit exact cut‑outs, and seal the edges.
When we’re done, you’ll have a bench that looks fresh, stands up to mud‑splattered boots, and makes you actually look forward to prepping that big family stew.
Ready to swap that tired surface for something built to handle country life? Let’s get started today.
TL;DR
A kitchen benchtop replacement in Tamworth gives you a durable, easy‑clean surface that stands up to mud‑splattered boots, heavy chopping and the unpredictable Aussie weather, with material choices from warm timber to low‑maintenance quartz. Awesim Building Contractors will measure, sample and install it around your farm schedule, so you can start prepping that big family stew on a fresh bench tomorrow.
Step 1: Assess Your Existing Benchtop and Plan the Replacement
First thing we do is stand right in front of that old benchtop and ask yourself, “What’s really bothering me about this surface?” Maybe it’s a crack that shows up every time a pot of soup boils, or a faded edge that swallows the colour of your favourite mug. That moment of recognition is where the plan starts.
Take a quick walk around the kitchen with a notepad – or just the back of your hand if you’re on the go. Jot down any spots that feel soft, any seams that are lifting, and any stains that refuse to come out even after a good scrub. We call it the “damage inventory.” It sounds a bit formal, but it’s really just you pointing out the things that make you sigh when you’re prepping the evening stew.
Check for Structural Issues
Look at the underside of the benchtop. Is there any water damage? Any mouldy smell? In rural Tamworth homes, a leaky roof can sneak its way into the kitchen during a sudden rainstorm, and the wood underneath can swell. If the support brackets feel wobbly, that’s a red flag – you’ll need a stronger substrate before you slap on a new slab.
And don’t forget the edges. Chips or splintered corners aren’t just an eyesore; they’re a safety hazard for kids and the family dog. If you notice any, mark them – they’ll dictate how much of the old material you can reuse, if at all.
Measure Accurately
Grab a steel tape and measure the length, width, and depth of each section. Write the numbers down in centimetres; we’ll convert to metres later for the quote. It’s tempting to eyeball it, but a half‑centimetre error can mean a costly re‑cut on site.
While you’re measuring, check the cut‑outs – sink, stove, dishwasher. Note any irregular shapes; a farmhouse sink often has a curved front that needs a custom notch. If you’re unsure, just sketch a quick diagram and tag the tricky bits.
Plan Your Material Choice
Now that you know what you’re dealing with, think about what you actually need the new benchtop to do. Heavy chopping? Choose engineered stone or quartz – they resist etching from knives and are easy to wipe down after a day of processing livestock. Warmth and a bit of rustic charm? Solid timber can handle a few splashes, but you’ll need a good sealant for those inevitable mud‑splattered boots.
If you’re also dreaming about an outdoor cooking station, you might appreciate some useful tips for a patio gas heater – the same durability mindset applies to outdoor benchtops as it does indoors.
Jot down your top three priorities – durability, maintenance, and budget – and rank the materials accordingly. That little list becomes the brief we hand to the installer, so there’s no guesswork on the day.
Set a Realistic Timeline
Farm life isn’t a 9‑to‑5 schedule, so we sync the replacement with your milking, shearing, or harvest calendar. Identify a window when the kitchen can be out of commission for a day or two. Most of us can have the new slab measured, cut, and installed while the kids are at school and the cattle are in the paddocks.
Finally, give yourself a buffer – a day for the installer to prep the site and another for the sealant to cure before you start chopping again.
With the assessment complete, you now have a clear picture of what’s broken, what size the new surface needs to be, and which material will survive the next season’s mud, rain, and busy family meals.
Next up we’ll dive into getting accurate measurements and ordering the perfect slab. Stay with us – the best part is seeing that fresh surface appear in your kitchen, ready for the next big family feast.
Step 2: Choose the Right Benchtop Material for Rural Kitchens
Alright, you’ve measured the space and you know what the bench has to survive every day. The next move is picking a surface that won’t quit when the kids fling cereal, the dog drags mud in, or you’re carving a leg of lamb for the Sunday roast. It sounds simple, but the right material can save you hours of cleaning, a few pricey repairs, and a lot of frustration.
First, write down the three biggest jobs your benchtop will do. Is it heavy‑pot chopping, splash‑prone messes, or a place for boots and farm tools? Those answers will steer you toward timber, stone, quartz, laminate or even stainless steel. Below is a quick cheat‑sheet of the most common options for a rural kitchen.
Solid timber – warm, forgiving, but needs love
Timber feels like home – it hides dust, warms up in the winter sun, and you can sand out scratches. For a Tamworth homestead where the bench sees muddy boots and occasional spills, a well‑sealed hardwood (like spotted gum or jarrah) can last decades. The downside? It swells if water gets under the seal, so you’ll need to re‑seal every 12‑18 months and keep a cloth handy to wipe up any moisture right away.
Engineered stone – strength without the weight
Engineered stone (think composite of quartz and resin) offers a hard‑wear surface that resists chipping and can handle a butcher’s cleaver without a nick. It’s heavier than timber, so your cabinets need to be solid, but the material itself won’t crack from temperature swings – a common issue in outback kitchens where a cold night can meet a hot oven in minutes.
Quartz – low‑maintenance, stain‑proof
Pure quartz slabs are the go‑to for families who want a surface that won’t etch when you slice a pork joint or spill red wine. They’re non‑porous, so bacteria doesn’t hide in the pores, and you can wipe them with a mild detergent. The trade‑off is cost; a full‑size quartz top can be a few thousand dollars, but you’ll save on sealants and labour down the road.
Laminate – budget‑friendly, but watch the heat
Laminate tops are the most affordable – perfect if you’re watching the budget and the bench is mostly a prep area, not a heavy‑duty chopping block. Modern designs mimic wood or stone, but a hot pot left for too long will leave a ghost mark, and the edges can chip if a shovel or heavy tool bumps into them.
Stainless steel – industrial, easy‑clean
Stainless steel is a favourite in commercial kitchens and works surprisingly well in a farmhouse setting. It’s 100 % heat‑resistant, won’t stain, and you can scrub away any mess. The main gripe is that fingerprints and water spots are obvious, so you’ll need a microfiber cloth and a bit of elbow grease daily.
Here’s a quick decision matrix you can print out:
- Durability under heavy chopping: Engineered stone or quartz.
- Resistance to water & mud: Quartz or stainless steel.
- Warm aesthetic & forgiving look: Solid timber.
- Budget constraints: Laminate.
- Low‑maintenance cleaning: Quartz or stainless steel.
Actionable steps to lock in your choice
1. Rank your priorities. Use the matrix above and mark the top three factors that matter most to you.
2. Grab samples. Our 4×4 crew can drop a timber slab, a quartz piece, and a laminate swatch at your kitchen door. Let the kids spill juice, the dog sniff around, and you run a hot pan across each.
3. Test for stains. Pour a splash of red wine, coffee, or a bucket of water on each sample. Watch how long it takes to wipe clean – that’s your real‑world performance.
4. Consider maintenance. Ask yourself: am I happy re‑sealing timber every year, or would I prefer a surface I can just wipe down?
5. Get a precise quote. Once you’ve narrowed it to one or two options, we’ll measure again, factor in cut‑outs for sinks and hobs, and send you a line‑item quote – no hidden fees.
Real‑world story: the McLeods of Gunnedah swapped a cracked laminate top for a solid timber slab after a rainy season left the old bench warped. They love how the timber hides the occasional dust speck, and the new seal keeps the mud from seeping in.
Another example: a shearing shed kitchen in Inverell chose quartz because the family needed a surface that could survive a hot iron and a splash of blood from the shearing process. Six months later they’re still amazed that the colour hasn’t dulled a bit.
Pro tip: always seal the edges of any stone or timber with a waterproof silicone. It prevents water from wicking into the cut‑outs and causing mould behind the bench.
If you’re worried about water damage to the cabinets or walls after the new bench is in, this guide on how to dry walls after a water leak walks you through quick, non‑invasive drying techniques.
Need a broader view of how a new benchtop fits into a full kitchen makeover? Check out our Kitchen Renovations for Rural Homes page for ideas, budgets, and a gallery of farms we’ve helped across Tamworth.
Step 3: Measure, Cut and Prepare the New Benchtop
Now that you’ve picked the perfect material, it’s time to turn those numbers into a real slab that fits your kitchen like a glove.
Double‑check your measurements
Grab a steel tape and run it along the length of the existing bench, then across the width. Write down the figures in metres, not centimetres – a half‑centimetre mistake can mean a gap big enough for a mouse.
Don’t forget the depth of any cut‑outs. Measure the sink opening, the hob, and any plumbing penetrations from edge to edge, then add a 2‑3 mm safety buffer. It sounds tiny, but that extra bit saves you from a frantic trim on site.
Got a 4×4 on site? Snap a photo with a ruler laid flat on the bench; it helps the crew visualise the space before they even leave the truck.
Mark the slab before you cut
Lay the new slab on a clean, flat surface – preferably on a set of sturdy sawhorses. Using a pencil or a thin marker, transfer each measurement onto the stone or timber. For quartz or engineered stone, a fine‑point scribe works best; for timber, a carpenter’s square and a pencil line will do.
Take a step back and eyeball the lines. Do they line up with the cut‑out outlines you measured earlier? If anything looks off, adjust now – it’s a lot easier to correct on paper than after you’ve made the first cut.
Cutting the benchtop
If you’re dealing with quartz or engineered stone, a wet saw with a diamond blade is the tool of choice. Let the blade do the work; don’t force it, and keep the water flow steady to avoid overheating.
For solid timber, a circular saw with a fine‑toothed blade gives a clean edge. Set the depth just a touch deeper than the slab thickness and guide the saw slowly along the marked line.
Pro tip: always wear safety goggles and a dust mask. A little dust in a farm kitchen can become a nightmare later on.
Finishing the edges
Once the slab is cut, sand the raw edges with progressively finer grit – start at 80 then move to 120 and finish at 220. For stone, a polishing pad will give a smooth, sealed finish; for timber, a light oil or polyurethane seal will protect against mud and water.
Remember the waterproof silicone tip from earlier – run a bead along every exposed edge, especially around sinks and hobs. That silicone acts like a barrier, keeping water from sneaking behind the bench and causing mould.
Fit‑check before you cement
Place the slab back onto the cabinets and press it gently into position. Does it sit flush? Any gaps? If you see a gap larger than a few millimetres, use a thin shim of plywood or a self‑levelling compound to even it out.
Check the alignment of the cut‑outs – the sink should sit evenly, and the hob should have a uniform reveal all around. A quick dry‑fit saves you from a costly re‑cut later.
Secure the benchtop
When everything looks good, apply a bead of construction adhesive along the top of the cabinets. Lay the slab down, press firmly, and wipe away any excess that oozes out.
For heavy stone, consider anchoring with stainless‑steel brackets underneath the cabinets – it adds extra stability on those windy Tamworth evenings when the house shudders a bit.
Final seal and clean‑up
Give the entire surface a final wipe with a damp cloth, then apply a food‑grade seal if you’re using timber. Let it cure according to the manufacturer’s instructions – usually 24 hours before you start chopping, wiping, or letting the kids’ boots track mud across it.
And there you have it – a perfectly measured, cut and prepared benchtop ready to take on everything from a hot iron to a rain‑soaked work boot. Your kitchen is now set for the next season’s harvest, and you can finally enjoy prepping that big family stew on a surface that won’t let you down.
Step 4: Install the Benchtop – Tools, Tips and Common Pitfalls
Alright, you’ve got the slab trimmed to perfection and the cabinets are level – now it’s time to actually get that benchtop sitting where it belongs. If you’ve ever tried to jam a heavy stone slab onto uneven cabinets, you know it feels a bit like trying to park a 4‑tonne tractor in a tiny shed. Let’s make it painless.
Essential tools for a smooth install
First up, grab a few basics: a good‑quality construction adhesive (the kind that stays put on timber, stone or quartz), a rubber mallet, a caulking gun, a spirit level, a 2‑metre straight edge, and a set of stainless‑steel brackets if you’re working with a heavyweight stone. Don’t forget safety gear – goggles, gloves, and a dust mask – because cutting and sanding create a fine cloud that’ll follow you around the farm for days if you skip it.
Pro tip: keep a bucket of clean water and a damp rag handy to wipe away any adhesive spill before it hardens. It saves a lot of scrubbing later.
Step‑by‑step installation
1. Prep the cabinets. Wipe each surface dry and give it a quick dust‑off. If you notice any squeaky joints, tighten the screws now – a wobbling base will make the benchtop flex later on.
2. Lay a bead of adhesive. Run a continuous 10‑mm bead along the top edge of each cabinet run. You don’t need to flood the area; a thin, even line is enough to create a strong bond.
3. Set the slab. With a helper, lift the benchtop onto the cabinets, aligning the cut‑outs for sink and hob. Gently press down and roll a rubber mallet across the surface to push the adhesive into the gaps.
4. Secure heavy stone. For quartz or engineered stone, drill pilot holes through the pre‑drilled bracket slots and bolt the stainless‑steel brackets underneath. This extra anchoring keeps the bench from shifting on those windy Tamworth evenings when the house shudders a bit.
5. Level and seal. Place a spirit level across the centre and at each end; if you spot a high spot, slip a thin shim of plywood under the low side and tap it into place. Once level, run a bead of waterproof silicone along every exposed edge – especially around the sink and hob – to stop water creeping behind the slab.
6. Clean‑up. Wipe away any excess adhesive with a damp cloth while it’s still tacky. Let the bench cure for at least 24 hours before you start chopping, wiping, or letting the kids’ boots track mud across it.
Common pitfalls (and how to dodge them)
One mistake I see time and again is ignoring the heat‑proof surface rule for appliances. An air fryer, for example, can scorch a laminate or timber top if it sits directly on the bench. CHOICE advises placing a heat‑resistant board under the air fryer to protect the benchtop from heat damage.
Another trap: using too much adhesive. A globs‑of‑glue situation not only looks messy but can seep into cut‑outs and create a sticky mess that’s hard to remove later. Stick to a thin, even bead.
Don’t rush the level check either. Even a 2‑mm tilt can cause water to pool around the sink, leading to mould behind the bench – a nightmare for any farm household.
Quick checklist before you step back
- All cabinets tightened and dust‑free?
- Adhesive bead applied evenly?
- Benchtop aligned with cut‑outs?
- Brackets bolted for stone tops?
- Silicone sealed around edges?
- Level confirmed with spirit level?
- Heat‑proof boards in place for appliances?
Run through that list, and you’ll avoid the usual headaches.
And there you have it – a solid, level, and protected benchtop ready for the next round of family meals, muddy boots, and the occasional air‑fryer experiment. A proper kitchen benchtop replacement tamworth isn’t just about a new surface; it’s about giving your farm home a reliable workhorse that stands up to the Aussie outback.

Step 5: Finishing Touches and Maintenance for Longevity
Now that the benchtop is finally in place, the real work begins – making sure it stays tough enough for muddy boots, hot pots and the occasional family chaos.
First thing’s a quick visual check. Walk the length of the slab, run your fingertips along the edges, and ask yourself: does anything feel rough, uneven or sticky? A little dust or adhesive residue looks harmless, but it can trap moisture and invite mould behind the cabinets.
Seal the edges, seal the future
Even the best‑quality timber or stone will betray you if water finds a way behind it. Grab a quality, food‑grade silicone and run a smooth bead along every exposed edge – around the sink cut‑out, the hob opening and any back‑panel gaps. Press it with a finger and wipe away any excess before it skins over.
Why the extra effort? A thin line of silicone is like a rain‑guard for your bench; it stops water from wicking into the cabinets where it can rot timber or rust screws. On a farm property, a sudden downpour or a bucket of water spilled during a Sunday roast is more likely than you think.
Protect high‑heat zones
We all love an air‑fryer or a cast‑iron skillet, but those heat sources can scorch laminate or even leave faint scorch marks on timber. Place a heat‑proof board or a silicone mat under any appliance that runs hot for more than a few minutes.
It’s a cheap habit that pays off. You’ll notice the difference the first time you lift a pot and the board slides right off without a singe.
Routine cleaning – the 5‑minute rule
Here’s the trick I swear by: after every meal, wipe the bench down within five minutes. A damp cloth and a mild dish soap are enough for most surfaces. For stone, a pH‑neutral cleaner keeps the seal intact; for timber, a quick oil‑wipe once a month tops off the protective finish.
And don’t forget the grout lines or the silicone joints – a soft brush can dislodge crumbs before they harden into a stubborn crust.
Seasonal maintenance checklist
Every three months, give your benchtop a deeper look. Check these items and you’ll dodge most headaches:
- Silicone seams – any cracks or gaps?
- Edge seal – is the silicone still smooth or has it dried out?
- Surface wear – are there scratches that need sanding (timber) or polishing (stone)?
- Stubborn stains – treat with a dedicated stone poultice or timber stain remover.
If you spot any wear, address it before it spreads. A quick re‑seal on a timber edge costs pennies compared with replacing the whole slab.
Tools and products you’ll reach for
Below is a quick reference table that sums up the most common finishing touches and the go‑to tools for each.
| Feature | Tool/Option | Notes |
|---|---|---|
| Edge sealing | Food‑grade silicone gun | Apply a smooth 2‑mm bead, smooth with fingertip, wipe excess |
| Heat protection | Heat‑proof silicone mat or wood board | Place under air‑fryer, kettle, or cast‑iron skillet |
| Routine cleaning | Microfibre cloth + mild dish soap | Wipe within 5 min of spills; use pH‑neutral stone cleaner if needed |
Remember, the goal isn’t to turn your kitchen into a museum – it’s to keep it functional for the next season’s harvest, the next family gathering, and the next muddy‑boot walk‑through.
One final tip: schedule a quick walk‑through with your Awesim builder at the end of the first year. A professional eye can spot tiny gaps you might have missed and re‑apply silicone where it’s started to shrink.
Stick to these simple habits, and your kitchen benchtop replacement Tamworth will stay as sturdy as a farm gate for years to come.
Step 6: Cost Estimation and Funding Options for Rural Homeowners
Alright, you’ve got the finish sorted, the silicone sealed and the bench looking like a farm gate that’ll stand the test of time. The next thing that keeps many of us up at night is the price tag – how much will this kitchen benchtop replacement Tamworth actually cost, and where can you find a bit of extra cash without pulling the plug on the rest of the farm’s budget?
Let’s break it down together, so you can see exactly where every dollar goes and feel confident that the numbers add up before the first nail is hammered.
1. Break down the numbers, line by line
Start with a simple spreadsheet – even a rough paper list works. Write the major heads, then fill in the details. Here’s a quick template you can copy:
- Material cost (timber, quartz, engineered stone, etc.)
- Cut‑out and edge‑sealing fees
- Labour – builder’s day rate + any overtime for remote access
- Transport – mileage for the 4×4, fuel surcharge for gravel tracks
- Site prep – any extra timber shims, waterproofing, or cabinet repairs
- Contingency – usually 10 % of the total to cover surprise cracks or weather delays
Does that feel a bit overwhelming? Take a breath – you’re just turning a vague idea into concrete numbers, and that alone saves you from nasty surprises later.
2. Rural funding avenues you might not have heard of
Because you’re working a farm, there are a few government‑backed and community programs that can chip in. A quick chat with your local council or the NSW Rural Assistance Office often reveals:
- Home Improvement Grants – modest sums for upgrades that improve safety or energy efficiency.
- Farm Business Development Loans – low‑interest loans that can be used for building works, including kitchen upgrades.
- Regional Development Fund – occasional one‑off rebates for renovations that boost rural tourism or accommodation.
It’s worth pulling out the phone and asking: “Do you have any current rebates for kitchen renovations on a working property?” You’ll be surprised how many options sit on a shelf you never knew existed.
And if you’ve got a good relationship with your bank, ask about a line of credit tied to your farm’s assets. That way you only pay interest on the amount you actually draw, not the whole project upfront.
3. DIY budgeting tools that keep you honest
We all love a spreadsheet, but sometimes a visual aid does the trick. Try a simple “cost‑vs‑benefit” board on the wall of your shed. Write each expense on a sticky note, then move the notes around as you get quotes. Seeing the big numbers side by side makes it easier to spot where you can trim – maybe a slightly thinner slab, or a local timber supplier instead of a city‑based dealer.
Another tip: ask Awesim for a detailed, itemised quote before any work starts. A transparent breakdown lets you compare line items with any other quotes you gather, and it gives you leverage to negotiate.
4. Watch out for hidden costs – the sneaky ones
It’s easy to forget the little things that add up. Here’s a short checklist you can run through before you sign the final paperwork:
- Extra transport for oversized stone slabs – some carriers charge per kilometre once you cross a certain weight.
- Site cleanup – disposing of old benchtop material isn’t always free; there may be a tip fee.
- Permits – certain council zones require a minor building permit, even for a kitchen bench.
- Insurance uplift – updating your home‑and‑content policy after a major renovation can raise premiums.
Ask the builder up front: “What, if any, additional charges should I expect after the quote?” The answer should be crystal clear, not a vague “we’ll let you know later.”
So, where does that leave you? With a solid spreadsheet, a handful of possible grants, and a clear picture of the hidden bits that could bite you later. Armed with that, you can sit down with Awesim Building Contractors, compare quotes, and walk away feeling like you’ve got a firm grip on the budget.
Remember, a kitchen benchtop replacement isn’t just an expense – it’s an investment in a space that will feed your family, host your neighbours and survive the next storm. When you understand the costs and know where the money can come from, that investment feels a lot less like a gamble and a lot more like a well‑planned step forward for your farm home.
FAQ
What is the typical cost range for a kitchen benchtop replacement in Tamworth?
When you’re looking at a kitchen benchtop replacement tamworth, you’ll usually see quotes between $4,000 and $12,000. The spread depends on material – timber or laminate sits on the low end, while quartz or engineered stone pushes the price up. Labour, transport on a 4×4 and any site‑prep work also add to the total, so ask your builder for a line‑item breakdown.
How long does the whole replacement process take from start to finish?
Most rural projects wrap up in one to two weeks. We start with a site visit, then measure, order the slab and schedule delivery – our 4×4 trucks can get to remote properties in a day. Installation itself is usually a single 8‑hour shift, followed by a 24‑hour cure time for adhesives. If you’re timing it around a harvest, add a buffer for weather.
Do I need a building permit for a benchtop swap on my farm property?
In most NSW council zones, a kitchen benchtop replacement tamworth doesn’t trigger a full building permit, but a minor works consent might be required if you’re altering the sink opening or changing the countertop height. It’s worth a quick call to your local council; they’ll confirm whether a simple notification form is enough.
What maintenance does a timber benchtop need compared with quartz?
Timber loves a regular oil or polyurethane top‑up every 12‑18 months – it keeps water out and the colour warm. Quartz, on the other hand, is non‑porous, so a mild soap and water wipe does the job and you won’t need resealing. If you’ve got muddy boots tracking in daily, quartz will forgive those spills faster, but timber hides dust and gives that farmhouse feel.
Can I keep my existing cabinets when I replace the benchtop?
Absolutely. As long as the cabinets are level and structurally sound, we’ll simply refit the new slab on top. We’ll also check for any sagging or loose joints during the prep stage – it’s the perfect time to tighten screws and reinforce any weak spots before the adhesive sets.
What hidden costs should I watch out for during the project?
Beyond the slab price, watch for transport surcharges on heavy stone, tip fees for disposing of the old bench, and any extra shims or waterproofing silicone you might need around cut‑outs. Some builders also charge a small fee for site clean‑up after the job. Asking for a complete quote that lists these items up front saves surprise invoices later.
How do I choose the right material for my farm kitchen’s daily grind?
Start by ranking your top three tasks – heavy chopping, heat exposure, or mud resistance. If you’re constantly slamming pots and boots, quartz or engineered stone offers the toughest surface. If you prefer a warm look and don’t mind occasional resealing, solid timber fits the bill. Laminate works if budget is tight and you mainly prep food. Our crew can bring samples to your door for a real‑world test.
Conclusion
We’ve walked through everything from picking the right material to sealing the edges, and I hope you’re feeling a bit more confident about your kitchen benchtop replacement tamworth.
Remember, the biggest win is matching the bench to the everyday chaos of farm life – mud‑splashed boots, heavy pots, and the occasional air‑fryer experiment.
So, what’s the next step? Grab a tape, jot down your top three priorities, and give us a call. We’ll swing by with samples, run a quick dry‑fit, and lay out a transparent, line‑item quote.
If you’re still on the fence about timber versus quartz, picture this: a solid timber slab that hides dust and ages beautifully, or a quartz surface that wipes clean after a splash of red wine. Both survive a storm‑y night, but one needs a yearly oil top‑up, the other just a gentle wipe.
Don’t forget the hidden costs – transport, tip fees, silicone sealant – we always spell those out so there are no surprise invoices.
At the end of the day, a well‑chosen benchtop is more than a countertop; it’s a workhorse that keeps your family fed and your farm running.
Ready to turn that vision into reality? Let’s schedule a site visit and lock in a solution that fits your schedule, budget, and the rugged NSW countryside.
Give Awesim Building Contractors a shout today – we’ve got the 4×4 capability, the local know‑how, and the honesty to get the job done right.


