

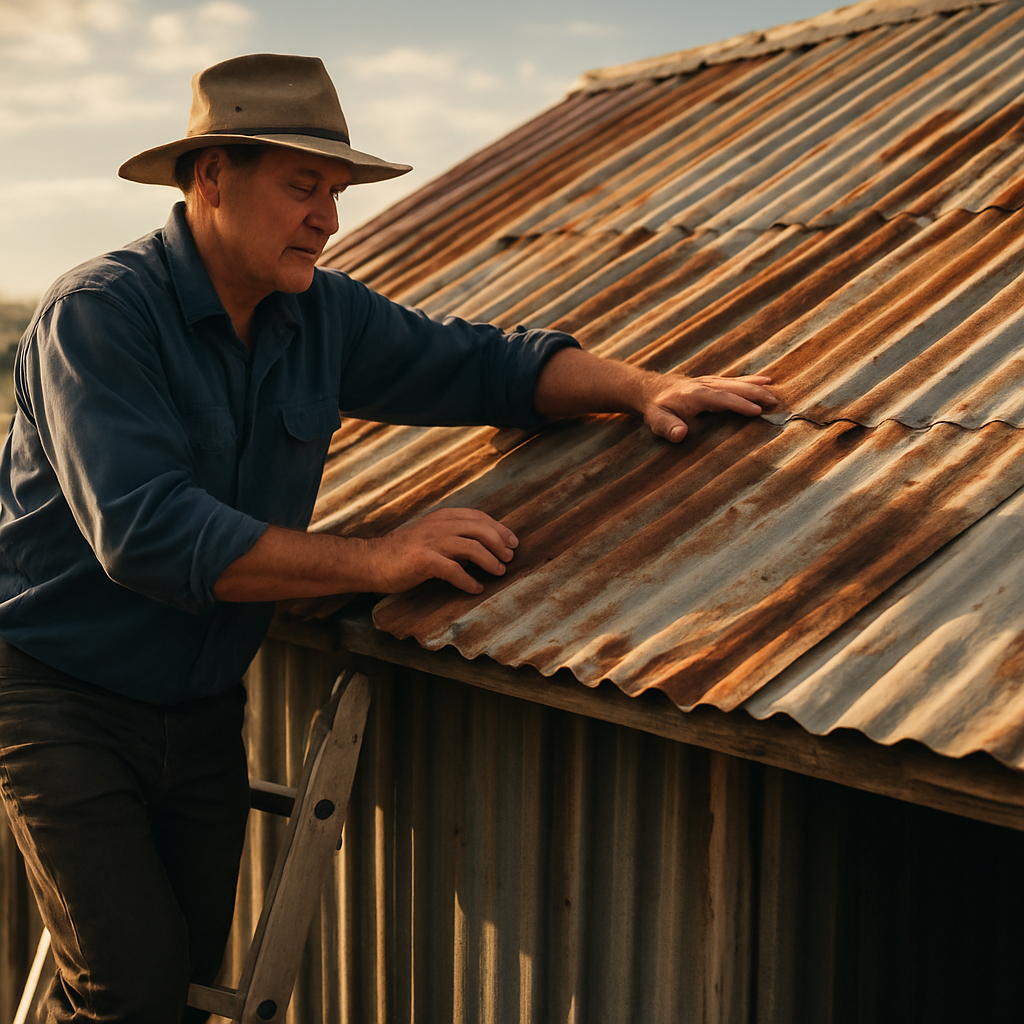
Ever stared up at a sagging shed roof on a hot summer morning, wondering if it’s going to give way before the next rain? You’re not alone – most of us who live on a farm have had that gut‑wrenching moment when the metal sheeting starts to rust and the gutters drip faster than a thirsty horse.
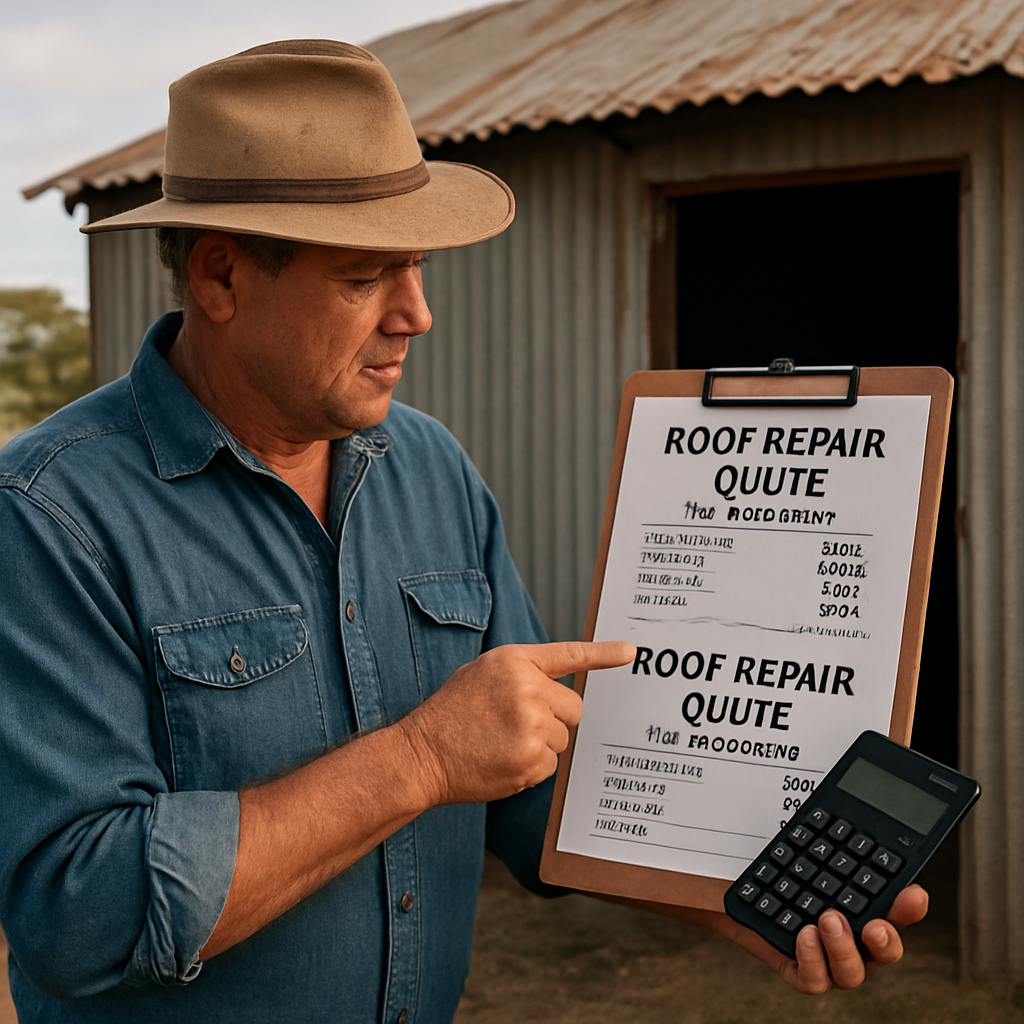
That first glance is usually the cheapest clue you get about what’s really going on. A few rust spots might just need a patch, but a warped frame or broken trusses can quickly turn a simple fix into a full‑blown budget line item. That’s why getting a clear picture of shed roof repair cost before you swing a hammer is as important as checking the weather forecast before heading out to the paddock.
So, what does “shed roof repair cost” actually cover? Think of it as three layers: the material you choose – steel, colourbond, or corrugated aluminium – the labour to strip, repair or replace the damaged bits, and the extra bits like flashing, sealants and disposal of old metal. In rural NSW, the material alone can swing between $30 and $70 per square metre, while skilled labour on a remote site often adds a premium because of travel time and 4×4 access.
Here’s a quick reality check: a modest 30‑square‑metre shed with a few rusted panels might run you $1,500 to $2,200 if you go with a straightforward replacement. Double that size, or add structural repairs, and you’re looking at $4,000‑$6,000. Those numbers feel steep, but they’re a lot cheaper than waiting for a leak to flood your equipment or ruin stored feed.
What I always tell my clients is to treat the roof as the skin of the shed – if the skin is compromised, the whole body suffers. A small inspection now can save you a mountain of stress and dollars later, especially when the season turns wet and the wind starts howling.
Ready to stop guessing and start planning? Let’s walk through the simple steps you can take today to get an accurate quote, understand where you can save, and keep your shed standing strong through the next summer, winter, and everything in between.
TL;DR
If you want to stop guessing about shed roof repair cost, do a quick visual check, note rust or sagging panels, and get a local quote.
We’ll walk you through steps to compare materials, factor travel premiums, and lock in a budget that protects your equipment and peace of mind.
Step 1: Assess the Shed Roof Condition
First thing’s first – you need to know exactly what you’re looking at before you start worrying about shed roof repair cost. Grab a sturdy ladder, a good flashlight, and a notebook. And if you’re not comfortable getting up there, call a local crew – safety always comes first.
When you reach the roof, do a slow, systematic walk‑around. Look for three tell‑tale signs: rust‑stained panels, sagging or drooping sections, and any loose fasteners. Those are the low‑hanging fruit that usually drive the bulk of the budget.
Take photos of every spot that catches your eye. A picture of a rust patch next to a water‑stained ceiling inside the shed will become a powerful reference when you request quotes. It also saves you the endless back‑and‑forth with contractors later on.
Now, let’s break the inspection into bite‑size steps so it doesn’t feel like a chore.
Step 1A – Visual Scan for Corrosion
Run your hand over the metal. If you feel a flake‑off texture or see orange‑brown spots, you’ve got corrosion. In rural NSW, salty air and occasional flooding make rust a common enemy. Mark each panel with a piece of chalk or a zip‑tie so you can count how many need replacement.
Pro tip: small rust patches can sometimes be sanded and sealed with a rust‑inhibiting primer. That’s a cheap fix that can shave a few hundred dollars off the final cost.
Step 1B – Check for Structural Sag
Stand a few metres away and sight‑line the roof. Does any part dip lower than the rest? A sag often means a compromised rafter or a broken truss. If you notice a dip of more than 50 mm, you’re probably looking at a structural repair, which can add $50‑$80 per metre to the total.
Example: A neighbour in Gunnedah had a 12‑metre span that sagged after a heavy rainstorm. The repair required new timber supports and cost him about $8,200 – double his original estimate.
Step 1C – Fastener and Flashing Audit
Grab a screwdriver and test a handful of screws or nails. Loose or missing fasteners are a red flag. Also, inspect the flashing around vents, gutters, and the ridge line. Cracked or rusted flashing is a sneaky source of leaks that will bump up your shed roof repair cost if left unchecked.
Tip: replace any corroded fasteners with stainless‑steel ones. They’re a few dollars each but can extend the life of the roof by years.
Once you’ve catalogued rust, sag, and fastener issues, you’ll have a clear picture of what’s a simple patch job and what’s a full‑scale replacement.
Here’s where the numbers start to shape up. If you have fewer than five rust‑spots, you might be looking at $500‑$800 for a patch. Over ten spots or any structural sag pushes you into the $2,000‑$4,000 range, especially when travel time to a remote property adds a premium.
Need a professional opinion? Our team at Roofing Repairs Across Rural NSW | Awesim Building Contractors can do a quick on‑site assessment and give you a written estimate that breaks down labour, materials, and travel fees.
And if the roof does leak, you’ll want to act fast to prevent water damage inside the shed. For the next step in protecting your stock and equipment, see this practical guide on what to do after a roof breach Water Mitigation Process Steps Explained – A Practical Guide for Homeowners.
Finally, write down your findings in a simple checklist: rust panels (count), sag spots (measure), fasteners (replace/repair), flashing condition (repair/replace). Hand that list to any quote‑seeker and watch the numbers line up with reality instead of guesswork.
Step 2: Calculate Materials and Labour Costs
Alright, you’ve got your checklist of rust patches, sagging bits and loose fasteners – now it’s time to turn those notes into a real number. That number is the heart of your shed roof repair cost, and getting it right means you won’t be caught off‑guard when the invoice arrives.
Break down the material side
First, measure the square metres you actually need to replace. Grab a tape, walk the perimeter of the damaged area and multiply length by width. It sounds simple, but I’ve seen folks under‑estimate by a whole panel because they forget the overlap.
Next, pick your metal. Colourbond, steel, aluminium – each has a price band. In rural NSW you’re typically looking at $60‑$90 per square metre, depending on gauge and finish. If you’re after extra durability against salty breezes, expect the higher end of that range.
Don’t forget the “extras”: flashing, sealant, rust‑inhibiting primer and replacement fasteners. Those bits can add $5‑$10 per square metre, but they’re the difference between a roof that lasts five years and one that needs a patch in six months.
Labour – the hidden variable
Labour costs are where the budget can jump, especially if your property is a bit off the beaten track. A local crew will charge a base rate – think $80‑$120 per hour – plus travel time. That travel premium can be $50‑$150 a day if the job is more than an hour’s drive from the nearest town.
Ask yourself: will the crew need to set up a 4×4 vehicle, bring extra safety gear, or work around livestock? Those logistical details often show up as a line item called “site access”. It’s not a sneaky charge; it’s the reality of getting tools and materials to a remote shed.
To keep labour honest, request a detailed breakdown: how many hours for stripping, how many for framing repairs, and how many for the final sheet‑metal install. That way you can spot any “mystery” time and ask for clarification.
Do the math – a quick spreadsheet trick
Open a simple spreadsheet and set up three columns: Material, Labour, Extras. Under Material, plug in square metres × unit price. Under Labour, multiply estimated hours by the hourly rate, then add the travel premium. Extras is a flat sum for flashing, sealant and fasteners.
Here’s a rough example: 40 m² of Colourbond at $55/m² = $2,200. Labour: 16 hours × $100 = $1,600 plus $120 travel = $1,720. Extras: $300 for flashing and sealant. Total? $4,220. That’s your ballpark shed roof repair cost before any contingencies.
Now, add a 10 % contingency. It sounds like a safety net, but it’s really just covering unexpected rust under a panel or a hidden rotted rafter. In our example, that bumps the total to about $4,640.
Tips to shave dollars off
Can you source the metal yourself? Many farmers buy Colourbond sheets from local hardware stores and hand them to the crew – that can shave $200‑$400 off the material charge.
Another trick: combine material orders with a neighbour’s shed repair. Buying in bulk often nets a discount, and the contractor appreciates the extra work.
Finally, schedule the job during the off‑season (late autumn). Contractors have lighter calendars, so they’re more likely to offer a reduced rate or waive the travel premium.
Does this feel like a lot? Take a breath – you’ve just turned a vague worry into a concrete number. And if you ever get stuck, a quick call to a local rural builder can confirm whether your calculations line up with on‑site realities.
Ready to see the numbers in action? Check out the short video below – it walks you through a real‑world cost estimate, step by step.
After watching, grab your notebook, plug your own figures into the spreadsheet template, and you’ll have a solid shed roof repair cost ready to discuss with any contractor.
Step 3: Choose the Right Repair Method
Now that you’ve got a rough figure for shed roof repair cost, the next decision is how you actually fix it. Do you go full‑replace, patch‑up, or a hybrid approach? That choice will steer the final bill.
First, ask yourself what the roof is really doing for you right now. If the rust is limited to a few panels and the structure feels solid, a spot‑patch can keep the cost down. But if you notice sagging rafters or water pooling, you’re probably looking at a more extensive repair.
Patch‑And‑Seal Method
This is the “quick fix” route – replace only the damaged sheets, treat the surrounding metal with a rust‑inhibiting primer, and seal the seams with a high‑quality silicone or butyl tape. It’s ideal when you have less than five panels needing attention and the underlying frame is sound.
Steps:
- Remove the corroded sheet by unscrewing the fasteners and lifting it away.
- Sand the exposed edges, apply primer, and let it dry.
- Fit a new sheet, match the gauge, and secure with stainless‑steel screws.
- Run a continuous bead of sealant along the joints and re‑install the flashing.
What’s the upside? Labour stays under a day, material costs stay low, and you’ll see the shed roof repair cost drop by a few hundred dollars. The downside is you’re still vulnerable if hidden rust is lurking behind the panels you didn’t remove.
Full‑Panel Replacement
When the damage spreads across a larger area or the frame shows signs of wear, swapping out whole panels is the safer bet. You’ll strip the old metal, check the timber or steel ribs, and install fresh Colourbond or aluminium sheets.
Key points to watch:
- Measure each panel accurately – a mis‑cut can add an extra hour of labour.
- Inspect the battens or purlins for rot or corrosion; replace any compromised members.
- Use matching gauge and colour to avoid thermal expansion issues.
- Seal every seam with a compatible sealant and reinstall flashing.
Because you’re tackling more material and possibly some structural work, expect the shed roof repair cost to climb toward the higher end of your budget. However, you gain peace of mind knowing the roof will hold up through the next storm season.
Hybrid – Reinforce Then Replace
Sometimes you’ll find a mix: a few panels are fine, but a couple of rafters have started to split. In that case, reinforce the frame first, then replace only the panels that truly need it. This method balances cost and durability.
How to approach it:
- Secure the roof with temporary bracing so you can work safely.
- Swap out any damaged timber or steel supports – a 4×4 crew can often do this on‑site.
- Patch small rust spots with primer and sealant.
- Replace the truly compromised panels.
By addressing the skeleton before the cladding, you avoid a situation where a new sheet later bows because the underlying support gave way.
So, which route feels right for you? Think about the size of the affected area, the condition of the framing, and how much downtime you can afford. If you’re on a tight budget and the roof is mostly intact, patch‑and‑seal might be enough. If you’ve got a few weeks before the rains hit, a full‑panel replacement or hybrid approach will likely save you money in the long run.
One last tip: always get a written quote that breaks down material, labour, and any travel premium. That transparency makes it easier to compare the three methods and keep the shed roof repair cost where you expect it.
When you’ve chosen your method, grab your notebook, mark the steps you’ll need, and give your local rural builder a call. A clear plan means the crew shows up with the right tools, and you walk away with a roof that won’t let you down.
Step 4: Compare Cost Options and Savings
Alright, you’ve scoped the damage, crunched the numbers for materials and labour, and picked a repair method. Now the real question is – which option gives you the best bang for your buck without compromising a roof that can stand another season?
It’s tempting to just go with the cheapest quote on the page, but you’ve probably seen a “low‑ball” price turn into extra labour hours when the crew discovers hidden rust. Let’s break down the three common routes – patch‑and‑seal, full‑panel replacement, and the hybrid approach – and see where you can actually save.
1. Patch‑and‑Seal – the quick‑fix budget
This method shines when you’ve got fewer than five rusted panels and the framing is still solid. Material costs stay low because you’re only buying a handful of sheets, and labour often fits into a half‑day job.
Typical shed roof repair cost for patch‑and‑seal lands somewhere between $800 and $1,500, depending on travel premiums. The upside? You get the roof back up fast, and you can often source the replacement sheets yourself to shave another $200.
But watch out for hidden corrosion underneath the panels you leave in place. If you’re not 100% sure the structure is sound, the savings can evaporate quickly.
2. Full‑Panel Replacement – the peace‑of‑mind route
When the damage spreads across a large area or you notice sagging rafters, swapping out whole panels is the safest bet. You’ll strip the old metal, check every battens, and lay fresh Colourbond or aluminium sheets.
Here the shed roof repair cost usually falls between $3,500 and $5,500 for a 30‑metre‑square shed in rural NSW. It looks pricey, but you’re buying durability – fewer follow‑up fixes for years.
Saving tips? Combine your order with a neighbour’s project to bulk‑buy material, or schedule the job in the off‑season when contractors are more flexible on rates.
3. Hybrid – reinforce then replace
Most farms end up somewhere in the middle: a few panels need swapping, but a couple of rafters are also showing wear. The hybrid method lets you reinforce the frame first, then only replace the panels that truly need it.
Cost lands in the $2,200–$3,800 bracket – a nice middle ground. You avoid the full expense of a complete replacement while still tackling the structural bits that could bite you later.
One clever way to trim the bill is to do the framing work yourself (or get a trusted hand from a family member) and let the pros handle the metal. That cuts labour hours dramatically.
So, how do you decide which path to take? Grab a piece of paper, jot down the number of panels, any visible sag, and your travel distance. Then line up the three rows in the table below – it’s a quick visual cheat sheet.
| Method | Typical Cost Range (AUD) | Savings Tips |
|---|---|---|
| Patch‑and‑Seal | $800–$1,500 | Buy sheets yourself, limit to <5 panels, DIY removal |
| Full‑Panel Replacement | $3,500–$5,500 | Bulk order with neighbour, off‑season scheduling |
| Hybrid (Reinforce + Replace) | $2,200–$3,800 | DIY framing work, only replace compromised panels |
Now that you’ve got the numbers side by side, ask yourself: which option aligns with your budget, timeline, and how much downtime you can tolerate?
If you’re on a tight cash flow and can monitor the roof closely over the next few months, patch‑and‑seal might be enough. If you’ve got a few weeks before the rains roll in, the hybrid or full‑panel route will likely save you money in the long run by avoiding repeat calls.
And remember, a clear, written quote that breaks down material, labour, travel, and any contingency is your best defence against surprise costs. When the numbers add up, you’ll feel confident that the shed roof repair cost you’re paying is truly earned.
Ready to lock in a figure? Take your checklist, call a local rural builder, and ask for a detailed quote that matches one of the three methods above. You’ll walk away with a roof that’s not just fixed, but future‑proofed – and a budget that doesn’t leave you scrambling for extra cash.
Step 5: Plan for Ongoing Maintenance and Budgeting
Alright, we’ve scoped the damage, crunched the numbers and picked a repair method. The next thing most folks overlook is what happens after the new panels are up – the ongoing care that keeps the shed roof repair cost from creeping back up.
Think of your roof like a tractor: you don’t just buy it and leave it in the yard. You oil it, check the tyres and give it a once‑a‑year service. A shed roof needs the same routine, otherwise the little things you saved on today turn into big bills tomorrow.
Create a Maintenance Calendar
Grab a simple diary or set a reminder on your phone. Mark two dates each year – one in early spring before the rains, and one in late autumn after the hottest months. Those are the sweet spots for a quick visual check.
- Walk the roof on a dry day. Look for new rust spots, loose screws or sagging edges.
- Clear any debris – leaves, twigs or old roofing nails – that can trap moisture.
- Inspect flashings around vents, gutters and the ridge line for cracks or corrosion.
It only takes 15‑20 minutes, and you’ll spot a problem before it adds another $200‑$500 to your shed roof repair cost.
Budget for Routine Upkeep
Set aside a modest amount each quarter – think of it as a roof‑maintenance piggy bank. In my experience a farm household can comfortably allocate $50‑$75 per month for a 30‑square‑metre shed. Over a year that’s $600‑$900, which covers sealant, rust‑inhibiting primer and a few replacement fasteners.
Why does this matter? When you already have the cash on hand, you won’t have to scramble for emergency funds when a small leak shows up after a storm.
Track Expenses and Adjust
Every time you buy a roll of sealant or replace a screw, jot it down in a notebook or a quick spreadsheet. Include three columns – Item, Cost, Date. After six months you’ll see a pattern: maybe you’re spending more on flashing than you expected, so you can re‑budget accordingly.
This habit also gives you concrete data to show a builder if you ever need a professional quote again. They’ll respect a well‑documented maintenance log.
Set Up a Contingency Fund
Even the best‑kept roof can get a surprise – a fallen branch, an unexpected hailstorm, or hidden rot that only shows up after a heavy wind. A good rule of thumb is to keep a contingency equal to 10 % of your original shed roof repair cost.
So, if your repair ran $4,200, aim for a $420 buffer. Keep it in a separate savings account or a “farm emergency” envelope. When the rain hits, you’ll reach for that fund instead of digging into your operational cash flow.
Stay Ahead with Seasonal Checks
Spring in NSW brings humidity and the first big rains. That’s the perfect time to re‑apply a rust‑inhibiting primer to any panels that look a shade darker. Autumn, on the other hand, is when you want to make sure gutters are clear – a blocked gutter can push water under the roof edge and start a leak.
And remember, the colourbond warranty often requires you to perform these seasonal checks to stay valid. Skipping them could void that protection and raise future repair costs.
Quick Wins to Extend Roof Life
- Replace any rust‑eaten screws with stainless‑steel fasteners – a few dollars each, but they last decades.
- Apply a thin bead of silicone sealant to the top of roof‑to‑wall flashings – stops water from seeping in at the most vulnerable junction.
- Trim back any overhanging trees within 5 metres of the roof – fewer branches mean less impact during windy days.
These small actions add up. Over five years they can shave $1,000‑$1,500 off what you’d otherwise spend on major repairs.
So, what’s the next step? Pull out that notebook, write down the two dates for your maintenance calendar, and earmark a tiny monthly amount for roof supplies. Treat it like you would a regular tractor service – a little effort now saves you a heap of stress – and most importantly, keeps the shed roof repair cost from becoming a recurring nightmare.
Step 6: Get Quotes and Hire Licensed Builders
Now that you’ve scoped the damage, crunched the numbers and picked a repair method, it’s time to turn those notes into a real‑world quote. Getting the right price isn’t about finding the cheapest number on a piece of paper – it’s about making sure the crew you hire can deliver a safe, long‑lasting fix that won’t surprise you with hidden fees later.
Gather a shortlist of local rural builders
Start by asking neighbours, your feed store, or the local agricultural co‑op for recommendations. A word‑of‑mouth reference usually tells you who actually shows up on time and respects your property.
If you’re comfortable with a quick online search, look for contractors who list “licensed roofers” and “4×4 access” in their service description – that’s a good sign they can reach a remote shed without hauling a trailer through a muddy track.
Ask the right questions before you hand over your notebook
When you call the shortlist, have these four questions ready:
- Are you fully licensed and insured to work on farm structures in NSW?
- Do you include travel premiums in your quote, and how are they calculated?
- What’s your warranty on labour and materials?
- Can you provide a written breakdown of material, labour, site access and contingency?
Those questions do two things: they weed out fly‑by‑night outfits and they give you a clear comparison sheet later on.
Request a detailed on‑site estimate
Ask each builder to visit the shed, walk the roof with you and use the checklist you created in the earlier steps. A good contractor will point out anything you missed – like a hidden rust spot behind a panel or a loose rafter that needs bracing.
During the walk‑around, watch how they explain their approach. Do they speak in plain language, or are they drowning you in technical jargon? You want someone who can translate “structural reinforcement” into “we’ll add a new 4×4 timber brace so the roof won’t sag after the next storm.”
Build a comparison spreadsheet
Take each written quote and copy the numbers into three columns: Material, Labour, Extras. Add a fourth column for “Travel & Access” and a fifth for “Contingency”. This visual layout makes it obvious which quote is truly competitive.
For example, Builder A might charge $2,200 for material, $1,600 for labour, $150 for travel and $300 for extras, totalling $4,250. Builder B could be $2,000 material, $1,800 labour, $200 travel and $250 extras, totalling $4,250 as well. The tie‑breaker then becomes warranty length or who offers a clear post‑job inspection.
Check licences and insurance on the spot
In NSW you can verify a contractor’s licence on the Fair Trading website. Ask to see their licence number and insurance certificate before they start any work. A genuine builder won’t mind you taking a photo – it shows they have nothing to hide.
Don’t forget to ask whether their insurance covers damage to your livestock, equipment or existing structures. That extra peace of mind can save you a nightmare claim if a storm blows a sheet of metal onto your stored feed.
Negotiate the final terms
Once you’ve narrowed it down to your top two, call them back and say, “I’m leaning towards your quote, but can we trim the travel premium or adjust the contingency?” Most rural builders are used to negotiating, especially if you’ve already done the legwork.
Lock in a start date that fits your farm schedule – maybe after the lambing season or before the first heavy rains. A clear timeline prevents the dreaded “we’ll be there next week” limbo that can push your shed roof repair cost up with overtime charges.
Sign a simple contract
A contract doesn’t have to be a novel. It should list:
- Scope of work (what panels are being replaced, any framing repairs)
- Itemised costs (material, labour, travel, extras, contingency)
- Payment schedule (deposit, progress payments, final balance)
- Warranty terms and post‑completion inspection
Both parties sign, keep a copy, and you’ve got a legal safety net if anything goes sideways.
Final checklist before the first hammer swing
✔︎ Licence and insurance verified
✔︎ Written, itemised quote on file
✔︎ Travel premium agreed
✔︎ Warranty and contingency documented
✔︎ Start date locked in
Cross those off, hand the list to your builder and watch the crew roll in with the right tools. In my 35 years of rural building, the projects that stick to this simple process end up costing exactly what was promised – and the roof stays solid for years to come.
So, grab that notebook, give a few trusted builders a call, and turn your shed roof repair cost from a vague worry into a concrete plan you can actually budget for.
Conclusion
We’ve walked through everything from spotting rust to crunching numbers, so by now you should feel a lot less fuzzy about shed roof repair cost.
Remember the simple mantra: inspect, itemise, quote, lock‑in. If you can tick those boxes before the first hammer swing, the odds of surprise charges drop dramatically.
So, what’s the next move? Grab that checklist you built, call a few local 4×4‑ready builders, and ask for a written breakdown that matches the method you’ve chosen – patch‑and‑seal, hybrid or full‑panel replacement.
When the quote lands in your inbox, compare the line items, not just the total. A $200 travel premium might look small, but over several trips it can balloon fast.
Finally, set a reminder for a twice‑year roof glance and stash a modest maintenance pot – think $50‑$75 a month. Those few dollars now keep the shed roof repair cost from sneaking up later.
If you need a partner who knows the NSW bush, the remote tracks and the quirks of farm schedules, Awesim Building Contractors are just a phone call away. Let’s get your shed solid, budget‑friendly, and ready for the next season.
Keep this routine, and you’ll spend less time worrying and more time enjoying the farm life you love.
FAQ
How much does a typical shed roof repair cost in rural NSW?
On most farms in rural NSW you’ll see a shed roof repair cost anywhere between $800 for a simple patch‑and‑seal and $5,500 for a full‑panel replacement on a 30‑metre‑square shed. The spread depends on how many panels are rusted, whether any rafters need bracing, and if the builder has to drive a 4×4 vehicle onto a gravel track. In short, small jobs stay under a grand, big jobs can push five‑plus thousand.
What factors cause the shed roof repair cost to jump?
Several things can push the numbers up. First, hidden rust under a seemingly sound panel often means you’ll need to strip and replace more sheets than you initially counted. Second, any sagging rafters or corroded battens require structural reinforcement, which adds labour and material fees. Third, remote locations bring travel premiums and possible 4×4 access charges. Finally, opting for premium colour‑bond or extra‑thick gauge will raise the material price per metre.
Is it cheaper to do a patch‑and‑seal yourself?
Doing the patch‑and‑seal yourself can shave a few hundred dollars, especially if you source the replacement sheets at the hardware store and use a cordless drill for the fasteners. You’ll still need to prime the edges, apply a rust‑inhibiting primer and seal the joints, which takes a half‑day of focused work. Just remember that missing a hidden rust spot or skimping on sealant can cost you more in a future leak.
How do travel premiums affect the overall cost?
Travel premiums are a line item most rural builders add when the job site is more than an hour’s drive from the nearest town. The fee can range from $50 to $150 per day, covering fuel, wear‑and‑tear on the 4×4 and the extra time spent getting in and out. Over a two‑day job that premium can add $200‑$300 to your total shed roof repair cost, so always ask for it up front.
What’s the best way to compare quotes without hidden fees?
The easiest trick is to demand an itemised quote that breaks down material, labour, travel, extras and contingency on separate rows. Then copy those numbers into a simple spreadsheet and total each column – you’ll instantly see if one builder is inflating the labour hour estimate or sneaking in an un‑explained travel charge. Also, ask for a written warranty; a clear guarantee usually means there are no surprise cost traps later.
How often should I schedule maintenance to keep costs down?
Plan two quick inspections each year – one in early spring before the rains and another in late autumn after the hottest months. During each walk‑around, look for fresh rust, loose screws or any sagging edge, clear debris from gutters and give flashings a once‑over. Spending 15‑20 minutes now can prevent a $400‑$800 leak repair later, and it keeps your overall shed roof repair cost flat.
Can I combine shed roof work with other farm projects to save money?
Absolutely – bundling jobs is a proven way to shave off both material and travel costs. If a neighbour needs a barn roof replacement or you’re ordering a new fence, order the colour‑bond sheets in one bulk delivery; the supplier often offers a discount for larger volumes. Plus, the builder can schedule both tasks in a single 4×4 trip, cutting the daily travel premium in half.

