

Ever stood on a dusty NSW outback track, watching the sunrise over your paddock, and thought, “who’s going to fix that sagging barn before the rains come?”
That knot of worry is something every farm and country home owner feels – you need a reliable rural builder who gets the grind of farm life and can show up even when the road is just a gravel ribbon.
I’m Glen, 35 years in the trade, and I’ve learned that a good rural builder isn’t just a contractor; they’re a neighbour who knows when the shearing season starts, when a storm is likely to hit, and how to keep the worksite safe for livestock.
So, why does that matter to you? Because a missed repair can cost thousands in lost produce, a cracked roof can flood the milking shed, and every day a project drags on is a day you’re not tending to your herd.
What you’ll get from a builder who understands the remote realities is simple: on‑time arrivals in a 4×4, materials packed for long hauls, and solutions that survive the hottest summer and the heaviest downpour.
Imagine this: you call, we meet at the property gate, I walk the site on foot, note the old timber, the drainage issues, and sketch a plan right there on the spot. No endless back‑and‑forth emails, no vague quotes that disappear once the first storm hits.
That hands‑on approach also means we schedule work around your harvest, calving or school holidays, so the construction never gets in the way of the farm’s rhythm.
In the next sections we’ll walk through the key things to look for when choosing a rural builder, the paperwork you’ll need, and a step‑by‑step checklist to keep your project on track.
Ready to stop guessing and start building with confidence? Let’s dive in.
TL;DR
Choosing the right rural builder means you get on‑time, 4×4 access, durable fixes that survive storms and keep your farm running smoothly. We’ll walk you through the key checks, paperwork, a clear timeline, and a step‑by‑step checklist so you can start building with confidence and avoid costly delays for you.
Understanding Rural Building Regulations in NSW
If you’ve ever stared at a council form and felt the same knot you get when the tractor won’t start, you’re not alone. Rural building regulations in NSW can feel like a maze of permits, setbacks and compliance checks, but cracking the code means your shed, barn or homestead gets built on solid legal ground – and you avoid costly stop‑work orders.
So, what’s the first thing to know? The State’s Building Code of Australia (BCA) still applies, but it’s layered with the Rural Fire Service’s bushfire‑prone land guidelines, local council zoning maps and, for larger structures, the NSW Planning Portal. In practice that means a rural builder has to juggle three sets of rules at once.
Why regulations matter
Beyond ticking a box, compliance protects you, your livestock and your neighbours. A structure that meets bushfire‑risk standards is less likely to become a fire‑starter, and a correctly sited shed won’t flood the next field after a heavy rain. Insurers also look for the paperwork – if you skip a permit, you could see a claim denied when the worst happens.
Key approvals you’ll need
Here’s the usual lineup for a typical farm project:
- Development Application (DA) – required for new builds over 30 m² or major alterations.
- Construction Certificate (CC) – confirms the design meets the BCA and any council conditions.
- Bushfire Management Plan – mandatory if your site sits in a designated bushfire‑prone zone.
- Stormwater Management Approval – essential for low‑lying paddocks or areas near creeks.
When you’re hunting for a qualified professional, a good place to start is Finding a Reliable Rural Builder in Tamworth for Your Farm Projects. A builder who knows the paperwork can flag missing items before you even submit the DA.
Navigating the consent process
Step one: do a quick site‑check on the council’s online map. Look for overlays labelled “Bushfire Prone” or “Flood Risk”. Step two: draft a simple sketch of your proposed building – dimensions, setbacks, access routes. Hand that to your builder; they’ll translate it into a formal plan that satisfies the DA.
Once the DA is approved, you’ll receive a “Compliance Schedule”. That’s your cheat‑sheet for the next stages. If you ever face a flood‑related issue – say a toilet overflow in a newly built outbuilding – the NSW Rural Council’s guide on toilet overflow cleanup steps can help you act fast while the builder arranges any necessary repairs.
Common pitfalls on the ground
One mistake I see time and again is assuming the council’s “setback” line is a suggestion. In reality it’s a hard boundary; ignore it and you’ll get a notice to demolish part of the structure. Another is overlooking the need for a stormwater permit when the site sits on a natural drainage line – the council will later demand a costly re‑grade.
Budget‑wise, many farm owners forget to factor financing costs. A quick chat with a mortgage adviser can reveal loan options that keep cash flow healthy during construction. Check out Mortgage Mapper for a simple way to compare rates and repayment plans tailored to rural projects.
Tools to keep you on track
We like to work from a living checklist: start with “Site Assessment”, tick “BCA compliance”, add “Bushfire plan”, then move to “Material delivery schedule”. Keeping that list in a shared spreadsheet means the 4×4 crew, the electrician and the council officer all see the same milestones.
Below is a short video that walks through the paperwork flow from DA to CC – it’s the kind of visual you’d get from a local council’s online portal, but stripped down to the essentials for a farmer’s schedule.
After you watch, grab a pen and sketch the outline of your next project. When you bring that sketch to a rural builder, you’ll save days of back‑and‑forth and get a clearer quote – because everyone knows a picture speaks louder than a thousand words on a council form.
Planning Your Farm Renovation: From Design to Budget
So you’ve got the idea of a new shed, a sturdier barn roof, or maybe a kitchen that actually works for a family of six. The first thing that usually pops up? A knot in the stomach wondering how you’ll pull it all together without blowing the budget.
Here’s what I mean: you’ve already spoken to a rural builder who gets the grind of farm life, you’ve scoped the site, and now it’s time to turn that rough sketch into a plan that won’t leave you chasing after every spare penny.
Step 1 – Map the purpose, not just the square metres
Start with the why. Are you adding storage for hay that gets rained on every spring? Or a workshop where you can fix the tractor without it being drenched? Write those goals down in plain language – “keep hay dry” or “service machinery under cover.”
When you can see the purpose, the design decisions become clearer. You won’t waste time debating whether a 2‑metre overhang is “nice to have” when the real need is protecting equipment from a 40‑mm hailstorm.
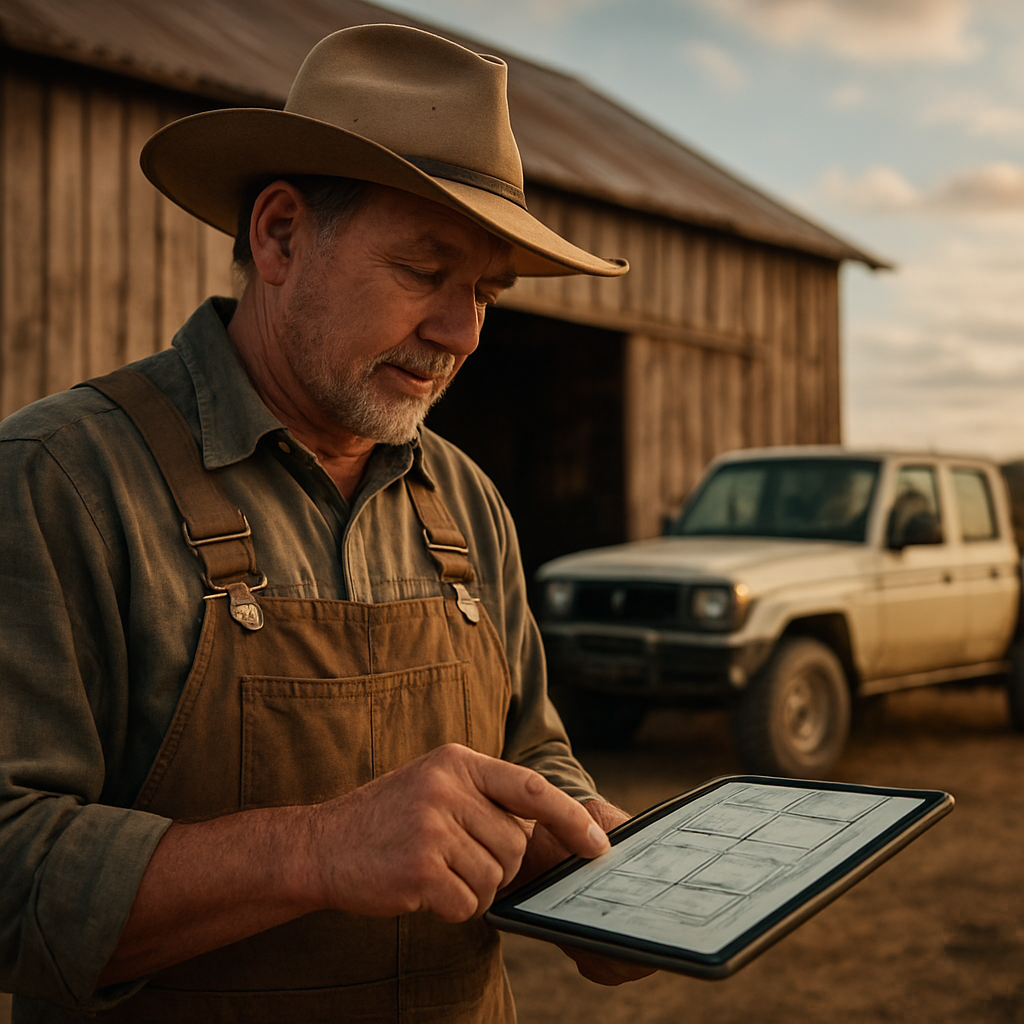
Step 2 – Sketch a rough layout (pencil or tablet, whichever feels right)
Grab a napkin, a sketch pad, or fire up a tablet. Draw the building footprint, note existing fences, water tanks, and livestock paths. I always add the 4×4 access lane – a tiny detail that saves a day of hauling when the truck can’t get close enough.
Don’t worry about perfect lines. Those early doodles are just conversation starters for your rural builder. They’ll spot structural gaps, suggest better orientations for wind, and flag any setbacks you might have missed.
Step 3 – Break the project into bite‑size phases
Think of the renovation like a series of small jobs rather than one massive beast. Phase 1 could be site prep and foundations, Phase 2 the frame, Phase 3 roofing and cladding, and Phase 4 finishes.
Why does this matter? It lets you spread costs, align work with low‑stress periods on the farm (like after the lambing season), and gives you a clear checkpoint before moving on.
Step 4 – Build a realistic budget spreadsheet
Start with the big buckets: labour, materials, permits, and a contingency (I always recommend 10‑15 % for the unknowns – think “what if the soil’s softer than expected”).
Pull quotes from your trusted rural builder for each phase. Compare material costs – sometimes a locally‑sourced steel truss is cheaper than a big‑box product shipped in.
Don’t forget the hidden costs: fuel for the 4×4, temporary fencing, and maybe a dust‑control plan if you’re working near a livestock paddock.
Here’s a quick tip: colour‑code your spreadsheet. Green for “already quoted,” amber for “awaiting quote,” red for “potential risk.” It turns a wall of numbers into something you can actually read on a Sunday morning.
Step 5 – Schedule around the farm calendar
Look at your planting, harvesting, and any seasonal events. If the rains usually hit in June, aim to finish roofing before then. If you have a calving window in October, plan any noisy work for before or after that period.
A good rural builder will respect those dates – they know a delayed roof can mean soaked hay, which means lost income.
Now, let’s watch a short video that walks through the whole planning flow, from the first sketch to the final budget sign‑off.
Take a minute after the video and compare the steps to your own list. If anything feels off, flag it before you hand the plans to the builder.
Once you’ve nailed the design and budget, the next move is to sit down with your chosen rural builder for a detailed scope. That’s where the magic of a clear, phased plan really shines – you both walk away knowing exactly what’s happening, when, and for how much.
Remember, a well‑planned renovation isn’t just about the end result; it’s about keeping your farm running smoothly while the work gets done.
Choosing Materials for Outback Construction
Understanding the outback environment
First thing’s first – the outback isn’t a climate‑controlled showroom. You’ve got scorching summer sun, sudden downpours, dust that can coat everything for weeks, and in many regions a real risk of bushfire. Those extremes dictate the kind of steel, timber and finishes that will actually survive on a farm.
So, before you even pick a colour, ask yourself: will this material hold up when a 40 mm hailstorm smashes the roof, or when a dust devil rolls through the paddock? That mindset keeps you from chasing cheap fixes that crumble after the first season.
Top materials that stand up to heat, dust and rain
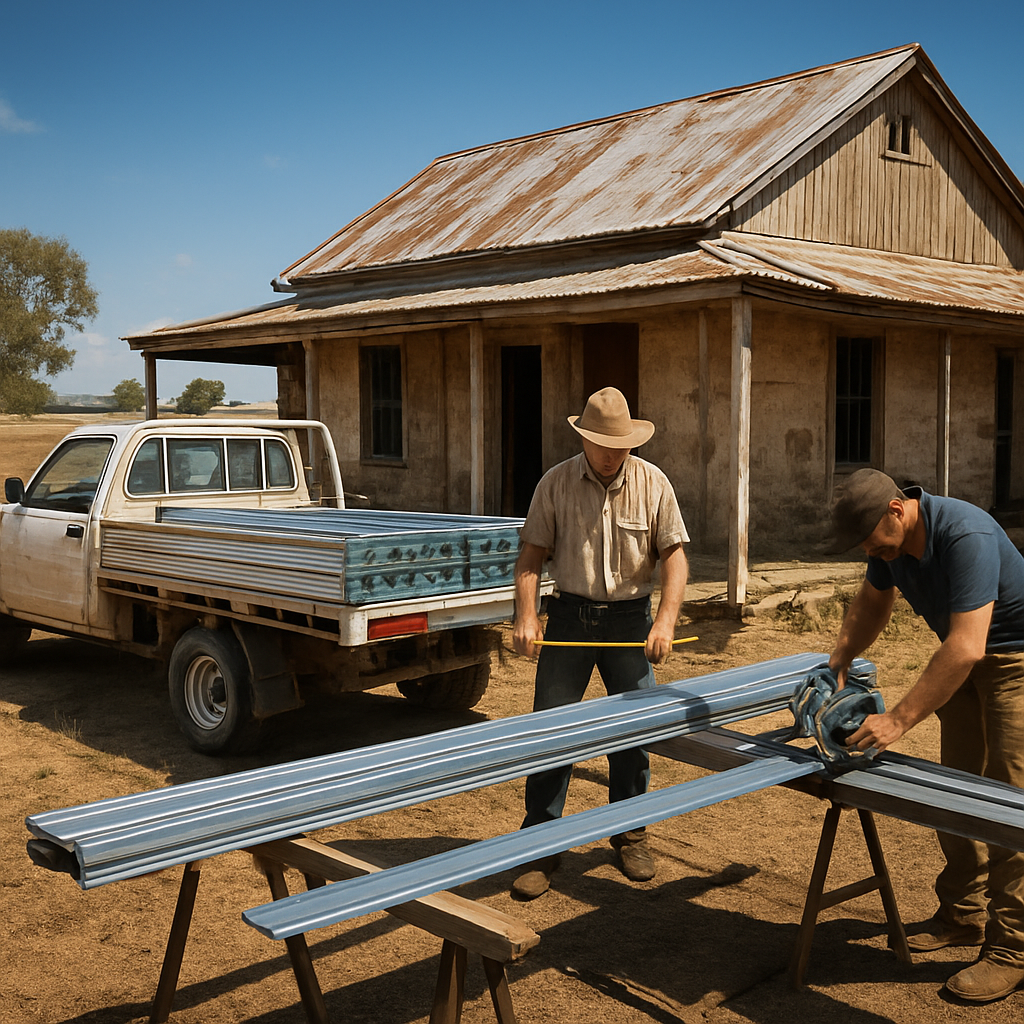
Steel framing and cladding. Galvanised or hot‑dip coated steel is the workhorse for most rural sheds and barns. It resists rust, takes the weight of heavy roof loads and can be bolted together on a 4×4‑accessible site without specialist tools. Look for a minimum 275 µm coating if you’re in a high‑salinity area like the Riverina.
Hard‑capped timber. When you need a warm, farm‑yard look, choose timber that’s been pressure‑treated and then capped with a UV‑stable, marine‑grade sealant. That double layer stops cracking under the sun and blocks moisture from seeping into joints – a common cause of structural failure in older sheds.
Fire‑rated cladding. In bushfire‑prone zones, the NSW Rural Fire Service recommends non‑combustible or fire‑resistant panels. Using RFS fire‑resistance guidance will help you avoid a costly rebuild after a blaze.
Concrete slab foundations. A well‑compacted, reinforced slab stops the ground from shifting under heavy machinery. Add a vapour barrier underneath to keep moisture from rising up into wooden floor joists – especially important for any future bathroom upgrades (our bathroom renovation service already plans for that).
Real‑world examples from NSW farms
Take the Coonamble property where a 30 m² livestock shed was rebuilt last year. The owner opted for a steel frame with 260 µm hot‑dip coating and fibre‑capped walls. After three hot summers and a heavy thunderstorm, the structure is still square – no rust patches, no warped walls.
Contrast that with a neighbour in the Inverell area who used untreated pine for a new workshop roof. Within six months the timbers started splintering from sun exposure, and a subsequent rainstorm warped the roofline, forcing a costly re‑roof.
In the Upper Hunter, a family needed a home office that could double as a storm shelter. They chose fire‑rated metal cladding, a concrete slab, and insulated roof panels with reflective coating. When a bushfire swept through the valley, the building stayed intact while surrounding structures suffered severe damage.
Actionable checklist for your build
- Assess your site’s fire rating – if you’re in a bushfire‑prone zone, lock in non‑combustible cladding before you order steel studs.
- Choose a steel grade with at least 275 µm coating for high‑salinity soils; request a coating certificate from your supplier.
- If you prefer timber, specify pressure‑treated, hard‑capped boards and a UV‑stable sealant – ask the builder for the product data sheet.
- Plan a concrete slab with a 100 mm depth, reinforcement mesh, and a 6 mm vapour barrier; this saves you from moisture‑related rot later.
- Factor in logistics – calculate the number of 4×4 trips needed for material delivery and schedule them when the road is dry.
- Build in a 10‑15 % contingency for unexpected material upgrades (e.g., switching to fire‑rated panels after a weather forecast change).
- Ask your rural builder to provide a material warranty that covers rust, rot and fire‑rating compliance for at least five years.
When you walk through the site with your builder, point out the local challenges – the dust on the track, the prevailing wind direction, the nearest water source. A seasoned rural builder will match each challenge with the right material, and you’ll end up with a structure that feels as solid as the ground it sits on.
Remember, the goal isn’t just to finish a project; it’s to build something that works for you year after year, rain or shine. Choose wisely, plan ahead, and let the right materials do the heavy lifting for the rest of your farming life.
Essential Maintenance Checklist for Farm Sheds and Homesteads
When the season changes and the dust finally settles, the first thing you notice is the roof’s shadow stretching across the shed floor. That’s the perfect moment to start a quick walk‑around and spot anything that looks out of place.
So, what should you be looking for? A cracked metal panel, a rusted bolt, or a gutter that’s started to sag? Those little things are the early warning signs that, if ignored, turn into costly repairs when the next storm hits.
Roof and Cladding
Inspect the roof after a heavy rain or hailstorm. Look for dents, loose fasteners, or any water pooling on the surface. If you spot rust, wipe it clean and apply a rust‑inhibitor – a rural builder can show you the right product for your steel grade.
Don’t forget the roof’s underside. A quick peek at the trusses can reveal rot in timber‑supported sections, especially if you’ve got a hard‑capped timber roof over a concrete slab.
Gutters, Downpipes & Drainage
Clear out leaves, twigs and the occasional broken fence wire. Blocked gutters are the number‑one cause of water‑logged floor joists. Run a garden hose through the downpipes to make sure water flows freely away from the foundation.
Check the grading around the building – the ground should slope at least 15 cm over a metre away from the walls. If water sits against the base, you’ll end up with mould, rot or a concrete slab that lifts.
Doors, Windows & Seals
Open and close each door and window a few times. Listen for squeaks, watch for gaps, and feel for drafts. A simple weather‑strip can make a huge difference in keeping dust out and preserving internal insulation.
For sheds that double as livestock shelters, make sure the latches hold firm – a loose door can let a curious ewe escape or let rain in.
Fire‑Safety Checks
If your property sits in a bush‑fire‑prone zone, you need to verify that the cladding, roof and any external timber meet the NSW Rural Fire Service’s standards. A quick online check using the RFS bush‑fire‑prone land tool will tell you whether additional fire‑rating measures are required.
Even if you’re not in a high‑risk area, keep a half‑inch of non‑combustible material around the eaves and clear vegetation to create a safe buffer.
Concrete Slab & Foundations
Walk the slab and tap any soft spots. Small cracks are normal, but anything wider than a quarter of an inch could mean the reinforcement mesh has shifted. Note the location and call your rural builder before the slab starts to settle.
Inspect the vapour barrier edges – if the barrier has been punctured during earlier works, moisture can rise and damage timber joists above.
Regular Maintenance Schedule
Here’s a quick cheat‑sheet you can stick on the back of the shed door. It breaks the big list down into three easy‑to‑remember visits each year.
| Checklist Item | Recommended Frequency | Who Should Inspect |
|---|---|---|
| Roof & cladding condition | After every major storm / twice a year | Owner + rural builder |
| Gutters & drainage grading | Quarterly, especially before rainy season | Owner |
| Fire‑rating compliance & vegetation clearance | Annually before summer | Rural builder |
Stick to those dates and you’ll catch most problems before they become emergencies.
One final tip: keep a simple logbook. Jot down the date, what you checked, and any notes. When you call your rural builder for a quote or repair, you’ll have the exact info they need, saving you time and money.
Remember, a well‑maintained shed isn’t just a storage space – it’s a reliable part of your farm’s daily rhythm. A little routine now means you won’t be scrambling when the next flood, fire or heatwave arrives.
Hiring the Right Rural Builder: What to Look For in Armidale & Beyond
Ever stood on the edge of your paddock in Armidale, wondering if the bloke you’re about to hire will actually show up when the road turns to mud? That uneasy feeling is the first clue you need to be picky – the right rural builder isn’t just a set of skills, they’re a partner who gets the rhythm of country life.
Know the local landscape
Before you even pick up the phone, take a quick look at the terrain around your property. Is the access track a steep, gravel‑spine that only a 4×4 can tackle? Do you sit on bush‑fire‑prone land where fire‑rating compliance is non‑negotiable? A builder who knows Armidale’s winter frosts and summer heat will already have a plan for concrete slab depth, drainage grading, and fire‑resistant cladding.
So, what does that mean for your shortlist? Ask yourself: does the builder mention experience with local codes and the NSW Rural Fire Service’s fire‑rating guidance? That’s a sign they’re not just winging it.
Check the builder’s 4×4 access game
We’ve all heard the horror story of a truck getting stuck halfway up a ridge, delaying a roof replacement until the next season. A reliable rural builder will have a fully equipped 4×4 work vehicle and a track record of getting material to the most remote corners of New England.
Ask for a recent job photo where their 4×4 is on your type of road. If they can point to a concrete slab poured on a dusty track outside Glen Innes, you’ve got someone who knows how to move, unload, and work without a sealed highway.
Ask the right questions (and listen for the details)
- How do you schedule work around harvest, lambing or school holidays? A builder who respects your farm calendar will break the project into phases that won’t knock your livelihood off‑track.
- What’s your approach to storm‑water management on a sloping site? Look for specifics – like “we’ll grade the ground 15 cm per metre away from the slab” rather than vague promises.
- Do you carry a warranty on fire‑rated cladding and steel coating? A solid warranty shows confidence in the materials they choose.
When they answer, notice if they use concrete examples (“last year on a 30 m² shed near Uralla we used 275 µm hot‑dip steel because of the salty soil”). Those details mean they’ve actually done the work.
Look for compliance and safety track record
Any legitimate rural builder should have a licence that covers NSW rural construction and be able to produce a copy of their insurance certificate on request. Ask for proof of recent compliance checks – especially for bush‑fire‑prone zones. The NSW Rural Fire Service guidance on bushfire‑prone land outlines the standards for non‑combustible cladding and vegetation clearance; a builder who references that document is already thinking about your safety.
Don’t forget the paperwork: a complying development certificate (CDC) or development application (DA) should be part of their proposal, not an after‑thought.
Trust the gut – but verify with references
We all love a good story, but when it comes to a shed that will hold your hay for years, you need hard evidence. Ask for at least three recent references from farms within a 100 km radius of Armidale. Call them, and listen for the same themes: punctual 4×4 arrivals, respectful communication, and work that survived the next summer’s heatwave.
If a reference mentions a “quick fix that cracked after a storm,” that’s a red flag. A solid reference will rave about “no rust after two years of heavy rain” or “the builder left the site cleaner than they found it.”
Quick checklist before you sign
- Builder has a NSW rural building licence and up‑to‑date insurance.
- Proven 4×4 access capability for remote tracks.
- Clear plan for fire‑rating compliance (cite RFS guidance).
- Phased schedule that fits your farm calendar.
- Written warranty on materials and workmanship.
- Three recent, verifiable farm references.
When you tick all those boxes, you’ve moved from “maybe” to “the builder I can rely on when the next storm rolls in.” Remember, the right rural builder becomes part of your farm’s story – they show up, they fix what matters, and they leave you with a structure that stands as steady as the land itself.
Cost Breakdown: Typical Expenses for Country Home Renovations
When you sit down with a notebook and start crunching numbers, the first thing you feel is that knot in your gut – will the budget explode before the first wall goes up? I’ve been there a dozen times, watching the price tag grow while the rain is still on the horizon. Let’s walk through the line items you’ll actually see on a quote from a rural builder, so you know exactly where each dollar is going.
Labour – the heart of the project
A skilled carpenter or steel‑frame crew doesn’t charge by the hour the way a city tradesperson might. In the bush, a day’s work includes travel, set‑up, and the extra sweat of loading material off a 4×4 onto a dusty track. Expect the labour component to sit between 30 % and 45 % of your total budget. If you’re hiring a builder who can do both the framing and the roof, you’ll save on coordination costs, but the trade‑off is a slightly higher hourly rate – a price most farmers find worth paying for the seamless hand‑off.
So, what should you ask your rural builder? “How many crew members will be on site each day, and what’s their travel allowance?” A clear answer helps you spot hidden mark‑ups before they appear on the invoice.
Materials – steel, timber, and everything in between
Materials are the biggest line item, usually 35 % to 50 % of the overall spend. In NSW country homes, the choice usually boils down to galvanized steel framing versus pressure‑treated timber. Steel with a 275 µm coating costs a bit more upfront, but it laughs at rust and survives salty soils on the Riverina – a win for long‑term durability.
Timber feels warmer, but you’ll need a UV‑stable sealant and a hard‑capped finish to stop cracking under that relentless summer sun. Ask your builder for a material data sheet; that’s the best way to compare apples to apples and avoid surprise price jumps when the supplier switches grades mid‑project.
Permits, certifications, and compliance
Rural building isn’t a free‑for‑all. A complying development certificate (CDC) or a full development application (DA) can add $600 to $3 000 to your costs, depending on the scope. The fee covers the certifier’s time, any required engineering reports, and the paperwork the council demands.
Don’t let this slip under the radar. A good rural builder will bundle the certifier’s fee into the quote and give you a timeline for when the paperwork will be handed in – that way you won’t be staring at a stalled site while you wait for approval.
Logistics & 4×4 access – the hidden mileage
Here’s where the remote factor bites. Every kilometre of 4×4 travel eats into your bottom line, especially if the road turns to mud after a storm. Builders usually charge a “travel surcharge” of $0.80 to $1.20 per kilometre, plus any extra fuel for a fully loaded truck.
Tip: map your site’s access points before the first quote. If you can provide a cleared lane or a temporary gravel pad, you’ll shave a few hundred dollars off that surcharge. It’s a small effort that pays off big when the truck finally rolls in with the steel studs.
Contingency and hidden costs – the safety net
No project is immune to the unexpected. Soft ground, a surprise rock outcrop, or a sudden change in fire‑rating requirements can throw a wrench in the schedule. Most builders recommend a 10 % to 15 % contingency built right into the estimate.
Keep a separate “what‑if” line item for things like extra drainage, extra insulation for a colder winter, or a last‑minute upgrade to fire‑rated cladding after a bushfire warning. When you see those numbers up front, you won’t be reaching for the emergency fund later.
Putting the numbers together
Let’s say you’re renovating a 40 m² kitchen and adjoining bathroom on a homestead near Armidale. A rough split might look like this:
- Labour: 38 % – $22,800
- Materials (steel frame, cladding, timber finishes): 42 % – $25,200
- Permits & certifier: 4 % – $2,400
- Travel & logistics: 3 % – $1,800
- Contingency (12 %): $7,200
That totals about $60,000 – a figure that feels less like a mystery and more like a roadmap. You can tweak each bucket to match your priorities: maybe you swap a bit of steel for more timber if the look matters more than the rust‑proof guarantee.
Bottom line? A transparent cost breakdown from a rural builder lets you see exactly where the money’s going, gives you room to adjust, and stops nasty surprises from popping up when the first nail is hammered. Grab a notebook, ask for a detailed quote that mirrors this structure, and you’ll walk into your renovation with confidence, not anxiety.
Conclusion
By now you’ve seen how a seasoned rural builder can turn a knot‑tying budget worry into a clear roadmap.
We’ve walked through design basics, cost buckets, fire‑rating checks, and the nitty‑gritty of 4×4 logistics – all the things that keep a farm project on track without pulling you off the land.
So, what’s the next step? Grab a notebook, jot down the purpose of your build, and reach out to a builder who already knows the backroads of Armidale, Inverell or Bourke.
When you ask for a detailed quote, make sure it mirrors the breakdown we outlined: labour, materials, permits, travel and a contingency. That transparency lets you spot hidden fees before they become a surprise after the first nail.
Remember, a reliable rural builder isn’t just a tradesperson; they’re a partner who schedules around lambing, respects your 4×4 access limits, and backs their work with a solid warranty.
Take a moment today to compare a couple of local builders, ask for recent farm references, and check that they carry the right licences and insurance. A quick phone call can save weeks of downtime later.
When you’ve found the right fit, you’ll walk onto your site confident that the shed, kitchen or barn will stand up to the next summer heat, the next storm, and the everyday rhythm of farm life.
FAQ
What does a rural builder actually do on a farm property?
A rural builder is more than a carpenter – they’re the person who translates your farm’s everyday needs into a solid structure. That means handling everything from site prep on uneven paddocks, designing a shed that fits around livestock paths, to fitting fire‑rated cladding for bushfire zones. Because they understand 4×4 access limits and seasonal schedules, they can deliver work that won’t disrupt lambing or harvest.
How can I choose a reliable rural builder in NSW?
Start by checking that the builder holds a NSW rural building licence and up‑to‑date insurance – that’s the baseline. Then, ask for recent farm references within a 100 km radius; a quick call will tell you if they’re punctual with 4×4 deliveries and respectful of farm routines. Finally, look for a written plan that breaks the project into phases, includes a clear travel surcharge and outlines warranty terms for steel, timber and fire‑rated cladding.
What are typical costs for a farm shed renovation?
Typical shed upgrades in NSW run between $1 500 and $2 500 per metre², depending on material choice and site access. Steel framing with a 275 µm coating sits at the higher end but saves you from rust later, while pressure‑treated timber is cheaper up front but may need a UV‑stable sealant. Add about 10 % for a contingency, plus a small travel surcharge if your track is steep or unsealed.
How does 4×4 access affect the building timeline?
4×4 access can add a day or two to the schedule, especially when the road turns to mud after a storm. A builder with a dedicated 4×4 crew will pre‑stage material on a nearby clearing, reducing the number of trips to the site. Ask them to map the access route before quoting – that way you’ll know whether a gravel pad or a temporary bridge is needed, and you can plan around weather windows.
Do I need special permits for a rural renovation?
Most farm renovations still need a complying development certificate (CDC) or a full development application (DA), even if the work is under 30 m². The key is to involve a certifier early – they’ll tell you which fire‑rating standards apply and whether your site falls under a bushfire‑prone designation. A rural builder who partners with a local certifier can submit the paperwork alongside the construction schedule, so you don’t sit idle waiting for council approval.
How can I keep my rural build on budget and avoid hidden fees?
Start by getting a detailed quote that mirrors the cost buckets we discussed – labour, materials, permits, travel and a contingency. Compare at least three builders and flag any line items that look vague, like ‘site fees’ without a breakdown. Ask for a payment schedule tied to completed phases, not a lump‑sum up‑front. Finally, keep a simple log of any change orders; a written note prevents surprise invoices and keeps the project on track.


1 Comment