

Before you even think about mixing up plaster, it’s crucial to figure out what you’re really dealing with. A crack in your gyprock is more than just an eyesore; it's a symptom. And on a rural property, that symptom could point to anything from a simple knock to a more serious structural issue like foundation shifts or hidden water damage. A lasting repair always starts with getting the diagnosis right.
Diagnosing Gyprock Damage in Rural Homes
Take a moment to properly inspect the damage before reaching for the tools. It’s the most important thing you’ll do. Properties in regional New South Wales face unique pressures—shifting clay soils, extreme weather—and these can show up on your walls and ceilings in very specific ways.
Just slapping some filler over a crack without understanding its cause is a short-term fix at best. It’s a bit like putting a band-aid on a wound that needs stitches. For rural homeowners, a small problem ignored can quickly balloon into a much bigger, more expensive headache.
Common Gyprock Problems and What They Mean
Not all cracks and holes tell the same story. If you learn to read the signs, you'll know exactly how to tackle the repair and, just as importantly, when it's time to call in a professional.
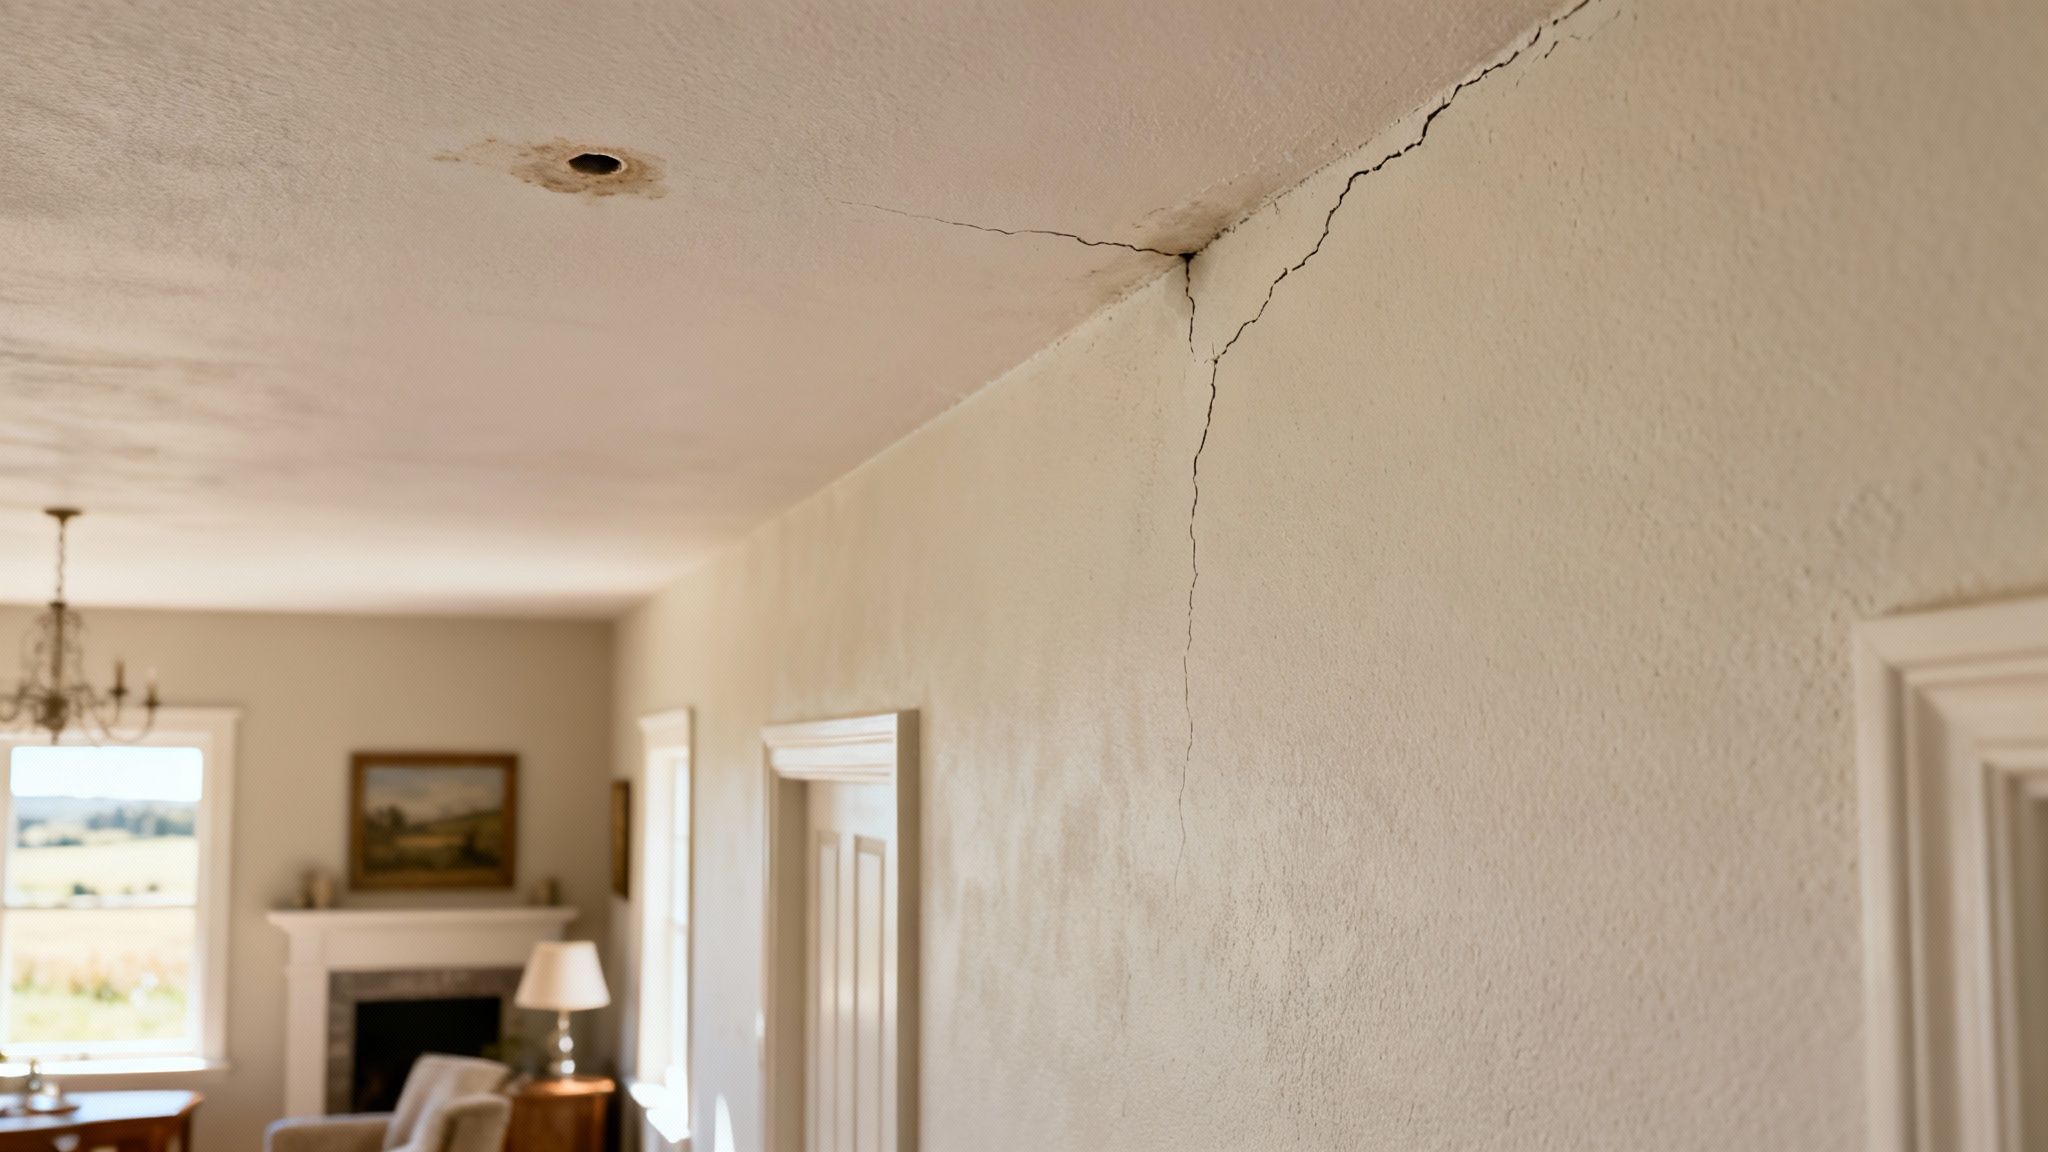
- Stress Cracks: Seeing jagged, diagonal lines running from the corners of doors and windows? That’s often a sign of stress. On rural properties, this can point to seasonal foundation movement as the soil expands and contracts.
- Impact Damage: This one’s usually pretty obvious. A doorknob, a piece of furniture, or an accidental bump leaves a dent or a hole. These are typically cosmetic issues, localised to the point of impact.
- Water Damage: Yellow or brown stains are the classic giveaway. You might also notice bubbling paint or gyprock that feels soft and spongy to the touch. The culprit could be anything from a leaky roof or pipe to poor ventilation in a bathroom.
When you're looking at damage in older rural homes, remember to consider hidden dangers. Knowing how is asbestos identified is crucial for your safety before you start cutting or sanding.
Why Early Diagnosis Matters in Rural NSW
Gyprock is everywhere—it's used in roughly 80% of Australian buildings. That makes knowing how to look after it an essential skill for any property owner. Cracks are the number one problem we see, and they should never be brushed off. They can be the first warning of underlying structural issues that could compromise the integrity of your entire home.
For properties out of town, simple logistics can turn a small job into a major ordeal. An issue that might have been a quick fix can escalate, suddenly requiring a lot more material or specialised gear than you have on hand.
At Awesim, we know all about the unique challenges of rural maintenance. That’s why our 10 tonne 4×4 truck is kitted out to access the most remote properties across New South Wales. We bring all the labour, materials, and equipment straight to your door, where and when it's needed the most.
A Practical Inspection Checklist
Ready to play detective? Walk through your home and use this simple checklist to get a handle on any damaged areas.
- Look at the Crack's Location and Shape: Is it a fine, straight line right on a join? That often points to a problem with the plaster tape. Is it jagged and spreading out from a corner? That’s more likely structural stress.
- Check for Moisture: Gently press the gyprock around any stains. If it feels soft, damp, or crumbles under your fingers, you've got a water problem. You absolutely must fix the source of the leak before touching the gyprock.
- Note Any Recurring Issues: If you've patched a crack before only to have it reappear, that’s a huge red flag. It tells you the underlying cause was never addressed. We see this all the time with foundation movement that needs more than a cosmetic touch-up.
By taking the time to diagnose the problem properly, you’re setting yourself up for a repair that will actually last. For issues that go beyond the plasterboard, our expertise in general property and building maintenance can help you protect and improve your entire rural property.
Getting Your Gyprock Repair Kit Together
There's nothing worse than getting halfway through a job only to realise you're missing a crucial tool, especially when the nearest hardware store is an hour's drive away. Having the right gear ready to go makes all the difference between a frustrating mess and a repair you can be proud of. It’s not about owning a truckload of specialised gear; it’s about having a core set of quality tools that will see you through most common gyprock fixes.
Let's start with the basics: the joint compound. You’ll see a few different types, but the main ones to know are base coat and top coat. Think of base coat as the workhorse – it's for strength, filling bigger gaps, and bedding in your tape. It dries hard and doesn't shrink much. The top coat, on the other hand, is your finishing product. It's much finer, spreads like butter, and is a dream to sand, giving you that glass-smooth surface ready for paint. It's always a good idea to have a tub of each.
The Right Compounds and Tapes for the Job
When you're dealing with a long, straight crack or joining new sheets, tape is non-negotiable. You’ll find self-adhesive fibreglass mesh tape, which can seem tempting, but honestly, most pros I know stick with paper tape. Why? Because when you bed it properly into a base coat, it creates a much stronger, more flexible join that’s far less likely to re-crack down the track, especially in homes that shift with the seasons.
- Base Coat Compound: This is for your initial fills and taping. It provides the muscle behind the repair.
- Top Coat Compound: Use this for the last one or two coats to get a perfectly smooth, invisible finish.
- Paper Joint Tape: It might take a bit more practice, but it delivers superior strength and stops old cracks from coming back to haunt you.
Hand Tools and Staying Safe
Beyond the mud and tape, a few simple hand tools will make your life a whole lot easier. A good set of taping knives is essential – I’d recommend having at least a 75mm, 150mm, and a 250mm blade. This variety lets you apply compound precisely and then feather the edges out for a seamless blend. A hawk or a mud pan is also a great bit of kit for holding a workable amount of compound, saving you countless trips back and forth to the main bucket.
Sanding is where a good job can turn into a dusty nightmare. For big walls or ceilings, a pole sander is your friend. For most patches, though, a simple hand-sanding block with a fine-grit sandpaper (120-180 grit) or a sanding sponge is all you need. Pro tip: look for sanding sponges you can use damp. It makes a world of difference in keeping the dust down.
Don’t ever skip the safety gear. Gyprock dust is nasty stuff that you don't want in your lungs. At a minimum, wear a good P2-rated dust mask and a pair of safety goggles anytime you’re cutting or sanding.
We know that just getting the materials out to a remote property can be the biggest challenge of all. It’s a hurdle we’ve tackled head-on. Our 10 tonne 4×4 truck is essentially a mobile workshop, capable of bringing in materials and supplies for the most remote properties around New South Wales. This allows us to bring labour, materials, and equipment where and when it's needed the most, no matter how far off the beaten path you are.
Mastering Common Gyprock Repair Techniques
Once you've got your tools sorted, it's time to get your hands dirty. Fixing gyprock isn't about brute force; it's a game of finesse and a little bit of patience. A truly great repair is one you can't see at all once the paint is on, blending perfectly into the wall.
I'm going to walk you through the tried-and-true methods for the most common dings and damage you'll find on a rural property. From prepping the wall correctly to laying down the compound for a rock-solid finish, every step counts. Nailing these techniques will give you the confidence to get a professional-looking result every time.
Preparing the Damaged Area for a Lasting Fix
Honestly, the biggest mistake I see people make with DIY gyprock repairs is rushing the prep work. You can't just smear filler over a crack and hope for the best—it simply won't last. The area needs to be clean, stable, and ready to take the new compound.
For minor issues like nail pops or hairline cracks, start by gently scraping away any flaky paint or plaster. Then, grab a utility knife and carefully carve out the crack into a shallow 'V' shape. This tiny step is a game-changer; it gives the joint compound more surface area to bite into, creating a much stronger bond and stopping that crack from coming back.
If you're staring down a larger hole, you'll need to create a solid backing for the patch. Cut a fresh piece of gyprock that's slightly bigger than the hole itself. Trace around it on the wall, and then use a plasterboard saw to neatly cut out the damaged section. This ensures your new patch fits snugly and is properly supported by the surrounding gyprock.
This flow chart breaks down the essential stages of getting ready for a solid gyprock repair.
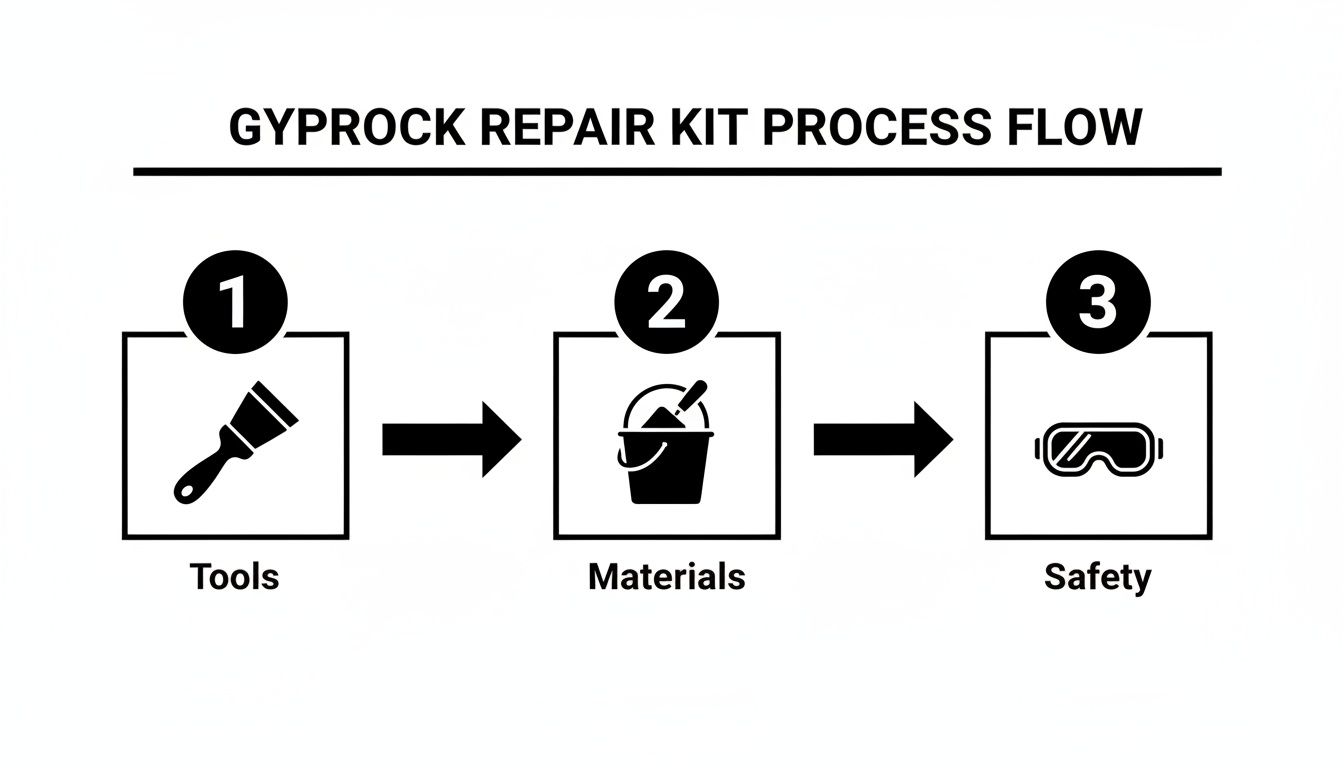
As you can see, a successful job is all about a methodical approach. It starts with having the right gear and materials on hand before you even think about starting the work, and always keeping safety in mind.
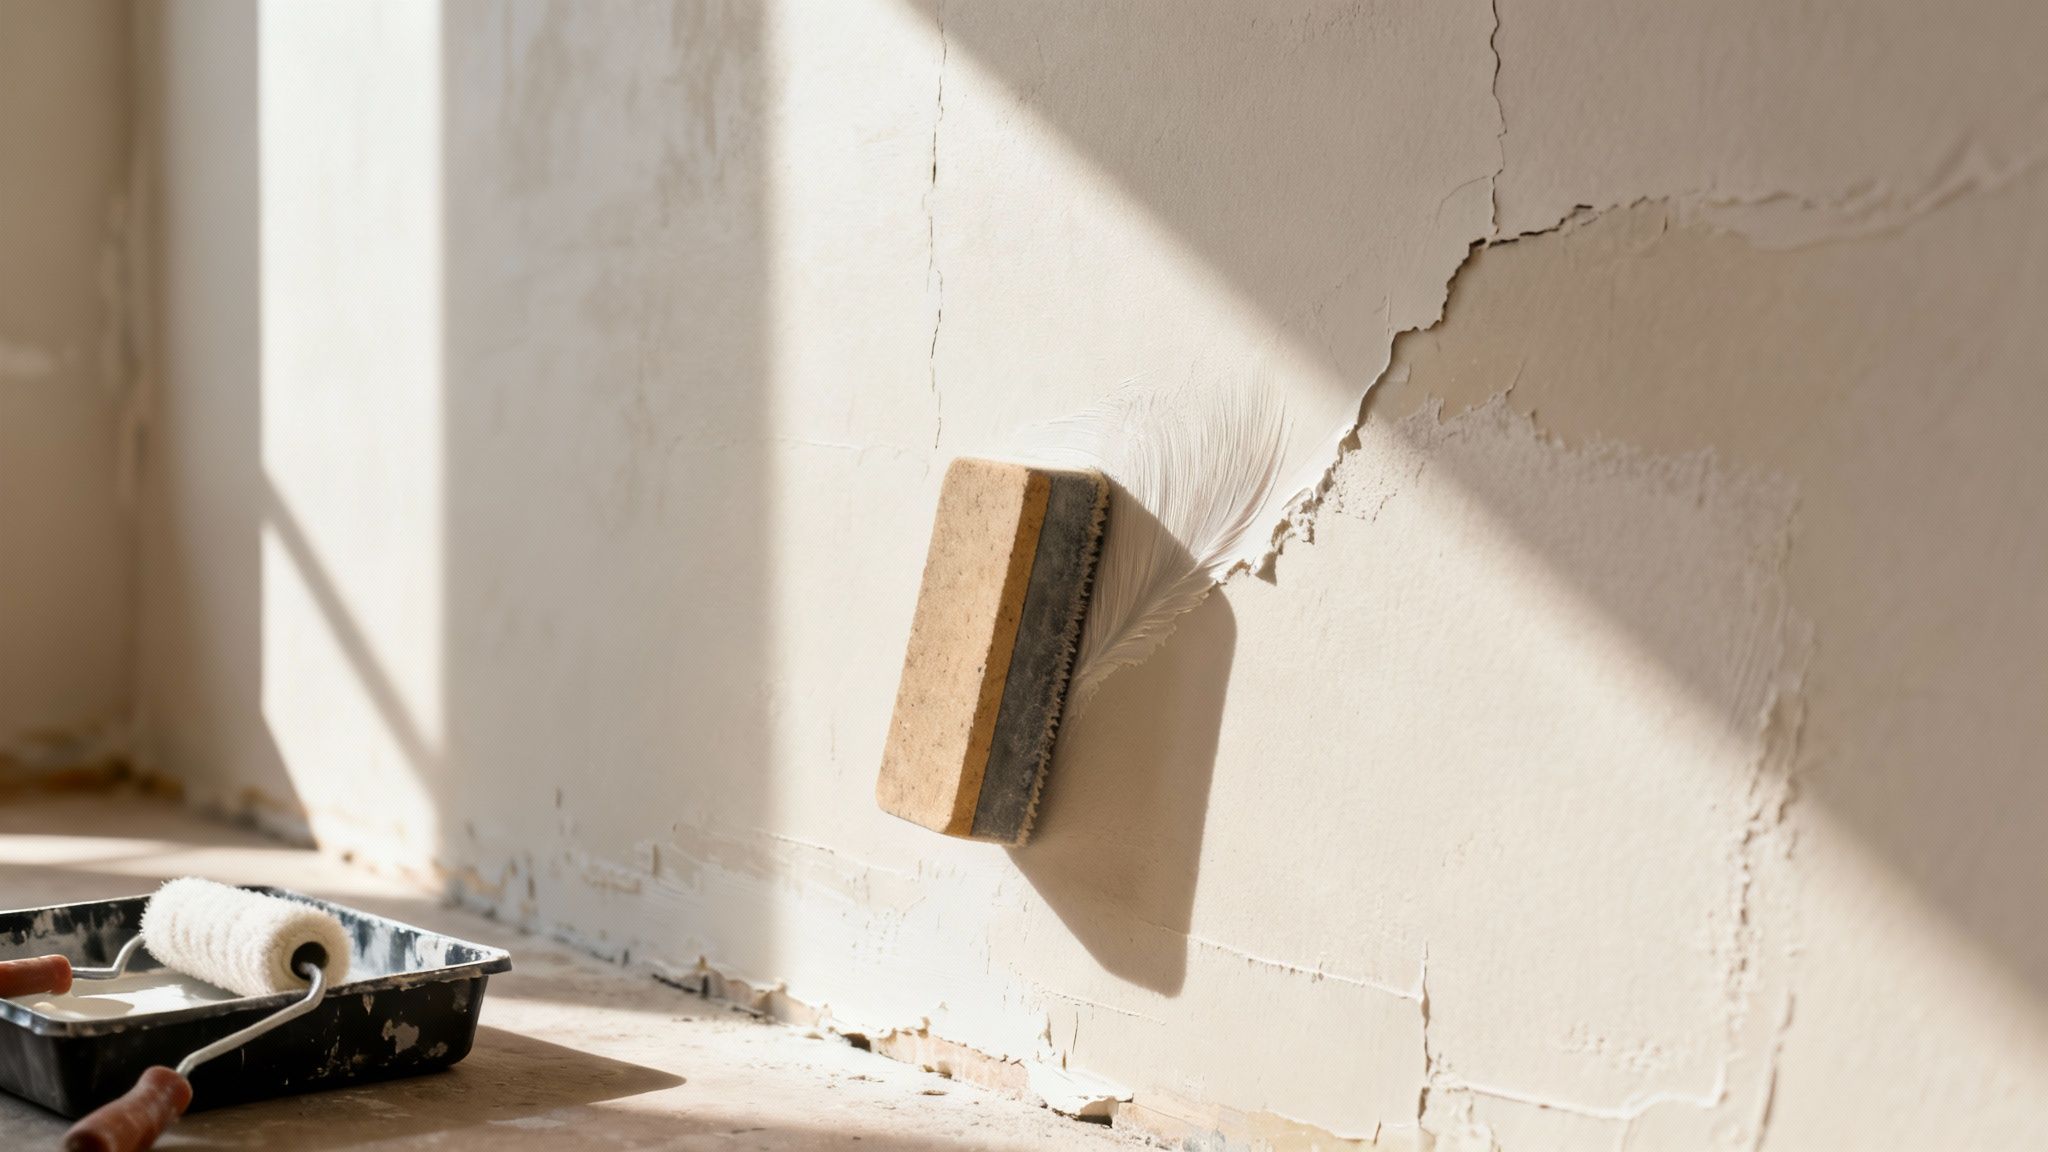
Applying Compound and Tape Like a Professional
With the area prepped and clean, you can get stuck into the first coat of compound. Using a 75mm or 150mm taping knife, press the mud firmly into the crack or around the edges of your patch. The idea is to fill the void completely without leaving any air pockets behind.
For cracks and joins, embedding paper tape is the next critical step. Cut a strip of tape to the right length, lay a thin bed of base coat over the crack, and then press the tape firmly into the wet compound with your knife. You want to squeeze out just enough excess mud from under the tape to get a solid, bubble-free bond. This is what gives the repair its strength.
A classic rookie mistake is globbing the compound on too thick. You're always better off applying two or three thin coats rather than one big, heavy one. Thin layers dry quicker, shrink less, and are a whole lot easier to sand smooth later.
Once the first coat is bone dry—which could take up to 24 hours depending on the weather out your way in NSW—you're ready for the next layer. This time, switch to a wider knife (like a 250mm one) to "feather" the edges. This just means spreading the compound a bit wider than the repair itself, creating a gradual taper that will disappear into the rest of the wall.
The Awesim Advantage for Remote NSW Properties
We know that a quick trip to the hardware store isn't always "quick" when you live hours from the nearest town. That logistical headache is exactly why we've set ourselves up to service even the most isolated properties across New South Wales.
Our 10 tonne 4×4 truck is more than just a way to get around; it's our mobile workshop. It’s been specifically kitted out to handle the rugged terrain, dirt tracks, and water crossings that are just part of life in rural NSW.
This unique setup means we can bring absolutely everything needed for any job, directly to you:
- Labour: Our experienced team shows up ready to go, no messing around.
- Materials: We haul all the gyprock, compounds, tapes, and supplies required.
- Equipment: From specialised tools right through to scaffolding, it's all on the truck.
Ultimately, this means we can handle any gyprock repair, no matter how big the job or how remote your property is. We get it done efficiently and correctly the first time because we bring the entire solution to you, right where you need it most.
Sanding and Painting for an Invisible Finish
You’ve patched the hole and feathered the edges. Now for the part that truly separates a decent repair from an invisible one. The final sanding and painting stage is where the real artistry happens, turning your hard work into a flawless surface that blends right into the existing wall.
So many people rush this final step, and it’s a mistake that makes the repair stick out like a sore thumb. A little patience and the right technique here will pay off big time, giving you a finish so good, you’ll forget the damage was ever there. It’s all about getting the surface perfectly smooth and matching the character of the surrounding wall.
Achieving a Perfectly Smooth Surface
The whole point of sanding isn't just to flatten the plaster; it's to create an imperceptible transition from the patch to the original wall. For this, you'll want a fine-grit sandpaper—something around 120 to 180 grit is the sweet spot. Anything coarser risks leaving scratches in the soft top coat that will definitely show through the paint.
When you're sanding, use light, circular motions and let the paper do the work. Don't press hard, or you could gouge the fresh compound or scuff the paintwork around it.
Here’s a great trick we use on site: grab a torch or a work light and shine it along the wall at a sharp angle. This is called ‘raking light’, and it will cast tiny shadows over any bumps or ridges you might have missed. It’s a simple but incredibly effective way to spot-check your work before you even think about cracking open a can of paint.
The Non-Negotiable Step: Priming Your Patch
Once you’ve wiped away all the sanding dust with a damp cloth, the temptation is to just start painting. Resist it. Applying a quality primer over the fresh plaster is an absolutely crucial step for a professional finish.
Why? Because fresh joint compound is way more porous than your painted wall. If you paint directly onto it, the plaster will soak up the paint unevenly, resulting in a dull, blotchy spot known as ‘flashing’. You’ll notice it immediately, especially if your wall has any sort of sheen.
Key Takeaway: Priming is essential. It seals the porous plaster so the top coat goes on evenly, and it creates a uniform base that helps your new paint colour blend in perfectly. Skipping this step is a surefire way to make your repair visible.
Matching Paint for a Seamless Blend
Matching the paint is the final piece of the puzzle, and it's about more than just getting the colour right. The sheen and texture are just as important. If you can, take a small chip of the old paint (an inch or so is fine) to your local paint or hardware store—they can do an accurate colour match for you.
For a truly perfect match, think about these factors:
- Sheen: Is the original wall matte, low-sheen, semi-gloss, or gloss? Putting a low-sheen patch next to a semi-gloss section will be immediately obvious.
- Texture: Older homes in particular often have a slight texture built up from years of roller applications. Try using a roller with a similar nap (the thickness of the roller sleeve) to mimic this texture on your patch.
- Feathering the Paint: As you apply the top coat, use your roller to paint slightly beyond the edges of the primed patch. This helps blend the new paint into the old, avoiding a hard, visible line.
Getting a perfect paint finish is a skill in its own right. If you’re tackling a larger project or just want to guarantee a flawless result, getting advice from expert painters in Dubbo can be invaluable, especially when dealing with the unique conditions of rural properties.
When It’s Time to Call in a Professional for Your Gyprock Repair
While this guide gives you the confidence to tackle many common gyprock issues, the most valuable skill is knowing when to put the tools down. A successful DIY job feels great, but biting off more than you can chew can lead to a botched finish, wasted materials, and even serious injury. Some situations just demand the experience, equipment, and structural knowledge that only a professional brings to the table.
Knowing when to pick up the phone saves you time, money, and a mountain of frustration. It’s about getting the job done right the first time by addressing the root cause, ensuring a safe and permanent fix.
Red Flags That Mean You Need an Expert
Some types of gyprock damage are more than just cosmetic—they’re symptoms of a much bigger problem. If you spot any of these warning signs, it’s a clear signal that you need a professional eye on the job.
- Significant Water Damage: A small, isolated stain is one thing. But if the gyprock is soft, sagging, or showing any signs of mould, you absolutely need a pro. They have the gear to safely remove the damaged sections, treat the area for mould, and make sure the timber framing is still sound before patching it all up.
- Large or Complex Ceiling Repairs: Working over your head is risky business. A big, sagging section of ceiling is incredibly heavy and can come down without warning. Tackling this yourself is a major safety risk. We use proper scaffolding and have proven techniques to manage these jobs safely and get a perfect finish.
- Widespread or Recurring Cracks: A single hairline crack above a doorway is often just settlement. But if you're seeing multiple cracks spreading across walls and ceilings, it could point to serious structural movement. A professional can diagnose whether it’s a foundation issue, roof truss uplift, or something else that a bit of plaster just won't fix.
Overcoming the Tyranny of Distance in Rural NSW
For anyone on a property in regional New South Wales, the decision to call a professional often comes with a massive headache: logistics. Just getting a qualified tradie, let alone all the right materials and tools, out to a remote location can feel like a logistical nightmare. Delays are almost a given, and the costs can spiral quickly.
This is exactly the problem our business was built to solve.
We invested in a custom-kitted 10 tonne 4×4 truck for one simple reason: to bring a complete building solution directly to your gate, no matter how far off the beaten track you are. This allows us to bring in labour, materials, and equipment where and when it's needed the most for the most remote properties around New South Wales.
Our unique setup means we can bring everything needed for the most complex gyprock repairs and renovations in a single trip. Our skilled team, full sheets of plasterboard, compounds, specialised tools, and anything else the job requires—it all arrives at once. This completely sidesteps the logistical hurdles and frustrating delays that plague so many rural projects. You get a professional job done efficiently, with zero compromises.
The Value of Professional Expertise
The Australian plastering and ceiling services industry is a huge part of the building sector, and repairs are a massive part of that. This just goes to show the constant demand for skilled tradespeople who deliver high-quality work. With material costs being fairly steady, the real difference comes down to local knowledge and exceptional service.
Hiring an expert is about more than just the repair itself; it’s about peace of mind. While our guide is focused on DIY, if you're planning more extensive renovations or even managing a larger build, checking out an Owner Builder Courses Guide can offer some fantastic insights.
A professional ensures the work meets Australian Standards and, most importantly, fixes any underlying problems that could cause headaches down the line. If you're looking at a patch of damage and aren't sure what you're dealing with, you can see how we tackle different challenges by exploring our detailed overview of gyprock repairs near me.
Answering Your Top Gyprock Repair Questions
Even the best guides can't cover every single scenario you might run into. When you're in the middle of a gyprock repair, a few questions always seem to pop up. Getting the right answers can make all the difference between a job you're proud of and one that leaves you frustrated.
Here are some of the most common questions we get from property owners across New South Wales, along with some practical, straight-from-the-field advice.
Why Can’t I Just Paint Over a Small Crack?
It’s a tempting thought, isn't it? Just a quick coat of paint and the problem disappears. But this is one shortcut that’s guaranteed to backfire. Paint is just a thin decorative layer; it has zero structural integrity.
While a thick coat might hide that hairline crack for a little while, the underlying issue is still there. Your house naturally shifts and settles, and as soon as it does, that crack will break right through your fresh paint job. To fix it for good, you need to reinforce the area with joint compound and tape. This bridges the gap and creates a solid foundation that moves with your wall, not against it.
How Long Does Joint Compound Really Need to Dry?
Patience is probably the most important tool you can have for gyprock work. The instructions on the tub might suggest a few hours, but conditions on the ground in NSW can tell a very different story. Out here, humidity and temperature play a huge role.
In damp coastal air or during a cold inland winter, joint compound can easily take up to 24 hours—sometimes more—to fully cure. Rushing it is a classic mistake. If you apply a new coat over a damp one, you trap moisture inside. That leads to bubbles, weak patches, and eventually, the repair failing altogether. The best way to check? The touch test. If it feels cool or even slightly soft, walk away and give it more time.
If you find yourself patching the same crack over and over, it's a huge red flag. This usually means the problem isn't the gyprock itself but a deeper structural issue causing the movement. At that point, you really need a professional to find out what's going on.
The demand for quality plasterboard work isn't just coming from new construction. A huge part of the market, as detailed in this Australian plasterboard market report, is driven by renovations and homeowners wanting to improve their existing spaces. This really underlines how important it is to get repairs right the first time.
Well-maintained walls are the canvas for any good renovation. For those of us on rural or remote properties, though, just getting the right materials and skilled people to the job site can be a massive challenge.
That’s a problem we’ve solved head-on. Our 10 tonne 4×4 truck is specifically designed to bring in all necessary materials and supplies to the most remote properties around New South Wales. This allows us to bring in labour, materials, and equipment where and when it's needed the most, ensuring no job is too far out of reach.
For professional, reliable gyprock repairs and building maintenance that can get to you, no matter where you are in NSW, trust the team at Awesim Building Contractors. Get in touch with us today to talk about your project.


