

A damaged gyprock ceiling is more than just an eyesore. When you're out on a rural property, it's a genuine threat to your home's safety and structural integrity. Those little water stains or stress cracks are warning signs, and if you let them go, they can snowball into serious structural issues, ruined insulation, and a much bigger repair bill down the track.
Why Ceiling Integrity is So Important on a Rural Property
On a sprawling homestead in New South Wales, your ceiling is the frontline defence against everything the weather and the land can throw at it. It’s not just a lid on your house; it's a vital part of the whole structure.
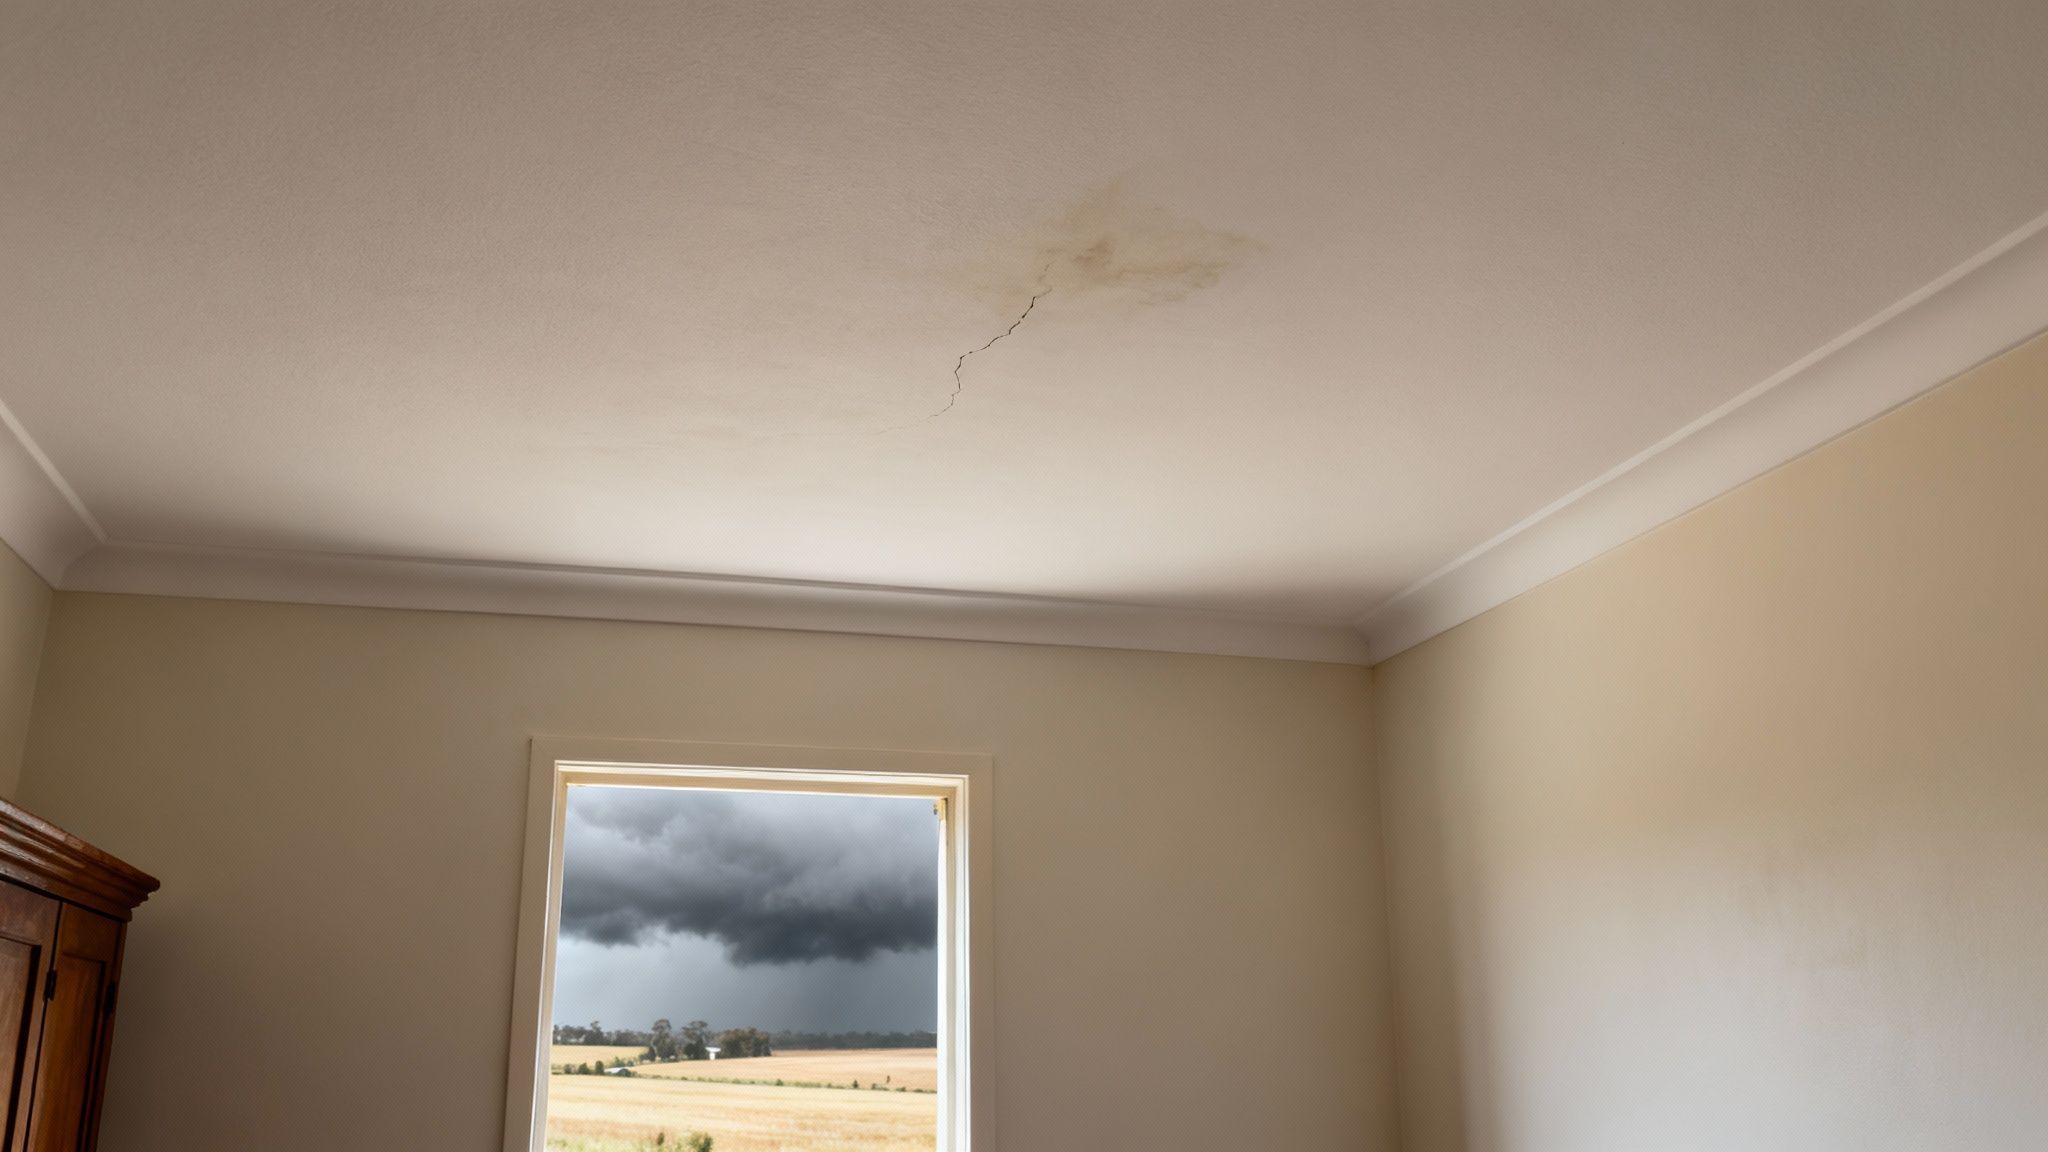
Just think about the last big storm that hammered through Armidale, or the subtle yet powerful soil shifts you see around the Riverina. These things put immense strain on your buildings. A small water stain might look harmless, but it’s a sign that water is getting in somewhere, which can quickly lead to rot and mould. In the same way, a new crack could be the first sign of foundation movement that needs to be sorted out, fast.
The Unique Headaches of Rural Properties
For those of us on rural properties, being proactive with gyprock ceiling repairs isn't just about keeping things looking nice—it's about preserving your asset. Small problems have a way of escalating out here, putting the safety and comfort of your home, sheds, and outbuildings at risk. Putting off those repairs can lead to some serious consequences:
- Compromised Insulation: Once plasterboard is damaged, your home’s thermal efficiency plummets. That means higher energy bills to keep the place warm in winter and cool in summer.
- Reduced Property Value: No one wants to see visible ceiling damage. It's a massive red flag for potential buyers and can seriously knock down your property's market value.
- Structural Risks: What begins as a minor sag can end in a full-blown ceiling collapse. It's a dangerous situation that can endanger your family and cause catastrophic damage.
Here in rural NSW, keeping ceilings in good nick is a critical service for farmers and homestead owners who are up against some pretty harsh conditions. Considering that plasterboard lines a staggering 80% of Australian buildings, proper maintenance is just part of life. Getting it done to the correct standard is essential to prevent dangerous failures.
We know that the biggest challenge is often just getting materials and skilled labour out to remote locations. That’s why we’ve invested in a specialised 10-tonne 4×4 truck to bring in materials and supplies for the most remote properties around New South Wales. This allows us to bring in labour, materials, and equipment where and when it's needed the most.
This ability to handle the logistics means we can manage complex property and building maintenance without the typical rural delays. We make sure your gyprock ceiling repairs are handled efficiently, protecting your most valuable asset.
Reading the Signs: How to Diagnose Your Gyprock Ceiling Problems
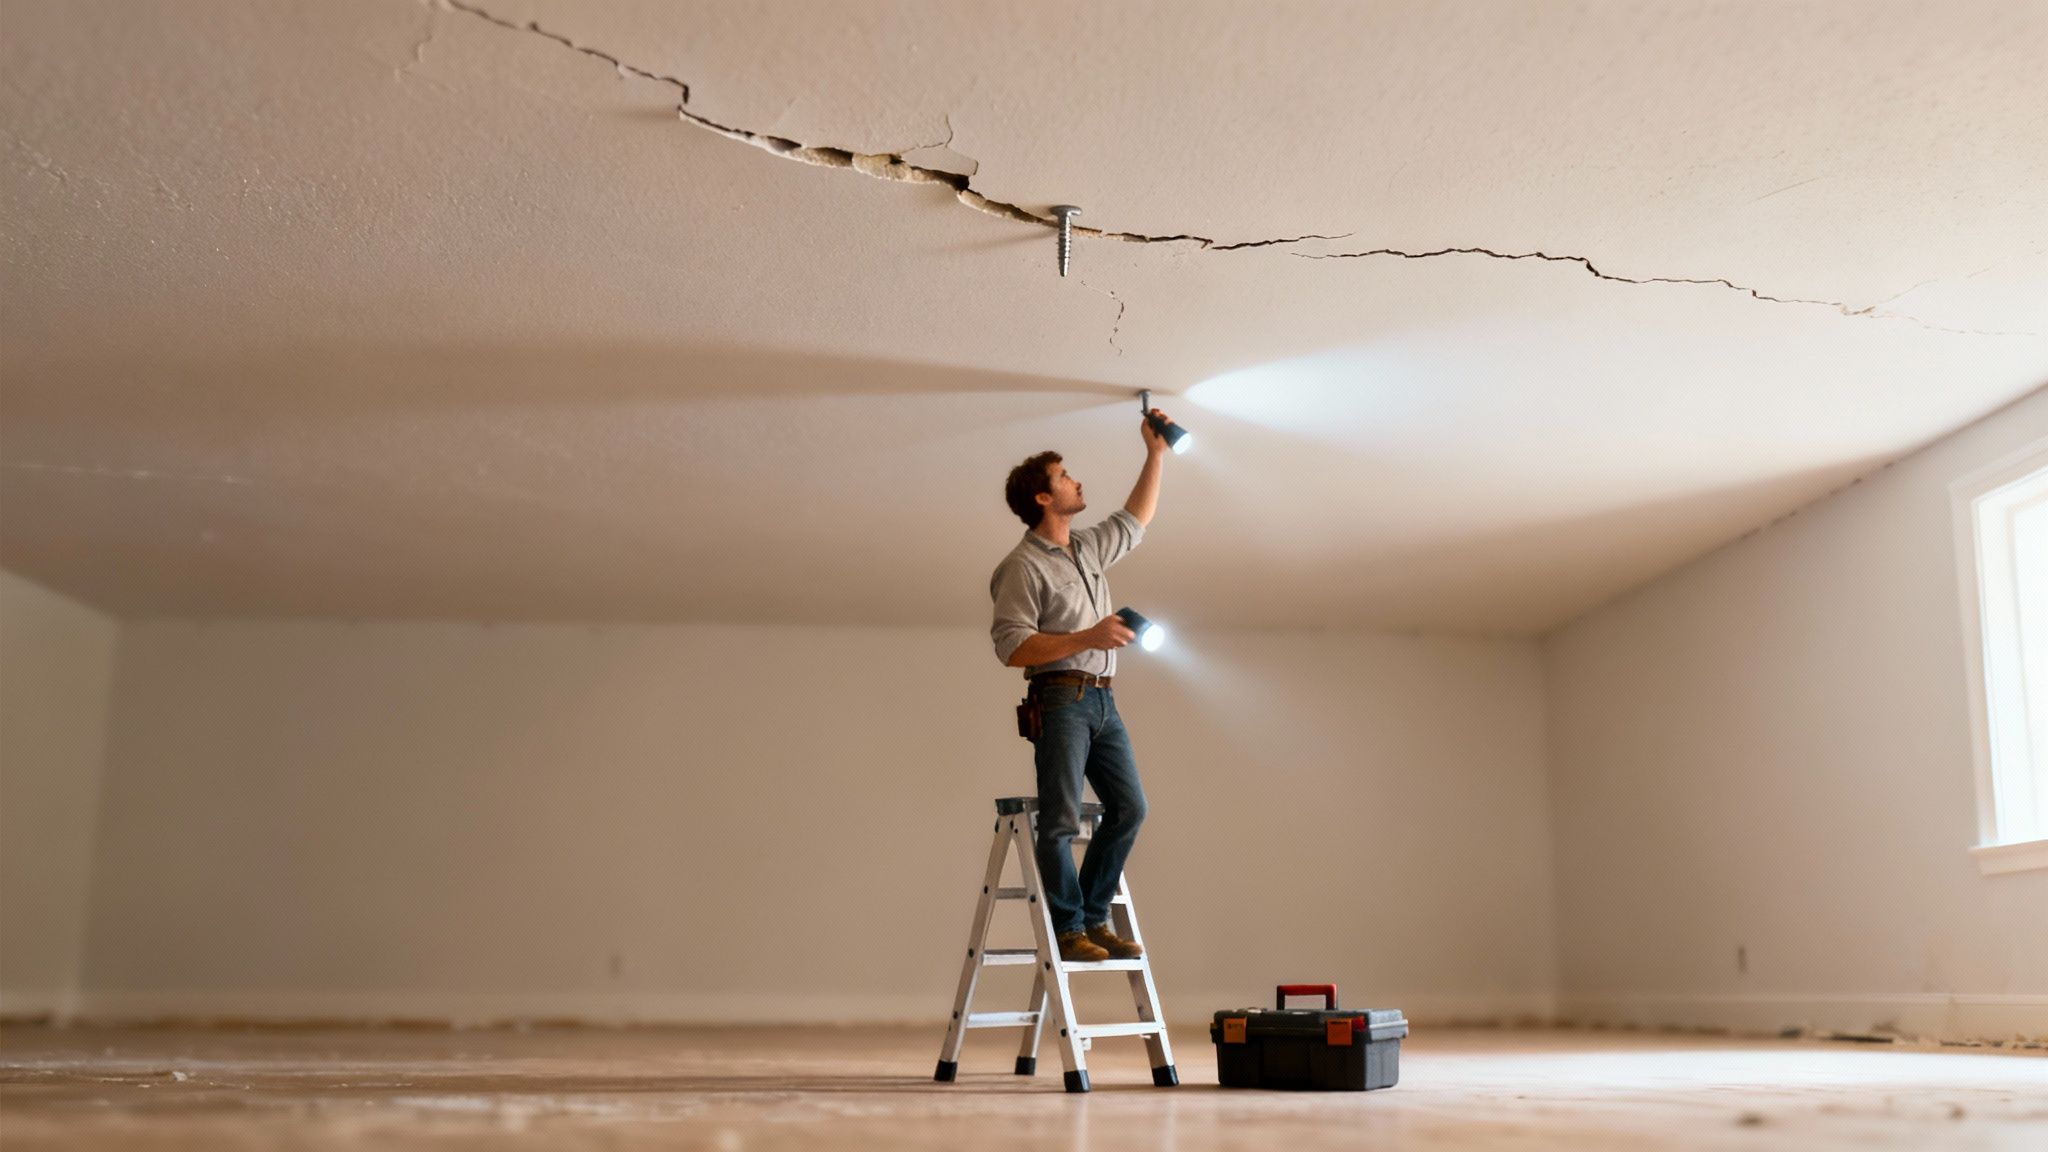
Before you even think about picking up a tool, the most important job is to play detective. A proper diagnosis is what separates a quick patch-up from a genuine, lasting repair. Your ceiling is trying to tell you a story, and learning to read the signs is a crucial skill for any property owner.
Is that fine line in the corner just the house settling, or is it the first sign of something more serious? A faint crack that appears during a long dry spell might not be a big deal. But one that’s getting wider, changing colour, or starting to bulge? That’s your ceiling sending out an S.O.S.
Cracks, Stains, and Other Telltale Clues
From my experience working on properties all over New South Wales, most ceiling issues fall into a few clear categories. Each one points to a different culprit, whether it's a slow-drip leak or a sudden shift in the building's frame.
Here’s what to look for:
- Hairline Cracks: You’ll often spot these thin, spidery lines near corners or around light fittings. They’re usually just cosmetic, caused by the natural expansion and contraction of the building materials as the temperature changes.
- Larger, Jagged Cracks: A crack wider than a few millimetres that looks aggressive and jagged is a different beast altogether. This could point to foundation settlement or significant structural movement.
- Water Stains: Yellowish or brown discolouration is the calling card of a leak. The source could be anything from a failing roof or dodgy plumbing to a simple lack of ventilation in the ceiling cavity.
- Sagging or Bowing Gyprock: If your ceiling looks like it’s drooping or has a noticeable bulge, that’s a serious red flag. It almost always means widespread moisture has weakened the plasterboard itself, or the adhesives and fasteners holding it up have given way.
Water damage is the number one enemy of gyprock ceilings, especially out in the country. Once moisture gets in, it can cause sagging, invite mould, and compromise the board’s integrity. Given that gyprock has a typical lifespan of just 25-30 years, it's something to keep a close eye on. You can find more insights into plasterboard longevity if you're curious.
Key Takeaway: Always treat the source, not just the symptom. Patching over a water stain without finding and fixing the leak is a waste of time. You're just hiding the problem, not solving it.
To help you figure out what's going on up there, here's a quick diagnostic guide. Use it to match the symptoms with the likely cause and decide on your next move.
Reading the Signs: A Quick Diagnostic Guide
| Symptom | Likely Cause | Severity Level | Recommended Action |
|---|---|---|---|
| Thin, spidery cracks near corners | Normal building movement/settling | Low | Monitor. If stable, a DIY patch and paint is usually sufficient. |
| Wide, jagged, or growing cracks | Structural movement, foundation issues | High | Call a professional immediately. Do not attempt a DIY fix. |
| Yellow or brown circular stains | Water leak (roof, plumbing, condensation) | Medium to High | Find and fix the source of the leak first, then repair the gyprock. |
| Bubbling or peeling paint | Moisture getting behind the paint | Medium | Scrape, sand, and seal with a stain-blocking primer before repainting. |
| Ceiling is noticeably drooping or sagging | Widespread water damage, adhesive failure | Critical | Evacuate the area below and call us. The ceiling could collapse. |
This table should give you a good starting point. Remember, when in doubt, it’s always better to get a second opinion from an expert.
Knowing When to DIY and When to Call Us
Being honest about your own limits is crucial. A minor hairline crack? That's often a perfect weekend project for a confident DIYer. But when you’re dealing with major sagging, extensive water damage, or anything that hints at a structural problem, getting a professional in is the smartest, safest move.
At Awesim, our real strength is our experience with the unique challenges rural properties present. We don't just patch the hole; we get to the bottom of why it happened in the first place.
This is where our logistical muscle, specifically our 10-tonne 4×4 truck, comes into play. It means we can haul all the labour, materials, and specialised gear directly to you, no matter how far off the beaten track you are in New South Wales. Whether we’re navigating dirt roads or water crossings, we arrive ready to handle your gyprock ceiling repairs properly, ensuring the fix is done right and built to last.
Getting Your Hands Dirty: A Guide to Minor Gyprock Repairs
If you live out in the country, you know that being able to handle small maintenance jobs yourself isn't just a skill—it's a necessity. When it comes to minor gyprock ceiling repairs, rolling up your sleeves and tackling the job can be incredibly satisfying. It saves you the time and money of calling in a pro for issues that aren't quite emergencies yet.
With the right know-how, you can confidently fix those common annoyances like nail pops, fine hairline cracks, and small dings or holes up to about 15cm. These are often the kinds of blemishes that, while not structurally dangerous, can really make a room feel dated and neglected. Getting on top of them is a valuable skill. Plus, a flawless ceiling does wonders for your home's appeal, a crucial point if you're following a preparing a house for sale checklist.
Your Go-To Toolkit and Materials
Before you even think about patching, get your supplies in order. Having everything you need from the get-go is half the battle won. It saves you from those frustrating mid-job trips to the hardware store and is the key to a clean, professional-looking finish. You don't need a tradie's van, just a few essentials.
Here’s a simple list to get you on your way:
- Joint Compound: Often called "base coat" or "top coat." For small jobs, a pre-mixed, all-purpose tub is your best bet.
- Plaster Spatula or Trowel: A flexible 10cm or 15cm blade is perfect for applying and smoothing the compound.
- Sandpaper or Sanding Block: Grab some medium-grit (around 120) for the initial shaping and fine-grit (around 180-220) for that flawless final touch.
- Utility Knife: Crucial for cleaning up the edges of cracks or holes before you start filling.
- Drop Sheets: Trust me, ceiling repair is messy work. Protect your floors and furniture with some decent plastic or canvas drop sheets.
- Primer: A high-quality, stain-blocking primer is non-negotiable. It ensures the new paint sticks properly and the repair doesn't show through.
Tackling Hairline Cracks and Nail Pops
Hairline cracks and nail pops are probably the two most common ceiling issues you'll run into. The good news is they're typically just cosmetic and pretty simple to fix, making them a great starting point for any DIYer.
For a hairline crack, take the corner of your utility knife and gently score along the crack. You want to widen it just a little, creating a shallow 'V' shape. This small groove is vital because it gives the joint compound something to properly grip onto, leading to a much stronger and more durable repair.
If you’re dealing with a nail or screw that’s "popped" out, your first move is to reset it. Simply drive the fastener a little deeper into the gyprock until it creates a slight dimple just below the ceiling surface. Just be gentle—you don't want to tear the paper face of the plasterboard.
The real secret to an invisible patch is all in the feathering. Apply your compound in thin layers, and with each new coat, extend it slightly beyond the last. This creates a gradual, seamless transition from the patched area to the existing ceiling, making it completely disappear once you've sanded and painted.
Patching Up Small Holes
Got a small hole from an accidental knock or a removed light fixture? It needs a slightly different approach but is still well within your DIY capabilities. For any hole up to about 15cm, a self-adhesive fibreglass mesh patch is an absolute game-changer.
First, make sure the area around the hole is clean, smooth, and free of any loose debris. Then, place the mesh patch squarely over the hole, pressing it firmly onto the ceiling so it sticks.
Using your trowel, apply a thin layer of joint compound directly over the patch, working from the centre outwards. The goal here is to completely fill the mesh while feathering the compound's edges smoothly onto the surrounding ceiling.
Now, be patient. Let that first coat dry completely, which can take up to 24 hours. You'll probably need two or three thin coats to get a perfectly flat surface. Remember to sand lightly with fine-grit sandpaper between each coat.
Once you’re happy with the finish and the final coat is bone dry, there's one last crucial step before you even think about painting: apply a coat of quality primer. This seals the porous new plaster, ensuring your final paint job has a consistent sheen and colour, making the repair truly invisible.
Tackling Major Ceiling Damage Like a Pro
When you’re staring up at more than just a hairline crack or a popped nail, the game changes. Extensive water damage, big holes from an unfortunate mishap, or the dreaded sight of a sagging ceiling—these are problems that a simple tub of filler just won’t fix. These are the heavy hitters of gyprock ceiling repairs, and getting them right requires a solid plan, the proper techniques, and a serious focus on safety.
Moving from a minor touch-up to a major repair means you're no longer just patching a surface; you're doing a bit of structural surgery. The goal isn't just to make the damage disappear. It's to create a repair that’s as strong and permanent as the original ceiling. This involves more than just slapping on some compound—it's about cutting, reinforcing, and seamlessly integrating new plasterboard.
Safely Removing Damaged Gyprock Sections
Before you can build it back up, you have to tear it down. The first real step in any major repair is to cleanly and safely remove the compromised section of gyprock. For those large, water-stained areas or gaping holes, you'll need to cut out a neat square or rectangle that extends back to solid, dry plasterboard.
First, grab a stud finder to locate the ceiling joists on either side of the damaged area and mark them out. These marks are your guide—they'll keep your cuts straight and show you exactly where to secure the new patch. Using a sharp utility knife or a keyhole saw, carefully cut along your lines.
Always, and I mean always, wear safety glasses and a decent dust mask for this part. Gyprock dust is incredibly fine and can be a real irritant. Plus, cutting into a ceiling can release insulation and all sorts of other debris from the roof space, so protecting your eyes and lungs is non-negotiable.
Once the damaged piece is out, take a good look inside the ceiling cavity. Check for any signs of ongoing leaks, damp insulation, or even damaged timber joists. This is your one chance to fix the root cause of the problem before you seal it all up again. If you need a hand figuring out different plasterboard issues, our team is always ready to help with comprehensive plasterboard repairs near me.
Re-Securing a Sagging Ceiling
A sagging ceiling is a serious red flag. It usually points to a failure in the original installation, often caused by moisture getting in or old adhesives giving up the ghost. To fix it, you need to re-attach the plasterboard firmly to the ceiling joists above. This is definitely a two-person job, as you need someone to gently but firmly push the sagging section back into place.
A handy trick is to make a temporary support, often called a 'deadman', out of two pieces of timber fixed into a 'T' shape. You can then wedge this between the floor and the ceiling to hold the gyprock flush against the joists while you work.
With the ceiling pushed back into position, it's time to secure it with new plasterboard screws. Drive screws straight through the gyprock and into the joists every 15-20cm. You want the screw heads to be countersunk just slightly, creating a small dimple below the surface without tearing the paper. This little dimple is what you’ll fill with joint compound later for that perfectly smooth finish.
Patching Large Holes for a Seamless Finish
Patching a large hole is where your technique really shines. Once you’ve cut out your neat square of damaged gyprock, you'll cut a new piece of plasterboard to the exact same dimensions. But for a truly strong repair, you'll want to add some backing support first.
- Install Timber Noggins: Cut a couple of pieces of timber so they're a bit longer than the opening is wide. Slide them into the ceiling cavity and screw them to the back of the existing gyprock. This creates a solid ledge for your new patch to sit on.
- Secure the Patch: Now, fit your new gyprock patch into the opening and screw it directly into the timber noggins you just installed. This makes sure the patch is completely stable and won't shift or crack down the line.
- Tape and Finish: Apply fibreglass mesh tape over all four seams where the patch meets the old ceiling. From there, it's all about applying thin layers of joint compound, feathering the edges out a little further with each coat to create that invisible blend.
This simple guide shows the basic finishing process, which is the same final step you'll take after securing a major patch like this one.
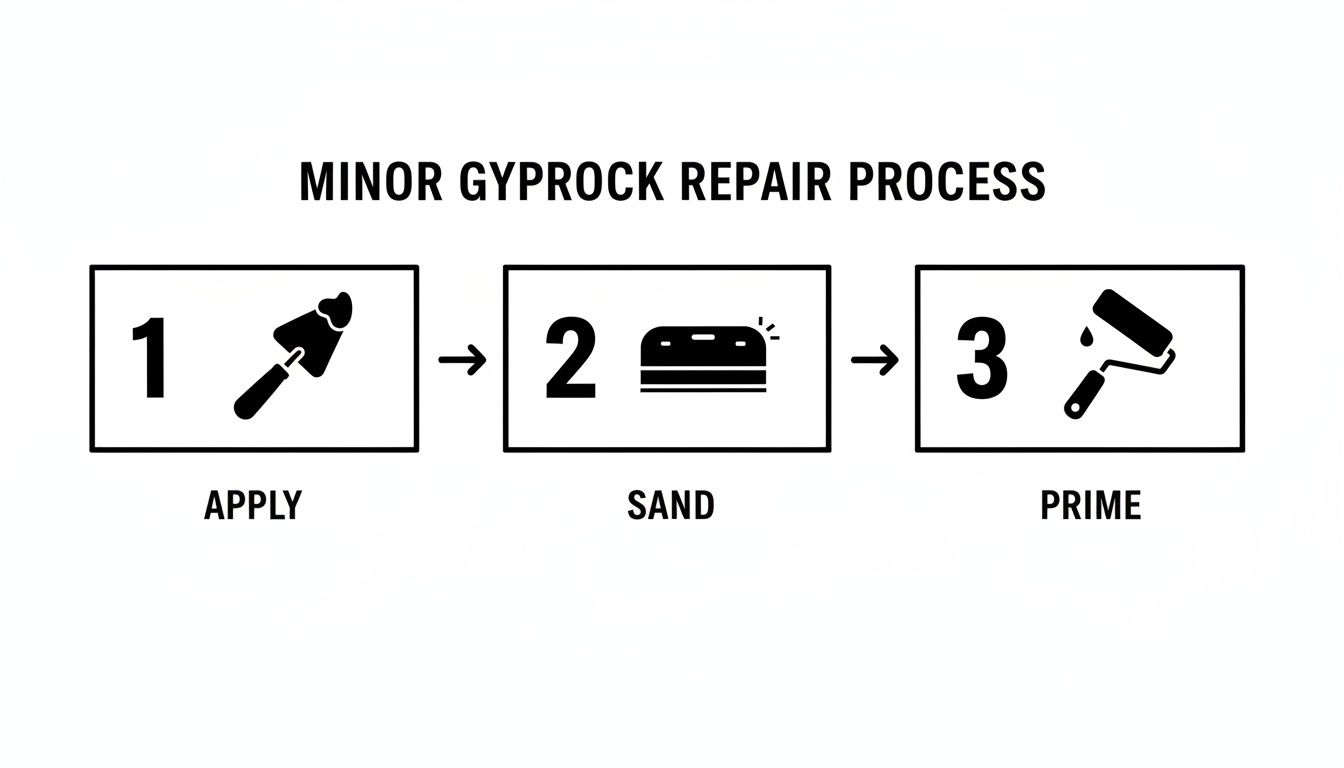
The real key here is being patient and systematic. Moving from applying the compound to sanding and priming is what ultimately delivers that professional, can't-even-tell-it-was-there finish.
When to Call in the Pros for Your Rural NSW Property
One of the best skills any DIY enthusiast can have is knowing when to put the tools down. It’s fantastic to handle small fixes yourself, but some gyprock ceiling repairs are best left to the professionals. Getting it wrong can compromise your safety and your home's structural integrity.
So, when is it time to call for backup? If you see extensive water damage, a ceiling that's noticeably sagging or bowing, or any problem near structural beams, electrical wiring, or insulation, it's a clear signal. Tackling these jobs without proper training can quickly turn a manageable problem into a major disaster, or even lead to a dangerous ceiling collapse.
We Get the Logistics of Remote Properties
Living out on a rural or remote property comes with its own set of challenges, and we get that. Simply getting tradies and materials to your front gate can be a logistical nightmare, often leading to frustrating delays and unexpected costs. This is exactly why we've structured our service to work for you, not against you.
To handle the unique demands of country New South Wales, we've invested in equipment built for the job.
Our key piece of kit is a 10-tonne 4×4 truck. It’s more than just a vehicle; it’s a fully-equipped mobile workshop that lets us bring every single thing we need for your ceiling repair directly to your property, no matter how far off the beaten track you are.
This truck means we can load up with all the labour, materials, and specialised tools in one trip. We can handle the dirt tracks, corrugated roads, and creek crossings that would stop a standard van. It’s how we deliver a reliable, high-quality service without the usual logistical headaches.
If access is a worry for you, you need a team that’s properly equipped. You can find out more about our tailored services and how we manage projects across the region by looking into gyprock repairs near me.
Still Have Questions About Gyprock Ceiling Repairs?
It’s completely normal to have a few lingering questions, even after you’ve got the repair steps down. We get asked a lot about the practical side of things, especially from folks living in more remote parts of New South Wales. Let's tackle some of the most common ones we hear out in the field.
The biggest worry for anyone on a rural property is often the logistics. How do you get materials and a full crew out to a place where the access road is more of a farm track than a highway? It’s a real concern, and it’s exactly why we’ve set ourselves up to handle these unique challenges.
How We Manage Rural Access and Logistics
We know that a standard delivery truck isn’t going to make it up the track to a homestead near Broken Hill or a farm out past Bourke. That's why we don't use one. Our solution is a purpose-built 10 tonne 4×4 truck, which is the backbone of our rural operations.
This truck is much more than just transport; it’s our mobile workshop and supply hub. It’s designed to carry everything we need—the crew, the tools, and all the materials—in a single trip. Whether we're dealing with corrugated dirt roads or shallow water crossings, this beast gets us on-site, ready to work.
Think of it this way: we can load up every single sheet of gyprock, all the timber for framing, compounds, and even scaffolding. Your project doesn't get stuck waiting for multiple deliveries from couriers who might not even service your postcode. We bring the entire worksite to you.
This self-sufficient approach cuts out the logistical nightmares that can plague rural builds and repairs. If you're looking at a major ceiling replacement, we won't be held up by third-party delivery schedules. It means your gyprock ceiling repairs get done properly and on time, no matter how far off the beaten track you are.
For gyprock ceiling repairs that are built to last and tailored for the realities of your rural NSW property, you can count on the team at Awesim Building Contractors. Contact us today for an on-site assessment and quote.


