

Building a shed on rural land in NSW isn't just about picking a nice flat spot. Before you even think about pouring concrete, there's some critical groundwork to do. It all starts with a proper site assessment and figuring out which council approval path you need to take: a Development Application (DA) or a Complying Development Certificate (CDC).
Getting these early steps right is the single most important thing you can do to avoid costly delays and make sure your project gets off to a smooth start.
Your Essential First Steps for a Rural NSW Shed
The prospect of building a shed on a rural block can feel a bit daunting, but breaking it down into a logical process makes it manageable. Before any tools come out, the real work is in understanding your land and the specific rules that apply to your local government area. This initial legwork is what separates a successful build from a project plagued with problems.
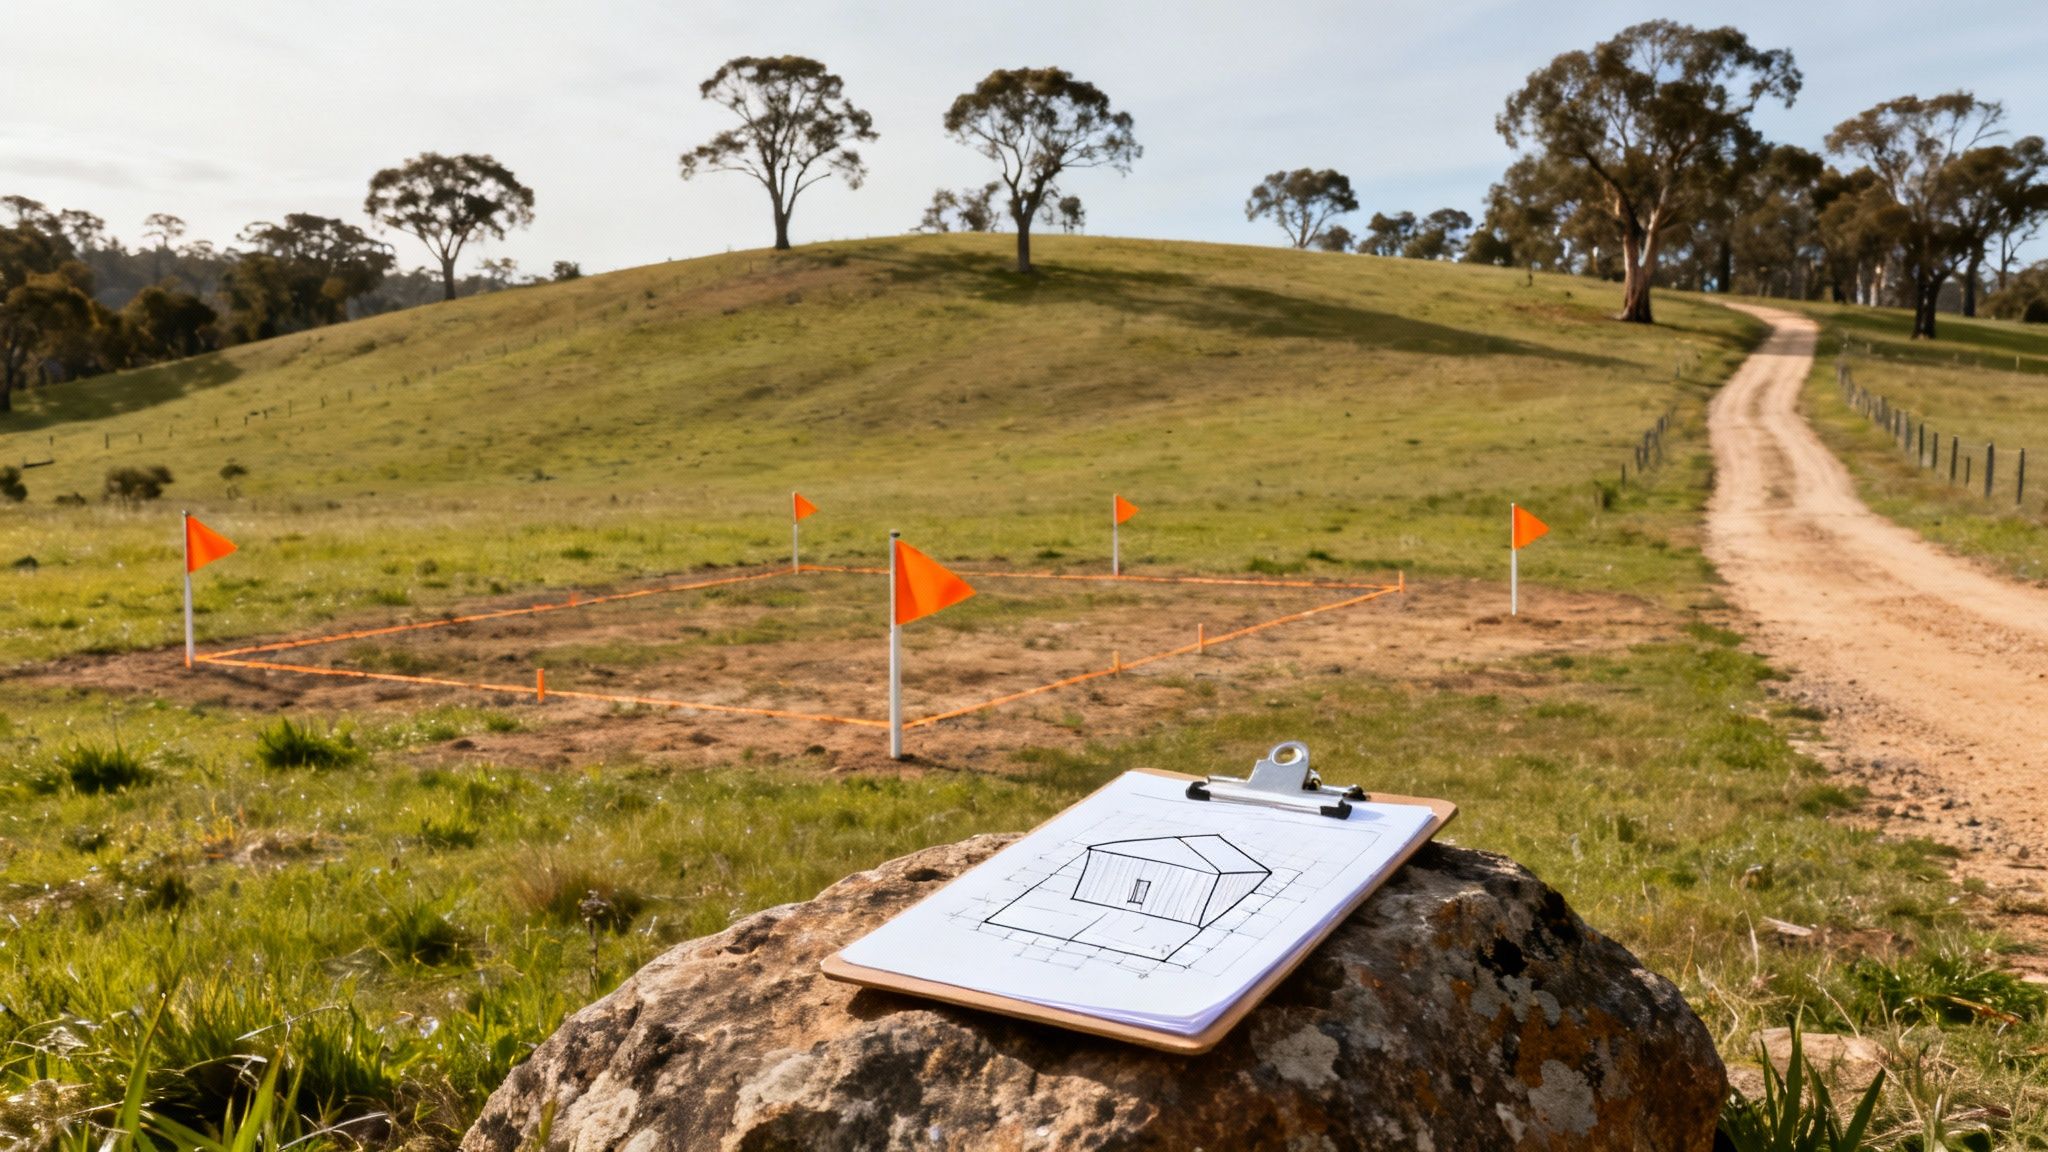
First up, you need to conduct a thorough site assessment. This means looking past the perfect view and getting practical about the factors that will shape your shed's location, design, and final cost.
- Zoning and Overlays: Check your property’s zoning. Is it RU1 Primary Production or RU2 Rural Landscape? More importantly, are there any overlays for things like bushfire or flood-prone land? These will trigger specific, non-negotiable building requirements.
- Topography and Access: Is your chosen spot actually level, or will you need to budget for extensive earthworks? You also have to think about logistics. How are you going to get trucks, materials, and machinery to the site? This is a huge consideration for remote properties.
- Existing Services: Where are your closest power and water connections? It's far easier and cheaper to plan for utility trenching and hook-ups from day one rather than trying to sort it out after the shed is built.
Remote Access Is No Barrier
Logistics can be one of the biggest headaches when building a rural shed in NSW. We’ve seen it all—remote properties with rough access tracks, unsealed roads, or tricky creek crossings that a standard delivery truck simply can't navigate. This can stop a project in its tracks.
We’ve invested in a specialised 10 tonne 4×4 truck specifically to overcome this. It's designed to bring in materials and supplies for the most remote properties around New South Wales. This allows us to bring in labour, materials, and equipment where and when it's needed the most, ensuring your project timeline isn't at the mercy of a difficult driveway.
Understanding Your Approval Pathway
In NSW, shed construction is tightly regulated by local environmental and development control plans. These rules cover everything from the building's size and setback to environmental risks. Councils get a lot of Development Applications (DAs) for sheds, and from experience, the ones that properly address all the key planning points are the ones that get approved faster. For a good example of what councils look for, check out the rural shed guidelines on the Ballina Shire Council website.
Generally, your project will head down one of two approval paths.
- Development Application (DA): This is the classic route through your local council. It’s a more detailed process needed for larger, more complex sheds or those that fall outside the standard criteria.
- Complying Development Certificate (CDC): This is a much faster, streamlined approval for straightforward projects that tick all the boxes of a state-wide code. A CDC can be issued by your council or an accredited private certifier.
Figuring out which pathway your shed falls under is the first big decision you'll make, and it has a major impact on your project's timeline, cost, and complexity.
NSW Rural Shed Approval Pathways at a Glance
Choosing between a DA and a CDC can be confusing. This table breaks down the key differences to help you see which path might be the best fit for your shed project.
| Feature | Development Application (DA) | Complying Development Certificate (CDC) |
|---|---|---|
| Who Approves It? | Your local council | Council or an accredited private certifier |
| Timeline | Slower, often taking 2-4 months or more, depending on complexity | Faster, typically 2-6 weeks once all documentation is submitted |
| Flexibility | More flexible; allows for variations from standard codes | Very strict; your project must meet every single requirement with no exceptions |
| Best For… | Large, complex, or non-standard sheds; sites with significant constraints | Simple, standard-sized sheds on straightforward sites |
| Cost | Generally higher due to more detailed plans and longer assessment times | Often more cost-effective due to the streamlined process |
| Public Notification | Usually requires neighbour notification and public exhibition | No public notification required |
Deciding on the right approval pathway from the start saves an incredible amount of time and stress. A CDC is great if you meet the criteria, but a well-prepared DA is necessary for any project that needs a bit more flexibility.
Getting Through Council: Your Approval Pathway in NSW
Let's be honest, navigating the paperwork for a rural shed in NSW can feel like the hardest part of the job. The rules can seem complex, but they're there for a good reason—to make sure every new structure is safe, suited to the environment, and doesn't cause issues for you or your neighbours down the track.
Essentially, your project will follow one of three main approval pathways. Figuring out which one applies to you early on is the secret to a headache-free build.
The dream scenario is Exempt Development. This is for smaller, low-impact sheds that tick a very specific set of boxes. If your build fits these criteria perfectly, you can skip the formal approval process altogether, saving you a stack of time and money.
Next up is the Complying Development Certificate (CDC). This is a fast-tracked assessment for sheds that are a bit bigger or more involved but still stick to a clear, state-wide code. A CDC is a great option because it can often be issued by a private certifier, which is typically much quicker than going through council.
For everything else, you'll be looking at a full Development Application (DA). This is the traditional, most detailed process, handled directly by your local council. A DA is necessary for those really big sheds, anything on land with environmental sensitivities, or projects that need to bend the standard planning rules.
First Things First: Know Your Zoning
Before you can even think about which path to take, you need to know your property's zoning. For most rural blocks in NSW, you’ll likely be zoned RU1 Primary Production or RU2 Rural Landscape. The best way to confirm this is by checking the online mapping tools on your local council's website or by ordering a Section 10.7 Planning Certificate.
Your zoning is the foundation for everything that follows. It sets the hard rules for your shed, including:
- Maximum Size: How big the total floor area can be.
- Height Limits: The highest point your shed's roof can reach.
- Setbacks: The minimum distance you have to keep from boundaries, your house, and any creeks or rivers.
These rules aren't just red tape; they're designed to manage things like visual impact on the landscape and maintaining privacy. Getting these details right from the start is absolutely non-negotiable.
A trap I see people fall into is thinking a big rural property means they can build wherever they want. Councils are very particular about setbacks, even out in the bush, to manage fire risk and ensure you’re not impacting your neighbours. Always, always check these distances before you finalise your plans.
The Rural Housing and Inland Codes: Your CDC Rulebook
If you’re aiming for that faster CDC approval, you’ll need to get familiar with two key state government documents: the Rural Housing Code and the Inland Code. Your location determines which one applies. As a rule of thumb, properties east of the Great Dividing Range fall under the Rural Housing Code, while land to the west is covered by the Inland Code.
Think of these codes as the complete rulebook for getting a CDC. They lay out the exact requirements for things like size, height, location, and even what you need to do for bushfire and flood protection. The whole point of this system is to streamline the process for straightforward projects, which frees up both landowners and councils to focus on more complex developments. You can dive into the specific details of these outbuilding rules on the NSW Planning website.
Putting Your Paperwork Together
Whether you're going for a CDC or a full-blown DA, the quality of your documentation can make or break your application. Being thorough and organised here will save you from those frustrating "request for more information" emails from your certifier or council planner.
Your application package will almost certainly need:
- Detailed Site Plan: A to-scale drawing showing property lines, the exact spot for the shed, any existing buildings, driveways, and all the required setback distances clearly marked.
- Shed Elevations and Floor Plans: Professional drawings showing all dimensions, the roof pitch and height, materials you'll be using, and where every door and window will go.
- Statement of Environmental Effects (SEE): This is a key part of a DA. It’s a written report where you explain the project and outline how you'll manage any potential impacts, from stormwater runoff to visual amenity.
Pulling all this together can feel like a big job. For a simple shed, you might manage a basic application yourself. But for anything more complex, I'd strongly recommend getting a building designer or certifier involved early. They know the codes inside out and will ensure your application is complete and compliant from day one.
If you want to dig deeper into this, our guide on whether you need council approval for a shed is a great place to start. A bit of expert help upfront can save you a mountain of time and stress later on.
Assessing Your Site for Bushfires, Floods, and Access
Once you've ticked the initial planning boxes, it’s time to get your boots on the ground. We need to look at the powerful forces of nature that are a simple fact of life in rural New South Wales. Bushfires and floods aren't just abstract risks; they're real-world factors that will dictate exactly where and how you can build your shed.
Getting this part right isn't just about satisfying council regulations—it's about protecting your investment and, most importantly, ensuring your property is safe for years to come. This is where you swap planning maps for a hard look at the physical reality of your block.
Understanding Your Bushfire Attack Level
If your property is anywhere near bushland, you’ll need to figure out its Bushfire Attack Level (BAL). This is a national rating system that measures a building's potential exposure to embers, radiant heat, and direct flames during a bushfire. A BAL assessment isn't a guess; it's a formal process, usually handled by a qualified consultant who analyses the specifics of your site.
The final BAL rating boils down to a few key things:
- Fire Danger Index (FDI): Your specific region’s fire danger rating.
- Vegetation Type: What kind of bushland is near your proposed shed site.
- Distance from Vegetation: How far the shed will sit from that bushland.
- Slope of the Land: Fire races uphill, so the gradient between the vegetation and your build site is a crucial factor.
A low rating like BAL-LOW means there’s not enough risk to trigger special construction rules. But as the rating climbs—through BAL-12.5, BAL-19, BAL-29, and BAL-40—the building standards get much stricter and, frankly, more expensive. A high BAL rating will dictate everything from non-combustible cladding and ember guards to specialised, toughened windows.
Checking for Flood Risks
At the same time you're thinking about fire, you need to investigate whether your chosen spot is on flood-prone land. Most local councils in NSW have online flood mapping tools that are incredibly useful for seeing which areas are likely to go under during a major downpour. This is an essential piece of due diligence.
Finding out your property is in a designated flood zone doesn't automatically kill the project. What it does mean, however, is that you’ll have to meet specific design and placement requirements. You might be required to:
- Build the shed on a raised foundation or piers.
- Make sure the finished floor level sits above the predicted flood height.
- Use water-resistant materials for the lower portions of the structure.
When you're assessing these risks, it's also a good time to consider the best ways to prevent soil erosion, which is a common headache on rural land that gets heavy rain or wind. Smart site management helps control runoff and protects your land.
This decision tree infographic gives a great visual of the different approval paths—Exempt, CDC, or a full DA—your shed project might follow.
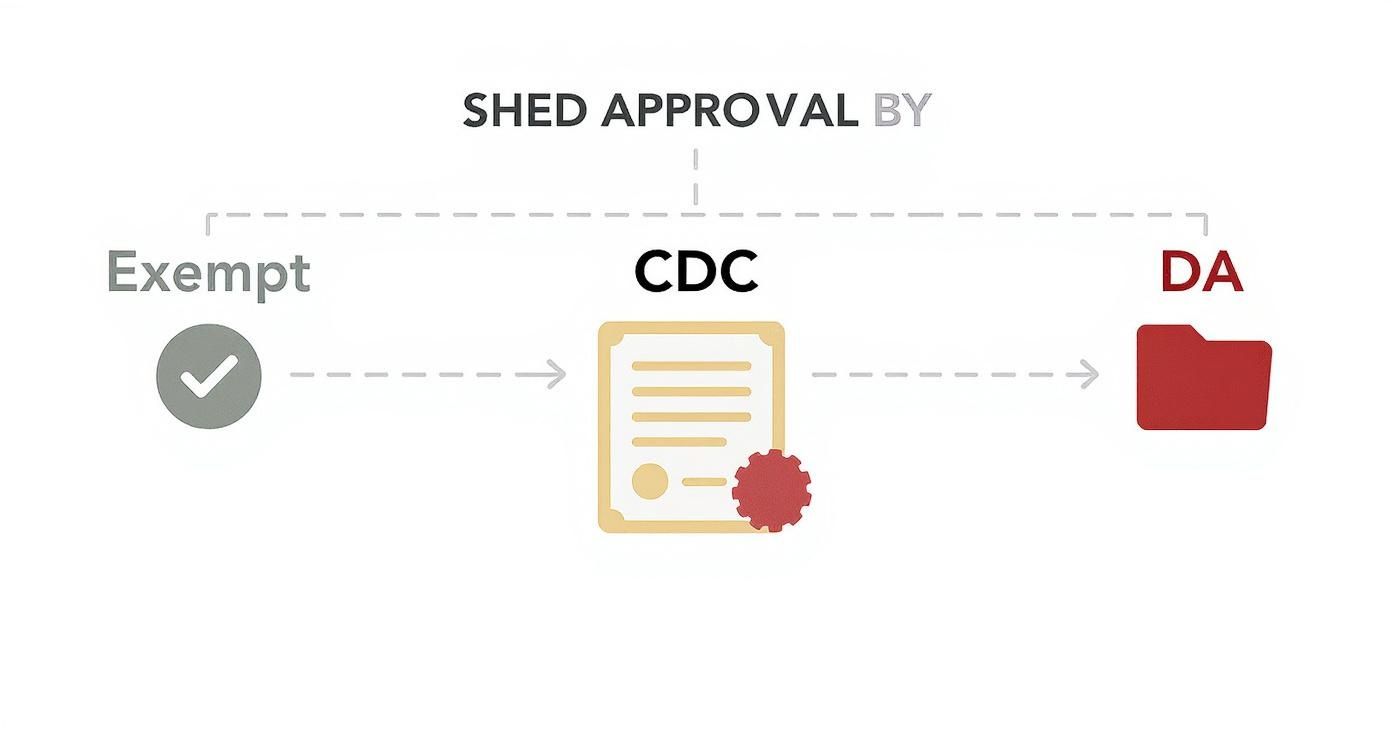
As you can see, the route you take depends entirely on how your project stacks up against the set standards. For anything complex, a DA is almost always required.
Solving the Challenge of Remote Site Access
Finally, let's talk about something critical that gets overlooked all the time: physical access. You can find the perfect, risk-free spot, but if you can't get materials and machinery to it, your project is dead in the water. Many rural properties have tricky access routes—think unsealed roads, steep inclines, or creek crossings that a standard delivery truck simply can't handle.
This logistical hurdle is a major source of stress and delays. It's a problem we've seen countless times across the diverse landscapes of New South Wales.
To get around this, we run a specialised 10 tonne 4×4 truck. This beast is purpose-built to navigate the rugged terrain and remote tracks common on rural properties. It allows us to bring in labour, materials, and equipment where and when it's needed the most, ensuring your project stays on schedule, no matter how far off the beaten track you are.
By working through fire, flood, and access issues methodically, you develop a complete picture of your site's limitations and possibilities. This groundwork is the foundation for building a shed that isn't just compliant and functional, but truly resilient and built to last.
Designing Your Shed and Choosing the Right Materials
https://www.youtube.com/embed/ah2-a-GADLQ
With the planning approvals out of the way, you can finally get stuck into the best part: designing a shed that’s a perfect fit for your property and your plans. For rural land in NSW, this means thinking beyond just a simple box. Your design needs to be a practical solution, whether you're after a secure workshop, a bay for heavy machinery, or a versatile space for hay and equipment.
The whole process kicks off with what you need the shed to do. A simple skillion roof shed, for instance, is often perfect for tractor storage. It gives you excellent weather protection and is relatively straightforward to build. But if you’re thinking about a more versatile workshop or storage area, a classic gable roof design offers more internal height, making it ideal if you want to add a mezzanine for extra storage or even a small office down the track.
Selecting Materials Built for the Australian Bush
Choosing the right materials is where smart design meets long-term durability. In the harsh NSW climate, picking robust, low-maintenance materials isn't just a matter of taste—it's a critical investment in your property's future value and practicality.
This is exactly why Australian-made materials have such a strong reputation. They're specifically engineered to handle our unique conditions, from the blistering summer sun to intense storm seasons.
- Colorbond Steel: This is the undisputed champion for roofing and cladding on most rural sheds, and for good reason. Its baked-on colour finish is incredibly tough, resisting fading and chipping for years. The steel base provides serious strength, and most importantly, it's non-combustible—an absolutely vital feature for any building in a bushfire-prone area.
- Treated Timbers: If you’re incorporating timber for framing or features like pergolas, make sure it’s H4 or H5 treated pine. This level of treatment is essential to protect the timber from termites and fungal rot, safeguarding the structural integrity of your shed for decades to come.
- Steel Portal Frames: For larger sheds, a galvanised steel portal frame delivers superior strength and allows for huge, open spans without needing internal columns. This is the only way to go for machinery sheds where you need clear, unobstructed access.
If you’re planning to harvest rainwater from your new shed roof, you’ll need to think about the entire system. For managing water effectively on rural land, choosing your best water storage container is a key part of the overall design.
Foundations: The Unseen Hero of Your Shed
A shed is only as solid as the foundation it stands on. The right choice comes down to your site's specific conditions—the soil type, the slope of the land, and any flood risk you identified earlier.
A concrete slab is easily the most common and versatile option. It gives you a solid, level, and incredibly durable floor that’s easy to clean and can handle serious weight. A properly engineered slab with the right steel reinforcement is the gold standard for workshops, garages, and storage sheds on fairly flat ground.
For sloping sites or land within a flood zone, however, a pier system is often the much smarter choice. Concrete or steel piers are set deep into the ground, and the shed is then constructed on a raised sub-floor. This approach drastically reduces the amount of earthworks needed, allows for natural airflow underneath, and can lift the entire structure safely above predicted flood levels.
A critical part of any rural build is simply getting labour, materials, and equipment to the site. We run a 10 tonne 4×4 truck purpose-built to handle the rough access tracks common on remote NSW properties. It means we can bring everything from steel frames to concrete supplies right to your build site, keeping the project on track, no matter how far off the beaten path you are.
At the end of the day, the goal is to build a structure that will serve you well for years, maybe even decades. By combining a practical design with high-quality, climate-appropriate materials, you’re ensuring your shed isn't just an addition to your property, but a lasting asset. To see some examples of what's possible, have a look at our guide on design options for small farm sheds.
The Construction Process From Earthworks to Final Inspection
With your plans finalised and the approvals in the bag, the really exciting part begins. This is where the lines on paper start to take shape on your property. It’s a process that logically builds from the ground up, and understanding the sequence helps you keep track of progress, ask your builder the right questions, and truly appreciate the work going into your new shed.
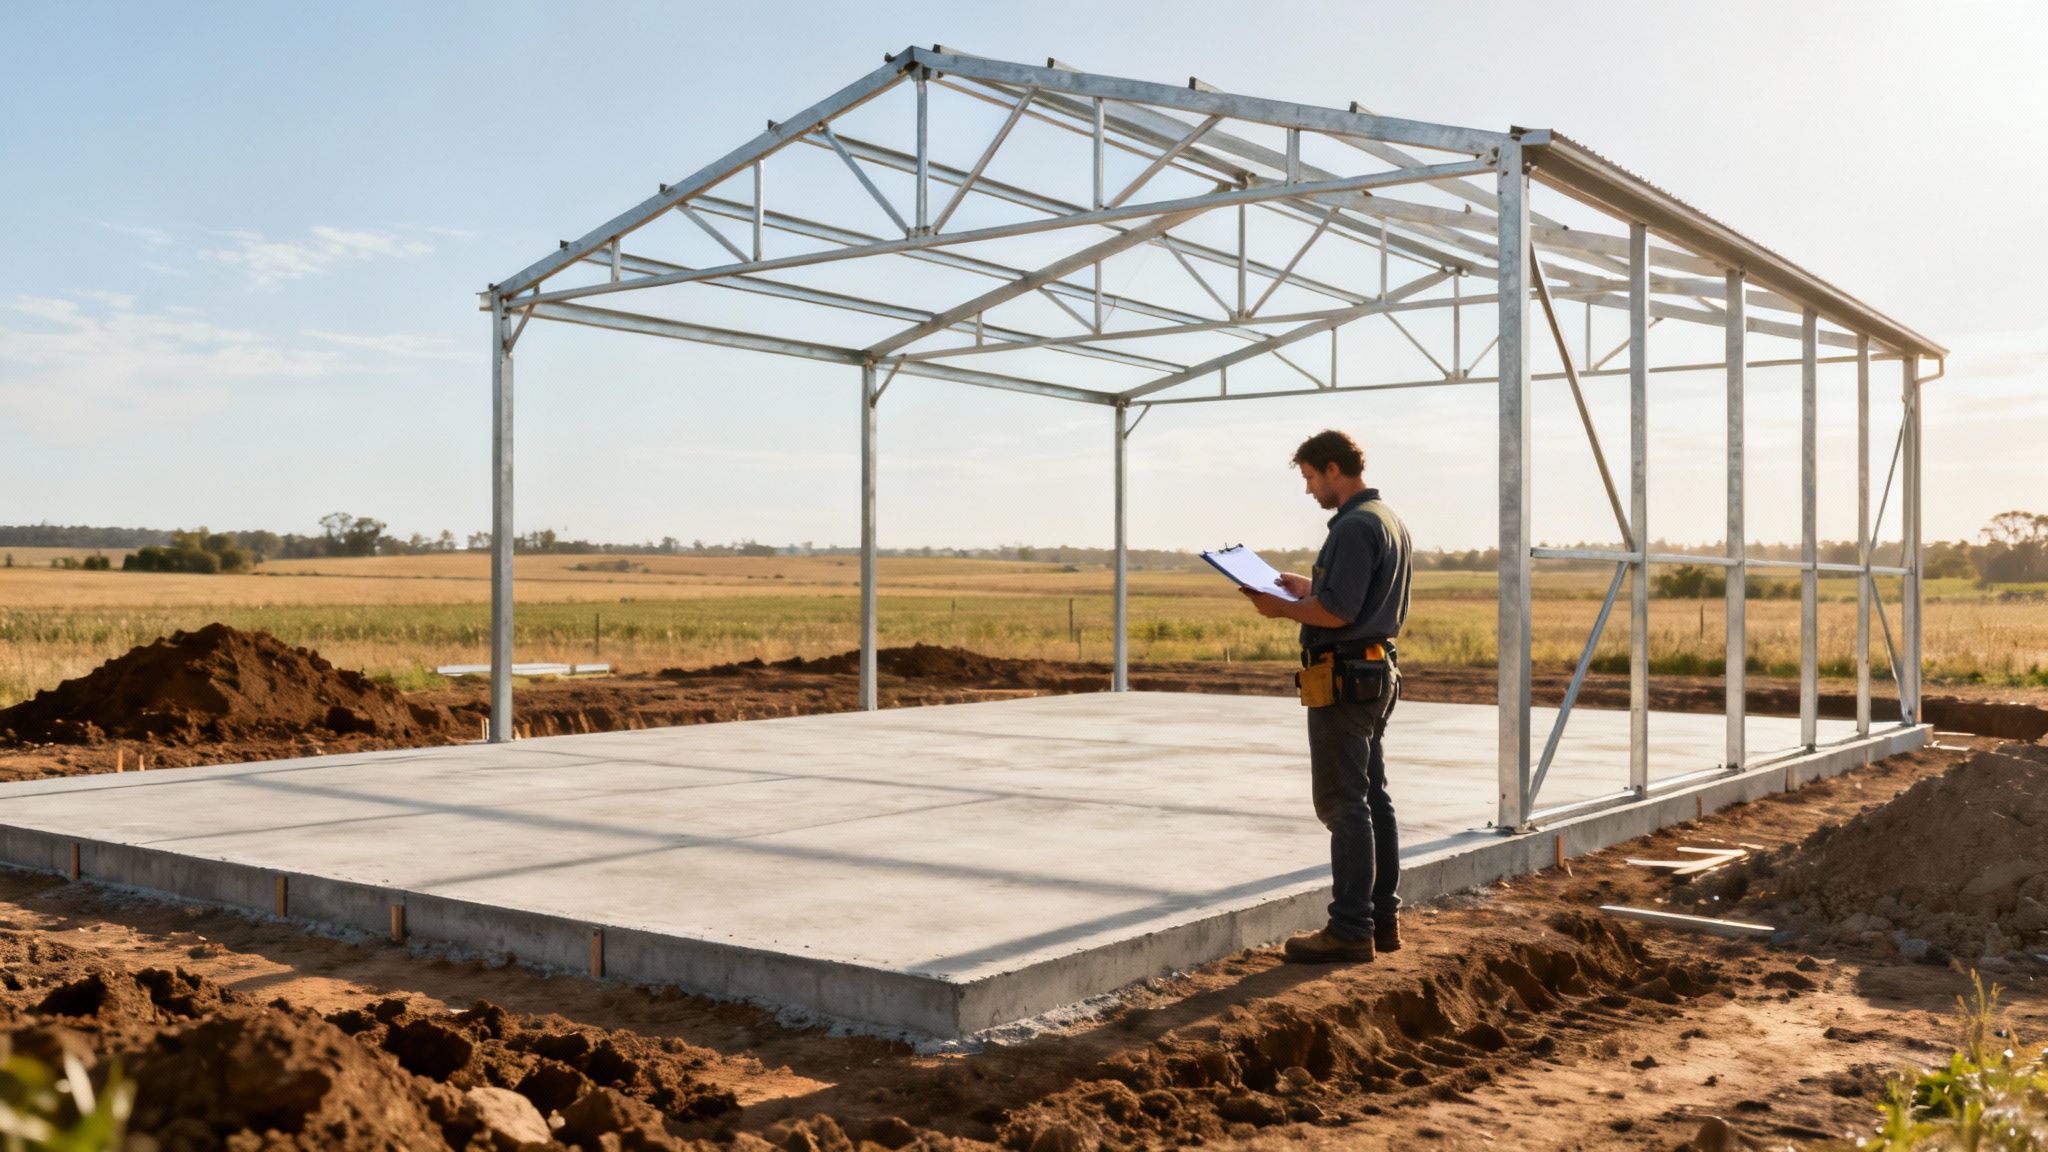
It all starts with getting the site prepared. This initial earthworks phase is the foundation for everything that follows—quite literally. You can't afford to rush this; a poorly prepped site will inevitably lead to problems down the track.
First, we clear and level the building pad, stripping away any vegetation, rocks, and loose topsoil to get down to a solid, compactable base. Just as important is establishing proper drainage. We contour the surrounding land to make sure water naturally flows away from your shed, which is critical for protecting the foundation from moisture and erosion.
Overcoming the Remote Access Challenge
One of the biggest headaches when building a shed on rural land in NSW is simply getting materials and equipment to the site. Many properties are a long way from the nearest sealed road, connected by access tracks that a standard delivery truck just can’t handle. It's a logistical nightmare that can grind a project to a halt before it even starts.
This is a problem we’ve solved head-on. Our purpose-built 10 tonne 4×4 truck is designed specifically for these rugged, off-road conditions. It allows us to bring in everything we need—labour, steel frames, concrete supplies, roofing sheets—without a hitch. No matter how remote your block is, we can get the job done and keep the build on schedule.
From Foundation to Lock-Up
Once the site is perfectly prepared, the focus shifts to the foundation. If you've gone with a concrete slab, this means setting up the formwork, laying a moisture barrier, and positioning the steel reinforcement mesh. The concrete pour is a crucial moment; it needs to be perfectly screeded and finished to create a durable, level floor. If the slab isn't square and level, the frame simply won't fit correctly.
After the slab has had time to cure properly, the frame goes up. For steel portal frames, this part happens surprisingly fast as the main columns and rafters are bolted together. Purlins and girts are then fixed across the main structure, creating the skeleton for the roof and walls. This is when you get the first real sense of your shed's size and scale.
Next comes the cladding, typically Colorbond steel. The sheets are meticulously fixed to the frame, and we install gutters, downpipes, and flashings to make the whole structure completely weatherproof. Finally, roller doors, personal access doors, and windows are fitted. At this point, the shed is at the "lock-up" stage—secure and protected from the elements.
The timeline for these phases can vary depending on the project's complexity, weather, and site conditions. However, having a rough idea helps you plan.
Typical Rural Shed Construction Timeline
Here’s a general guide to what you can expect for a standard shed build.
| Phase | Estimated Duration (for a standard 100sqm shed) | Key Activities |
|---|---|---|
| Site Preparation & Earthworks | 1-3 days | Clearing, levelling the pad, cutting in access, and establishing drainage. |
| Foundation (Concrete Slab) | 3-5 days + curing time | Formwork, reinforcement, concrete pour, and finishing. Curing can take up to 28 days. |
| Frame Erection | 2-4 days | Assembling and erecting the main portal frame, purlins, and girts. |
| Cladding & Lock-Up | 3-5 days | Installing roof and wall sheeting, gutters, doors, and windows. |
| Finishing & Final Inspection | 1-2 days | Site clean-up, final checks, and arranging the final inspection with the certifier. |
Keep in mind that this is an estimate. Larger, more complex sheds or those with extensive internal fit-outs will naturally take longer.
The Inspection and Handover Process
Throughout the construction, your council or a private certifier will conduct mandatory inspections at critical stages. These aren't just a formality; they ensure every part of the build complies with the Building Code of Australia and your approved plans.
You can expect inspections at these key points:
- Slab Inspection: This is done after the formwork and steel are in place, but just before the concrete is poured.
- Frame Inspection: The certifier will check that the structural frame has been erected correctly as per the engineering drawings.
- Final Inspection: Once everything is complete, a final inspection confirms the work is finished to standard and the site is clean. This leads to the issue of an Occupation Certificate.
These inspections are your ultimate assurance of quality. They confirm your shed is not only built to last but is also safe and legally compliant. Passing the final inspection marks the successful end of the project, and we can officially hand over the keys. Working with experienced rural shed builders ensures this whole process, from the first scoop of dirt to the final handover, is managed professionally and seamlessly.
Got Questions About Your Rural NSW Shed Build?
Even the best-laid plans can leave you with a few nagging questions. When you're building a shed out in the country, getting straight answers is crucial for your peace of mind and the success of your project. We've been doing this for years, so let's tackle some of the most common queries we hear from landowners right across NSW.
Just How Big Can I Build Without a Full-Blown DA?
This is the million-dollar question, and the answer isn't a simple one—it all comes down to where your property is. The maximum size your shed can be before it needs a full Development Application is determined by your local council’s rules and your specific zoning.
The Rural Housing Code (for properties east of the Great Dividing Range) and the Inland Code (for everything west) are your starting points. Under these codes, a shed up to 200 square metres on a big rural block might get the green light with a Complying Development Certificate (CDC). But—and this is a big but—it must meet every single requirement for setbacks, height, and how you plan to use it.
Don't ever assume that having plenty of acres gives you a blank cheque on shed size. The only way to know for sure is to dive into your council's Local Environmental Plan (LEP) and Development Control Plan (DCP). Better yet, get it in writing from your council or a private certifier before you spend a single dollar.
What on Earth Is a Statement of Environmental Effects?
A Statement of Environmental Effects (or SEE) is a standard part of most Development Applications. You can think of it as the story of your shed build. It’s your chance to explain to the council precisely what you're building and how you’ll make sure it doesn't negatively affect your property or your neighbours.
For a typical rural shed, your SEE will need to detail a few key things:
- Visual Impact: What will the shed look like from the road and from next door?
- Stormwater: How will you manage all the rainwater running off that big new roof and slab?
- Erosion Control: What steps will you take during the build to stop soil from washing away?
- Compliance: You'll need to clearly show how your design ticks all the boxes in the council's rulebook, from height limits to material choices.
A thorough, well-considered SEE shows the council you’re taking the project seriously, and that can make a huge difference in getting a smooth approval.
What's the Deal with Power and Water?
If you’re planning on having power, water, or a bathroom in your shed, it needs to be on the application from the very beginning. Adding utilities isn't just a simple add-on; it changes the whole scope of the project, and the council will want to see a proper plan.
For power, you’ll have to account for trenching from the nearest connection point and hiring a licensed sparky. For water, it depends on your source—are you connecting to town water, a tank, or a bore?
And if a toilet or sink is part of the plan, a wastewater management strategy is non-negotiable. This usually means linking up to your existing septic system (if it can handle the extra load) or installing a new one, which is a whole separate approval process in itself.
How Does a BAL Rating Affect My Shed Build?
Your property's Bushfire Attack Level (BAL) rating is a game-changer. It’s one of the biggest factors that will shape your shed's design, materials, and ultimately, its cost. A higher rating like BAL-29 or BAL-40 comes with a strict set of non-negotiable construction requirements based on Australian Standard AS 3959.
This isn't just a suggestion—it's the law. You’ll be required to build with specific materials and methods, including:
- Using non-combustible steel cladding like genuine Colorbond.
- Fitting ember guards to seal any gaps where a stray spark could get in.
- Installing specially rated toughened safety glass in any windows.
These measures are there to protect your property, but they will definitely add to the final bill for materials and labour.
How Do You Even Get Materials Out to a Remote Block?
Getting materials to site can be one of the biggest headaches of a rural build. We've seen it all—steep access tracks, washed-out dirt roads, and creek crossings that would stop a standard delivery truck dead in its tracks. These logistical nightmares can cause serious delays and budget blowouts.
This is a problem we solved a long time ago. We run a heavy-duty 10 tonne 4×4 truck that was custom-built to handle the tough conditions you find across regional New South Wales. This allows us to bring in labour, materials, and equipment where and when it's needed the most.
Whether it’s steel frames, concrete, or roofing iron, our truck ensures we can get to the most isolated properties, keeping your project moving forward, no matter how far off the beaten track you are.
Ready to get started on a shed that's built tough enough for your rural NSW property? The team at Awesim Building Contractors has the experience and the specialised equipment to manage your entire build, from navigating council approvals to the final handover, even on the most challenging sites.
Contact us today to talk about your project and get a practical, no-nonsense quote.


2 Comments